Creación de Cuenta AWS
Desliza para mostrar el menú
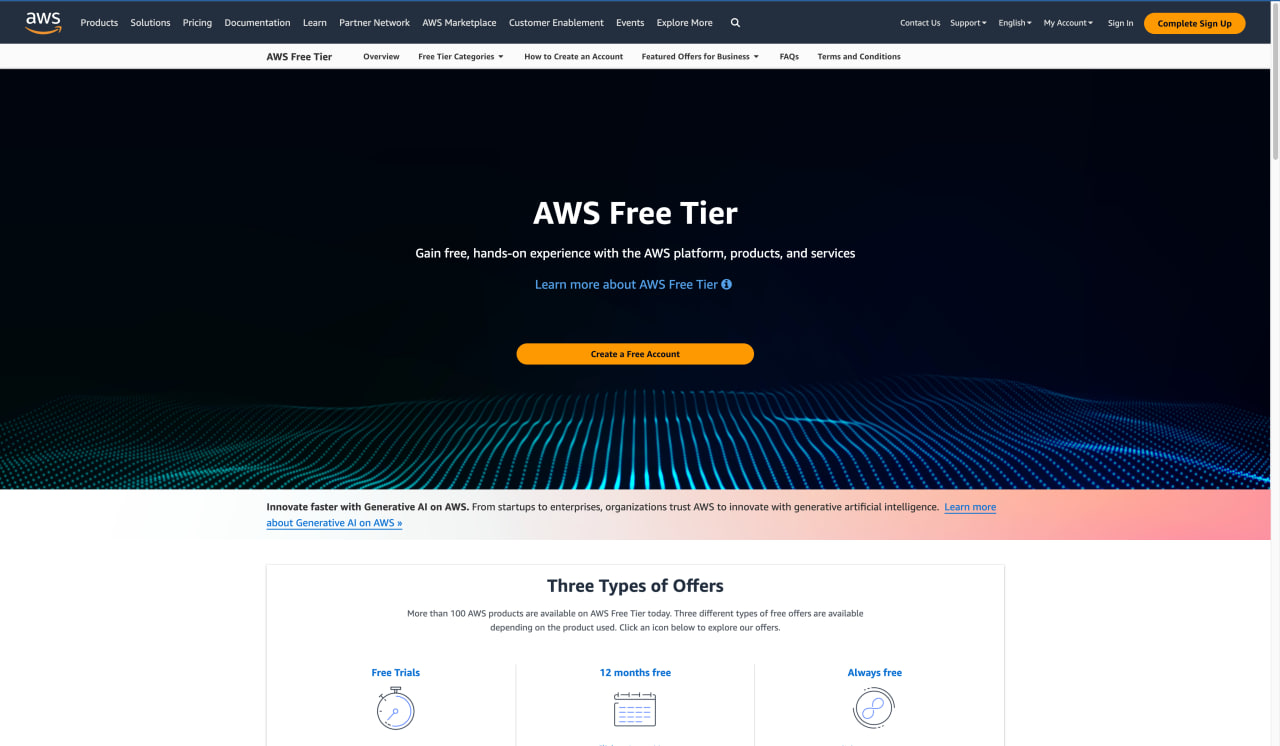
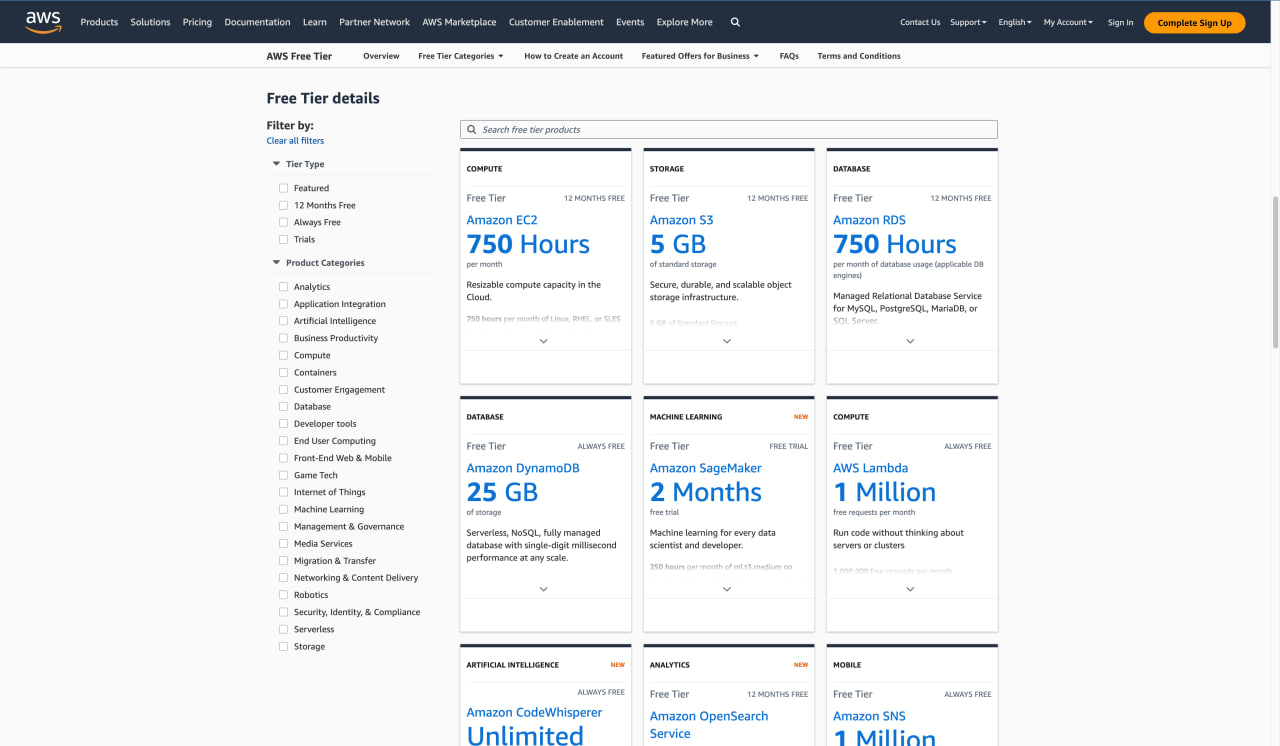
Para comenzar a aprender y utilizar AWS, es necesario contar con una cuenta para este propósito. Como se muestra en la captura de pantalla anterior, nos interesa el gran botón para crear una cuenta gratuita. AWS ofrece acceso gratuito limitado a muchos de sus productos, por lo que se recomienda cancelar la suscripción y gestionar los proyectos si no se está listo para pagar. A continuación, se puede ver la gama de servicios disponibles en el nivel gratuito:
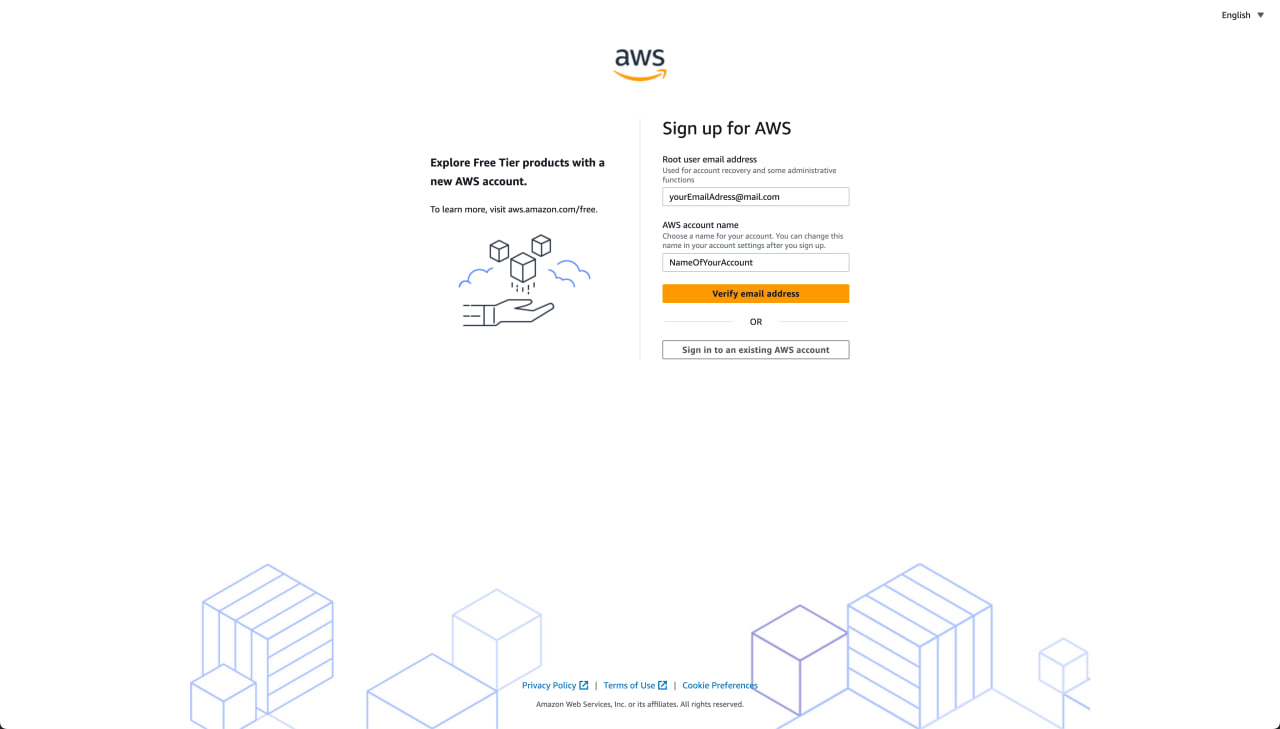
Pero pasemos al proceso de registro. Al hacer clic en el botón, aparecerá un menú donde será necesario ingresar la dirección de correo electrónico y el nombre, los cuales se podrán modificar posteriormente. Es fundamental ingresar su propio correo electrónico o el correo electrónico del administrador, ya que se utilizará para la recuperación y gestión de la cuenta:
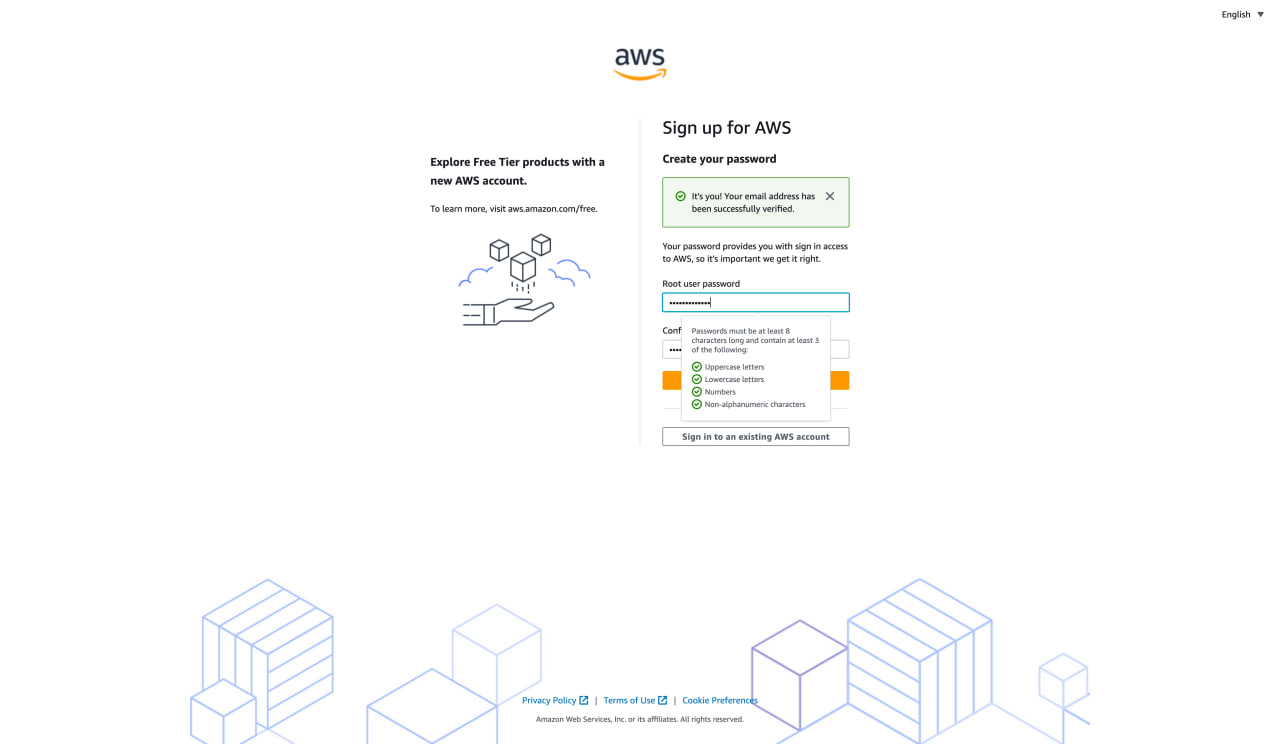
Después de confirmar el correo electrónico, será necesario crear una contraseña. Prestar atención a los requisitos de la contraseña que se muestran en la captura de pantalla:
A continuación, será necesario ingresar tus datos personales para el registro y tu tarjeta de pago. No te preocupes, no se realizará ningún cargo mientras estés en el nivel gratuito. Esto es necesario para verificar tu identidad.
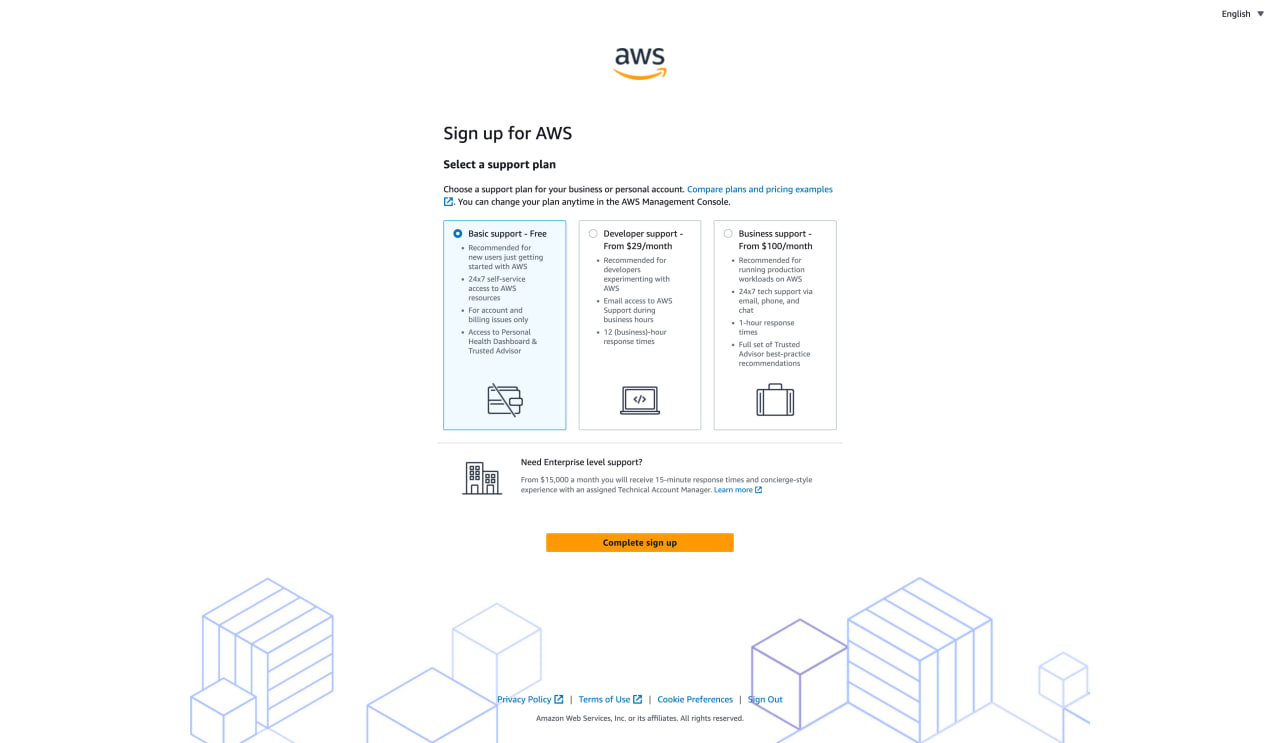
El paso final será elegir el plan que más te convenga. Necesitamos el plan gratuito ya que solo estamos aprendiendo, así que selecciona esa opción y continúa.
Después de eso, el registro está completo, y se nos ofrece elegir un rol y nuestros intereses. Esto no es obligatorio, pero puedes seleccionar un rol e intereses según tus preferencias.
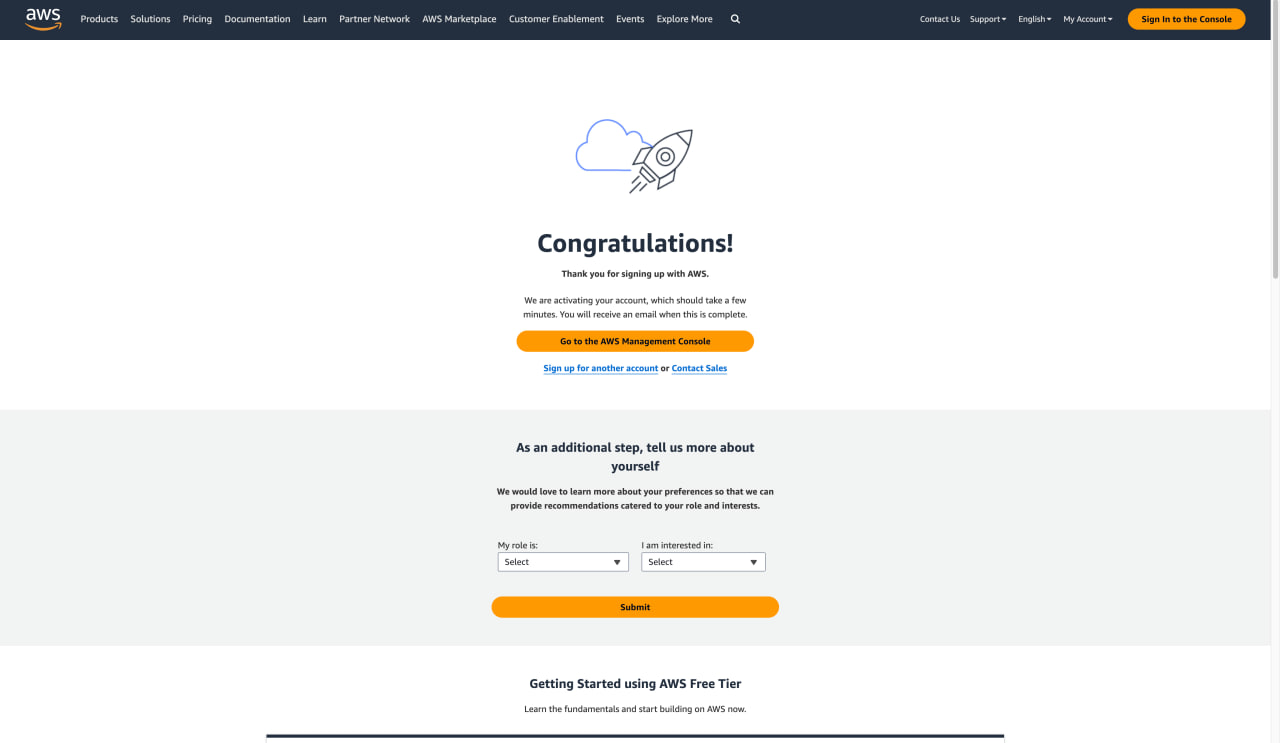
Después de eso, debemos hacer clic en "Ir a la Consola de Administración de AWS" donde veremos un menú:

Aquí, ingresamos el correo raíz y la contraseña que proporcionamos durante el registro y hacemos clic en iniciar sesión. Felicitaciones, has registrado e iniciado sesión en AWS correctamente.
Ten en cuenta que tu cuenta y plan son gratuitos siempre que te mantengas dentro de los límites de uso. Por lo tanto, si no estás listo para pagar por el uso de AWS, asegúrate de mantenerte dentro de los límites de la capa gratuita.
¡Gracias por tus comentarios!
Pregunte a AI
Pregunte a AI

Pregunte lo que quiera o pruebe una de las preguntas sugeridas para comenzar nuestra charla
