 Creating a TODO Application
In this chapter, we will try creating a TODO app using the knowledge of React we have acquired so far.
We will start by creating the main component called Todo:
function Todo(props) {
  return (
    // Code to be added
  );
}
The Todo component will have the following HTML elements:
<ul>for displaying the TODO list items;<form>for adding new items;<input>where the user can write the new item to be added;<button>for adding that new item.
In code it will look like this:
import React from "react";
import ReactDOM from "react-dom/client";
function Todo(props) {
  return (
    <div>
      <ul>{props.items}</ul>
      <form>
        <input />
        <button>Add Item</button>
      </form>
    </div>
  );
}
const root = ReactDOM.createRoot(document.getElementById("root"));
root.render(<Todo items={[<li>Example Item</li>, <li>Another Item</li>]} />);
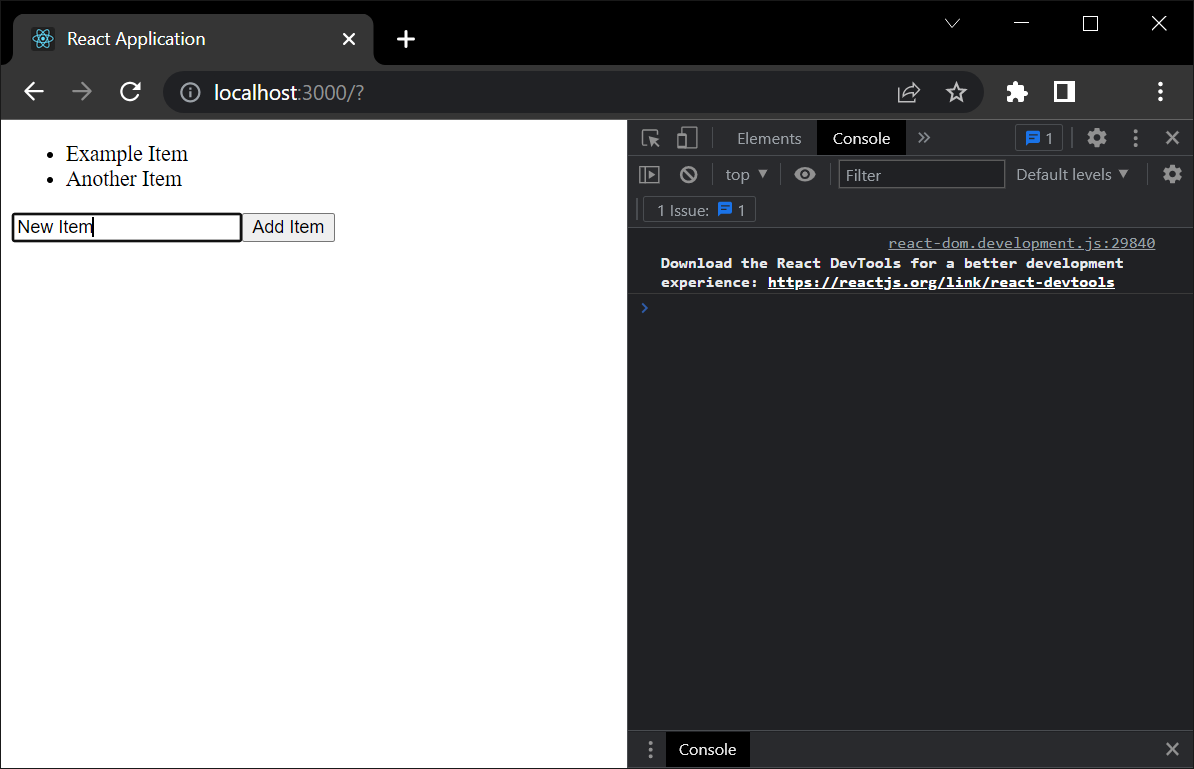
In the browser, the output should be something like this:
<img src = https://codefinity-content-media.s3.eu-west-1.amazonaws.com/118c2a49-583d-43eb-a9df-07bc65025c91/s.4+ch.6+pict1.png alt = 'Pict' width = 400>
If you click the Add Item button, it will just reload the page, and nothing will change.
Let's try making it functional. We will create a new inline function called handleSubmit and use preventDefault method to prevent the page from reloading. Then we will retrieve the value of the input element and add it to the list items props.items as a <li> element, and finally clear the input field.
This will update the props.items array. We will also add a console.log statement for debugging. The final code should look like this:
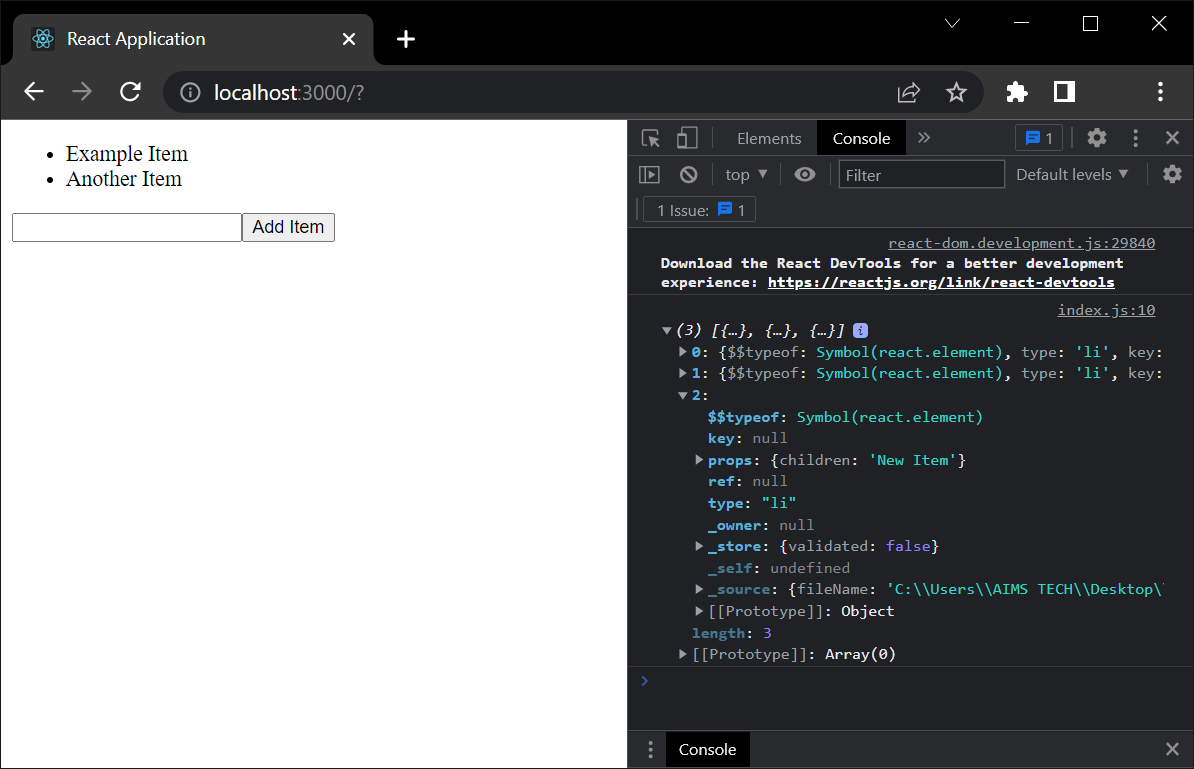
After running this code, you will notice that it doesn’t appear in the list when you add a new item.
However, if you check the console, you'll notice that the array is being updated every time you add an element:


This is because the component does not re-render when a new item is added since data stored in the props object is not tracked by Reac. We will fix that in the next section when we learn about the new data storing method: states.
¡Gracias por tus comentarios!
Pregunte a AI
Pregunte a AI

Pregunte lo que quiera o pruebe una de las preguntas sugeridas para comenzar nuestra charla
Genial!
Completion tasa mejorada a 2.7 Creating a TODO Application
Desliza para mostrar el menú
In this chapter, we will try creating a TODO app using the knowledge of React we have acquired so far.
We will start by creating the main component called Todo:
function Todo(props) {
  return (
    // Code to be added
  );
}
The Todo component will have the following HTML elements:
<ul>for displaying the TODO list items;<form>for adding new items;<input>where the user can write the new item to be added;<button>for adding that new item.
In code it will look like this:
import React from "react";
import ReactDOM from "react-dom/client";
function Todo(props) {
  return (
    <div>
      <ul>{props.items}</ul>
      <form>
        <input />
        <button>Add Item</button>
      </form>
    </div>
  );
}
const root = ReactDOM.createRoot(document.getElementById("root"));
root.render(<Todo items={[<li>Example Item</li>, <li>Another Item</li>]} />);
In the browser, the output should be something like this:
<img src = https://codefinity-content-media.s3.eu-west-1.amazonaws.com/118c2a49-583d-43eb-a9df-07bc65025c91/s.4+ch.6+pict1.png alt = 'Pict' width = 400>
If you click the Add Item button, it will just reload the page, and nothing will change.
Let's try making it functional. We will create a new inline function called handleSubmit and use preventDefault method to prevent the page from reloading. Then we will retrieve the value of the input element and add it to the list items props.items as a <li> element, and finally clear the input field.
This will update the props.items array. We will also add a console.log statement for debugging. The final code should look like this:
After running this code, you will notice that it doesn’t appear in the list when you add a new item.
However, if you check the console, you'll notice that the array is being updated every time you add an element:


This is because the component does not re-render when a new item is added since data stored in the props object is not tracked by Reac. We will fix that in the next section when we learn about the new data storing method: states.
¡Gracias por tus comentarios!