

 Clustering Weather Data
Let's work with some real data. If you passed the 'Visualization in Python with matplotlib' course you might remember the USA cities' weather data. We will use an expanded version of this dataset there.
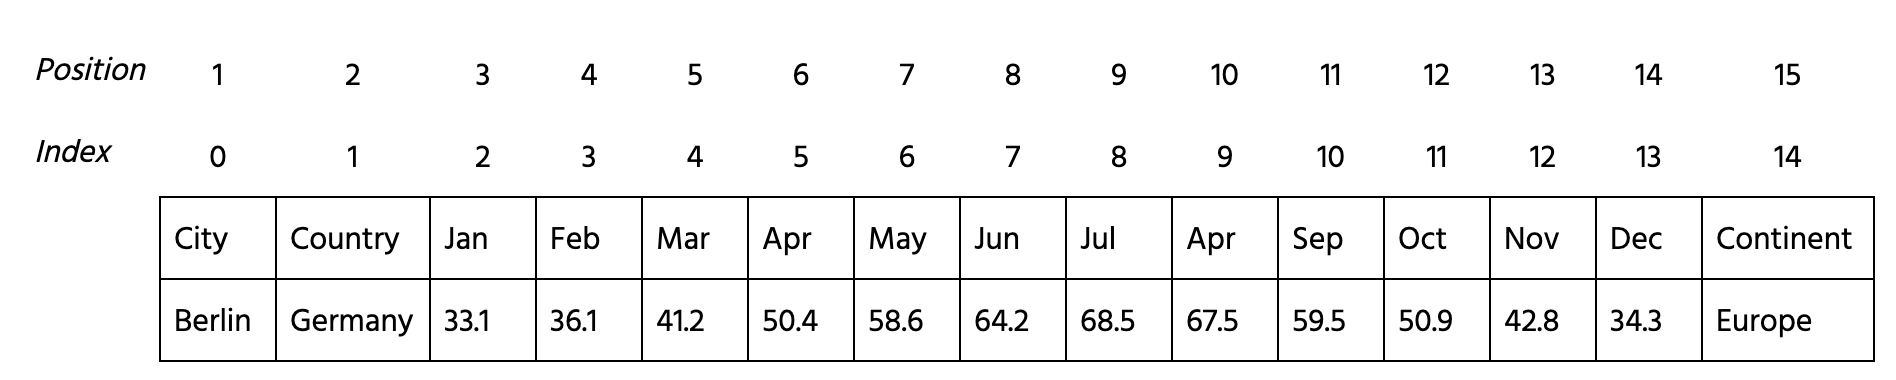
First, let's describe our dataset. It contains 15 columns: Country, City, All the 12 months, and Continent. Obviously, the months' columns are numerical and contain the average monthly temperature in Fahrenheit. For example, each row of this DataFrame looks like this.
We may guess that it would be logical to cluster by continent. But let's remind, that all the continents combine different climate types, which depend on proximity to the sea, to the ocean, to mountains, and so on. So, let's find out how will K-Means algorithm divide the observations.
Swipe to start coding
Given DataFrame data. Watch out, that numerical columns have indices 2 - 13!
- Import the
pandas,seabornlibraries with their standard aliases (pdandsnsrespectively), andKMeansfromsklearn.clusters. - Create
rangeobject with integers from 2 to 9 assigned toclustersvariable. - Iterate over
clustersvalues. At each step:
- Initialize
KMeansmodel with new number of clusters (i). - Fit the model to 2-13 (indices)
columns of
data. Remember.iloc[]method of DataFrame. You can pass the first parameter to access certain rows, and the second to access columns. - Add model total within sum of squares value (value of
.inertia_attribute ofmodel) tovarianceslist.
- Display the
seabornlineplot "number of clusters vs total within sum of squares" (clusters- x-axis vsvariances- y-axis).
Soluzione
Grazie per i tuoi commenti!
