Att Lösa Sammanslagningskonflikter
Svep för att visa menyn
Åtgärda konflikter
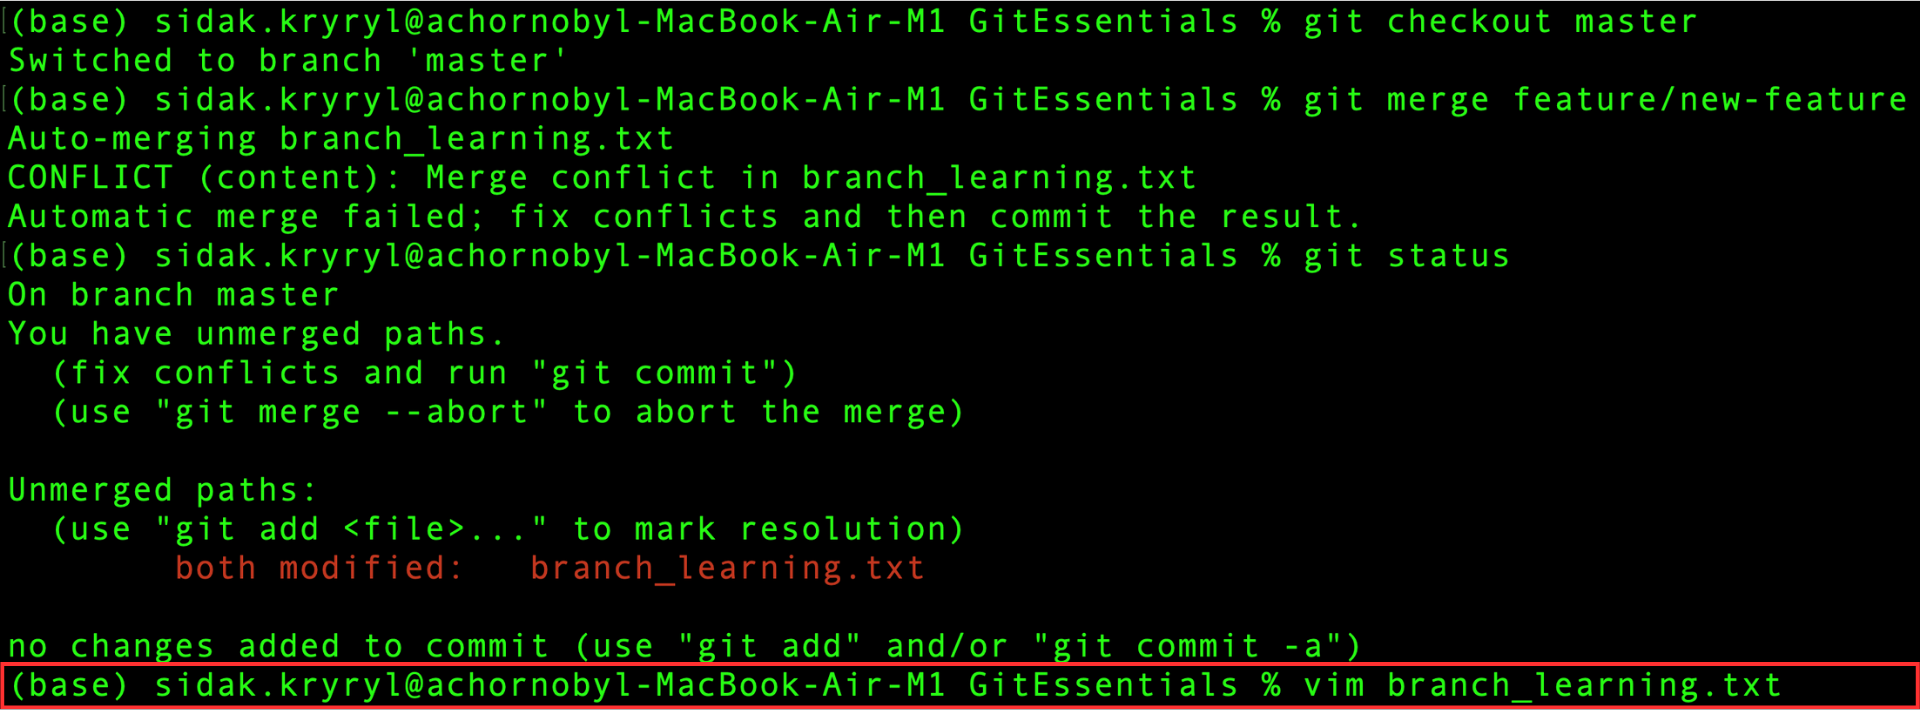
I föregående kapitel uppstod en sammanslagningskonflikt, så nu är det dags att lösa den.
Öppna först filen branch_learning.txt i Vim-editorn med följande kommando:
vim branch_learning.txt
Om Vim inte är installerat kan du använda en annan texteditor, till exempel nano eller atom, genom att ersätta vim med din editors namn i kommandot ovan.
Det rekommenderas dock att använda Vim för att enklare följa stegen som visas här.
Här är filen öppnad i Vim-editorn:
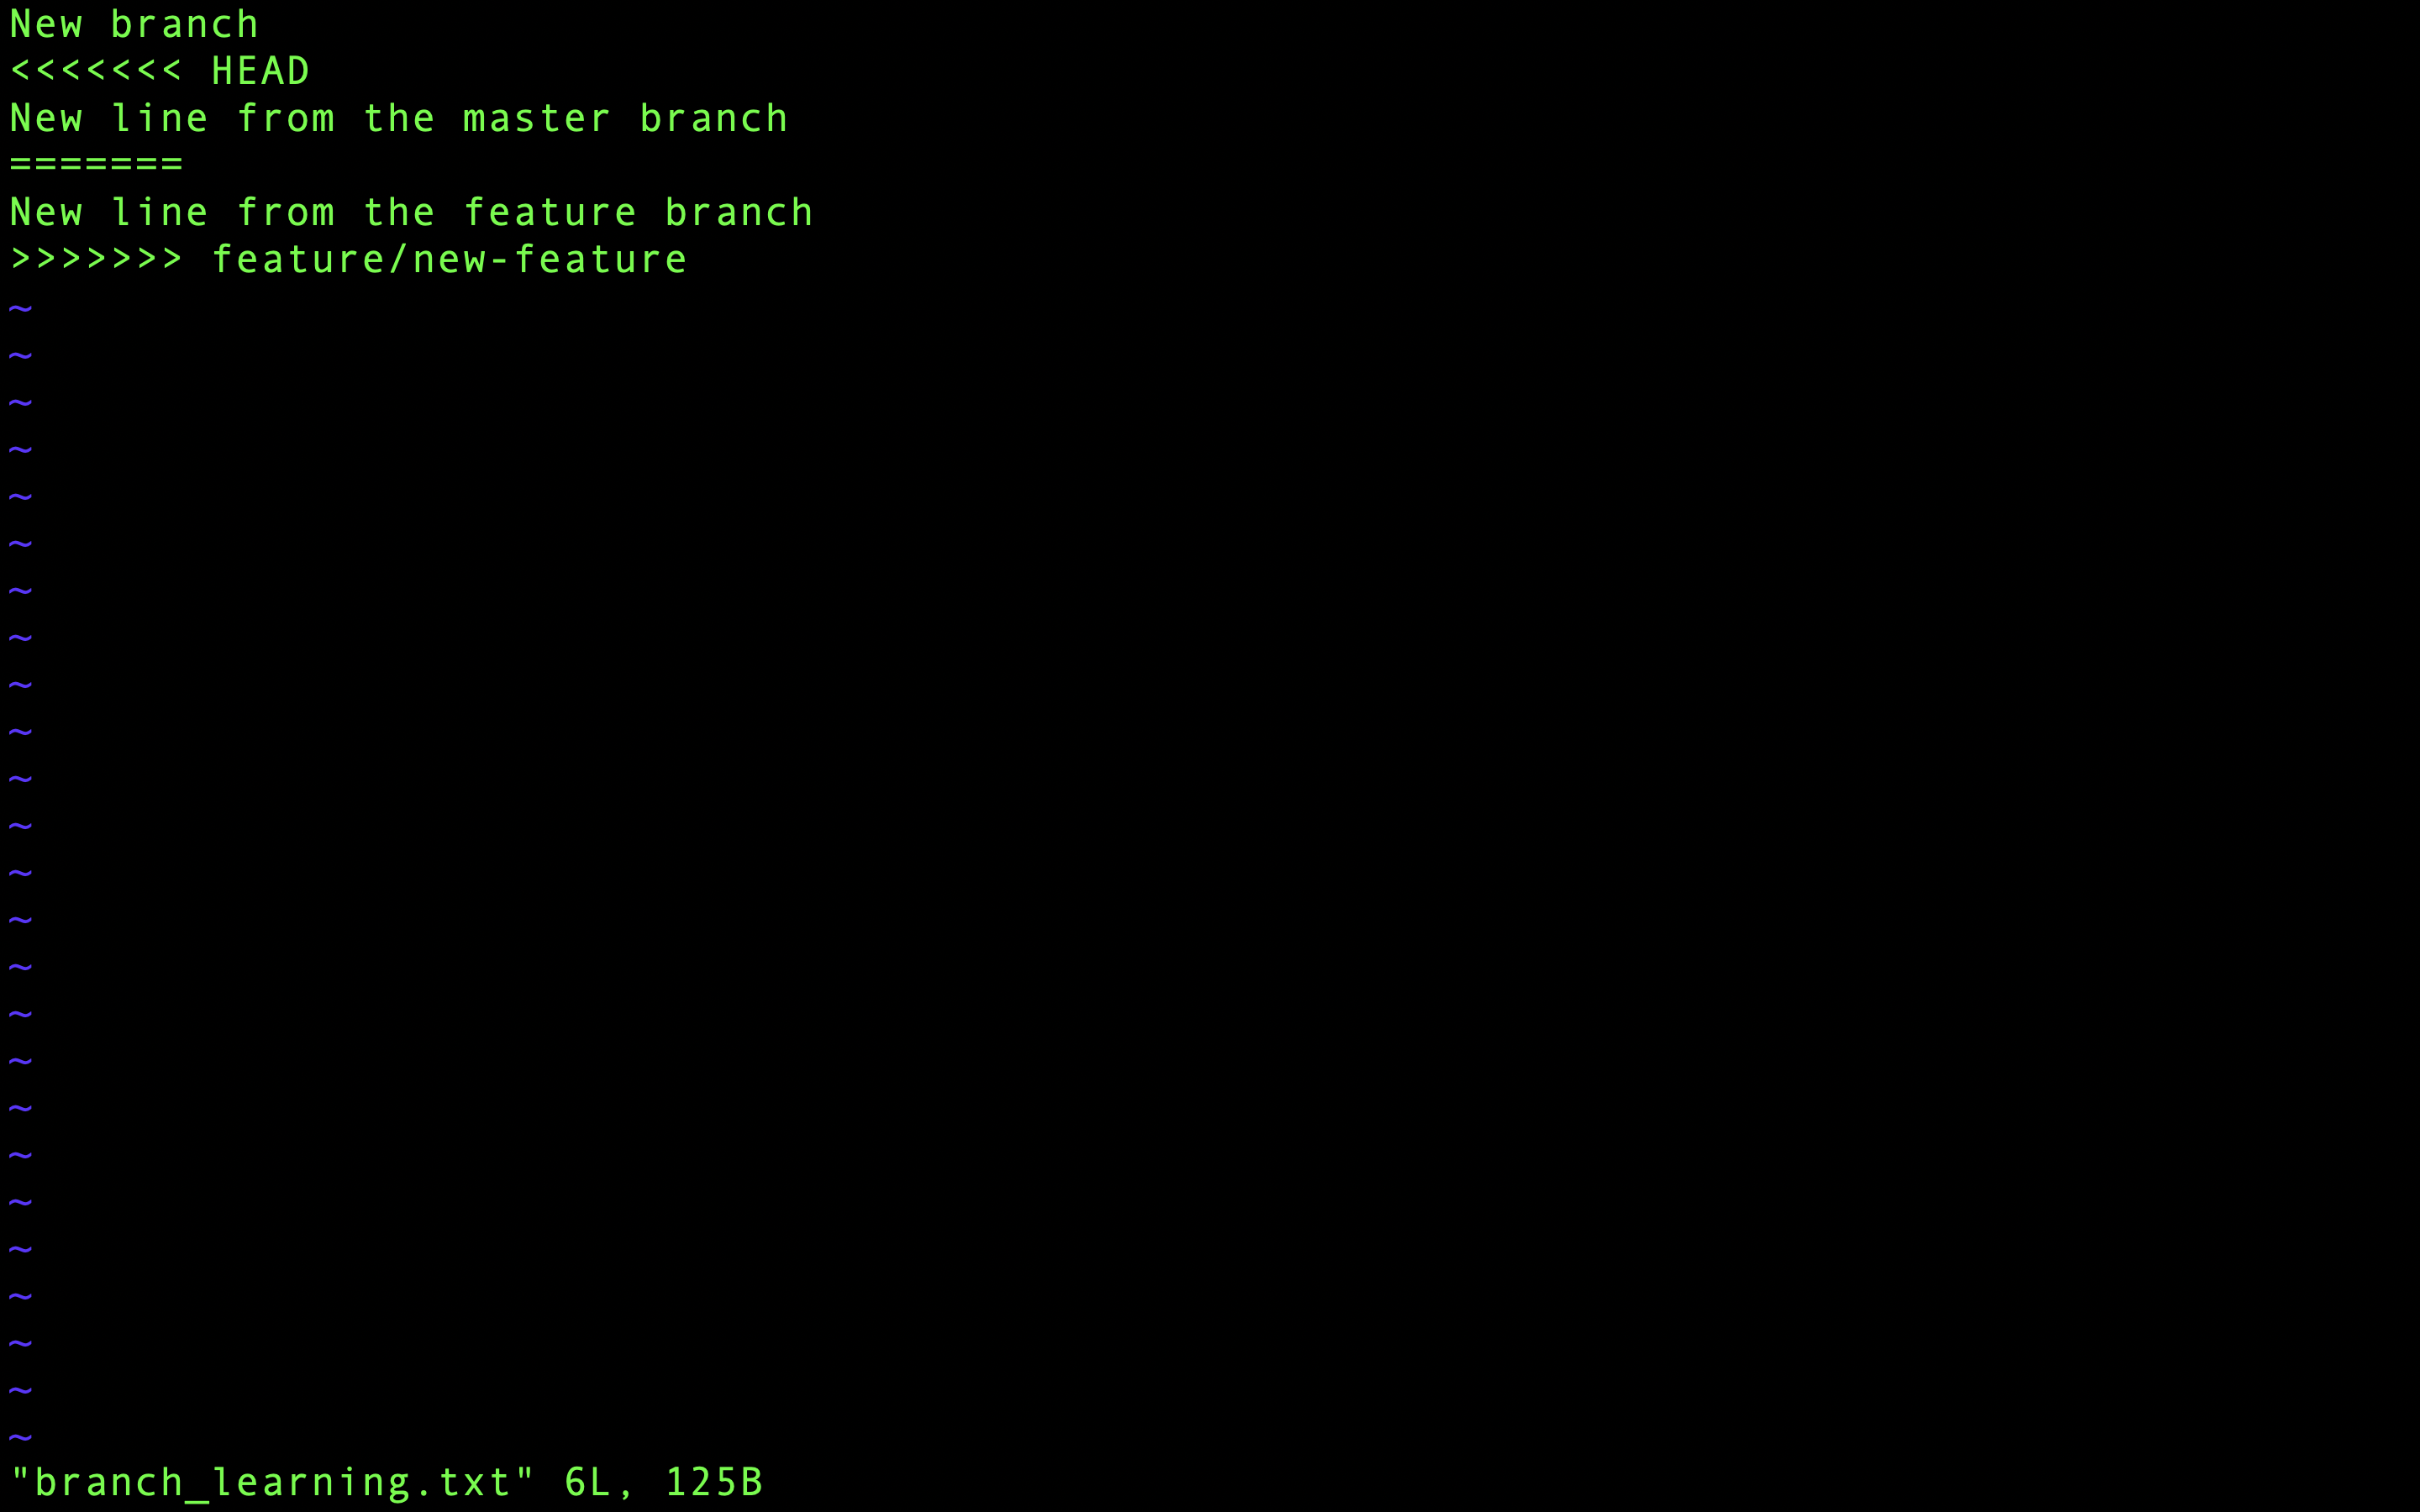
Nu visas konfliktmarkörer som indikerar de konfliktande avsnitten.
Dessa markörer använder pilar och speciella symboler för att markera skillnader mellan grenar:
<<<<<<< HEAD: markerar början på ändringarna från nuvarande gren (master);=======: separerar ändringarna från nuvarande gren (HEAD) och de från grenen som slås ihop;>>>>>>> feature/new-feature: markerar slutet på ändringarna från grenen som slås ihop.
För att lösa konflikten, välj ett av följande alternativ:
- Behåll ändringarna från nuvarande gren (
master); - Behåll ändringarna från sammanslagen gren (
feature/new-feature); - Redigera manuellt innehållet.
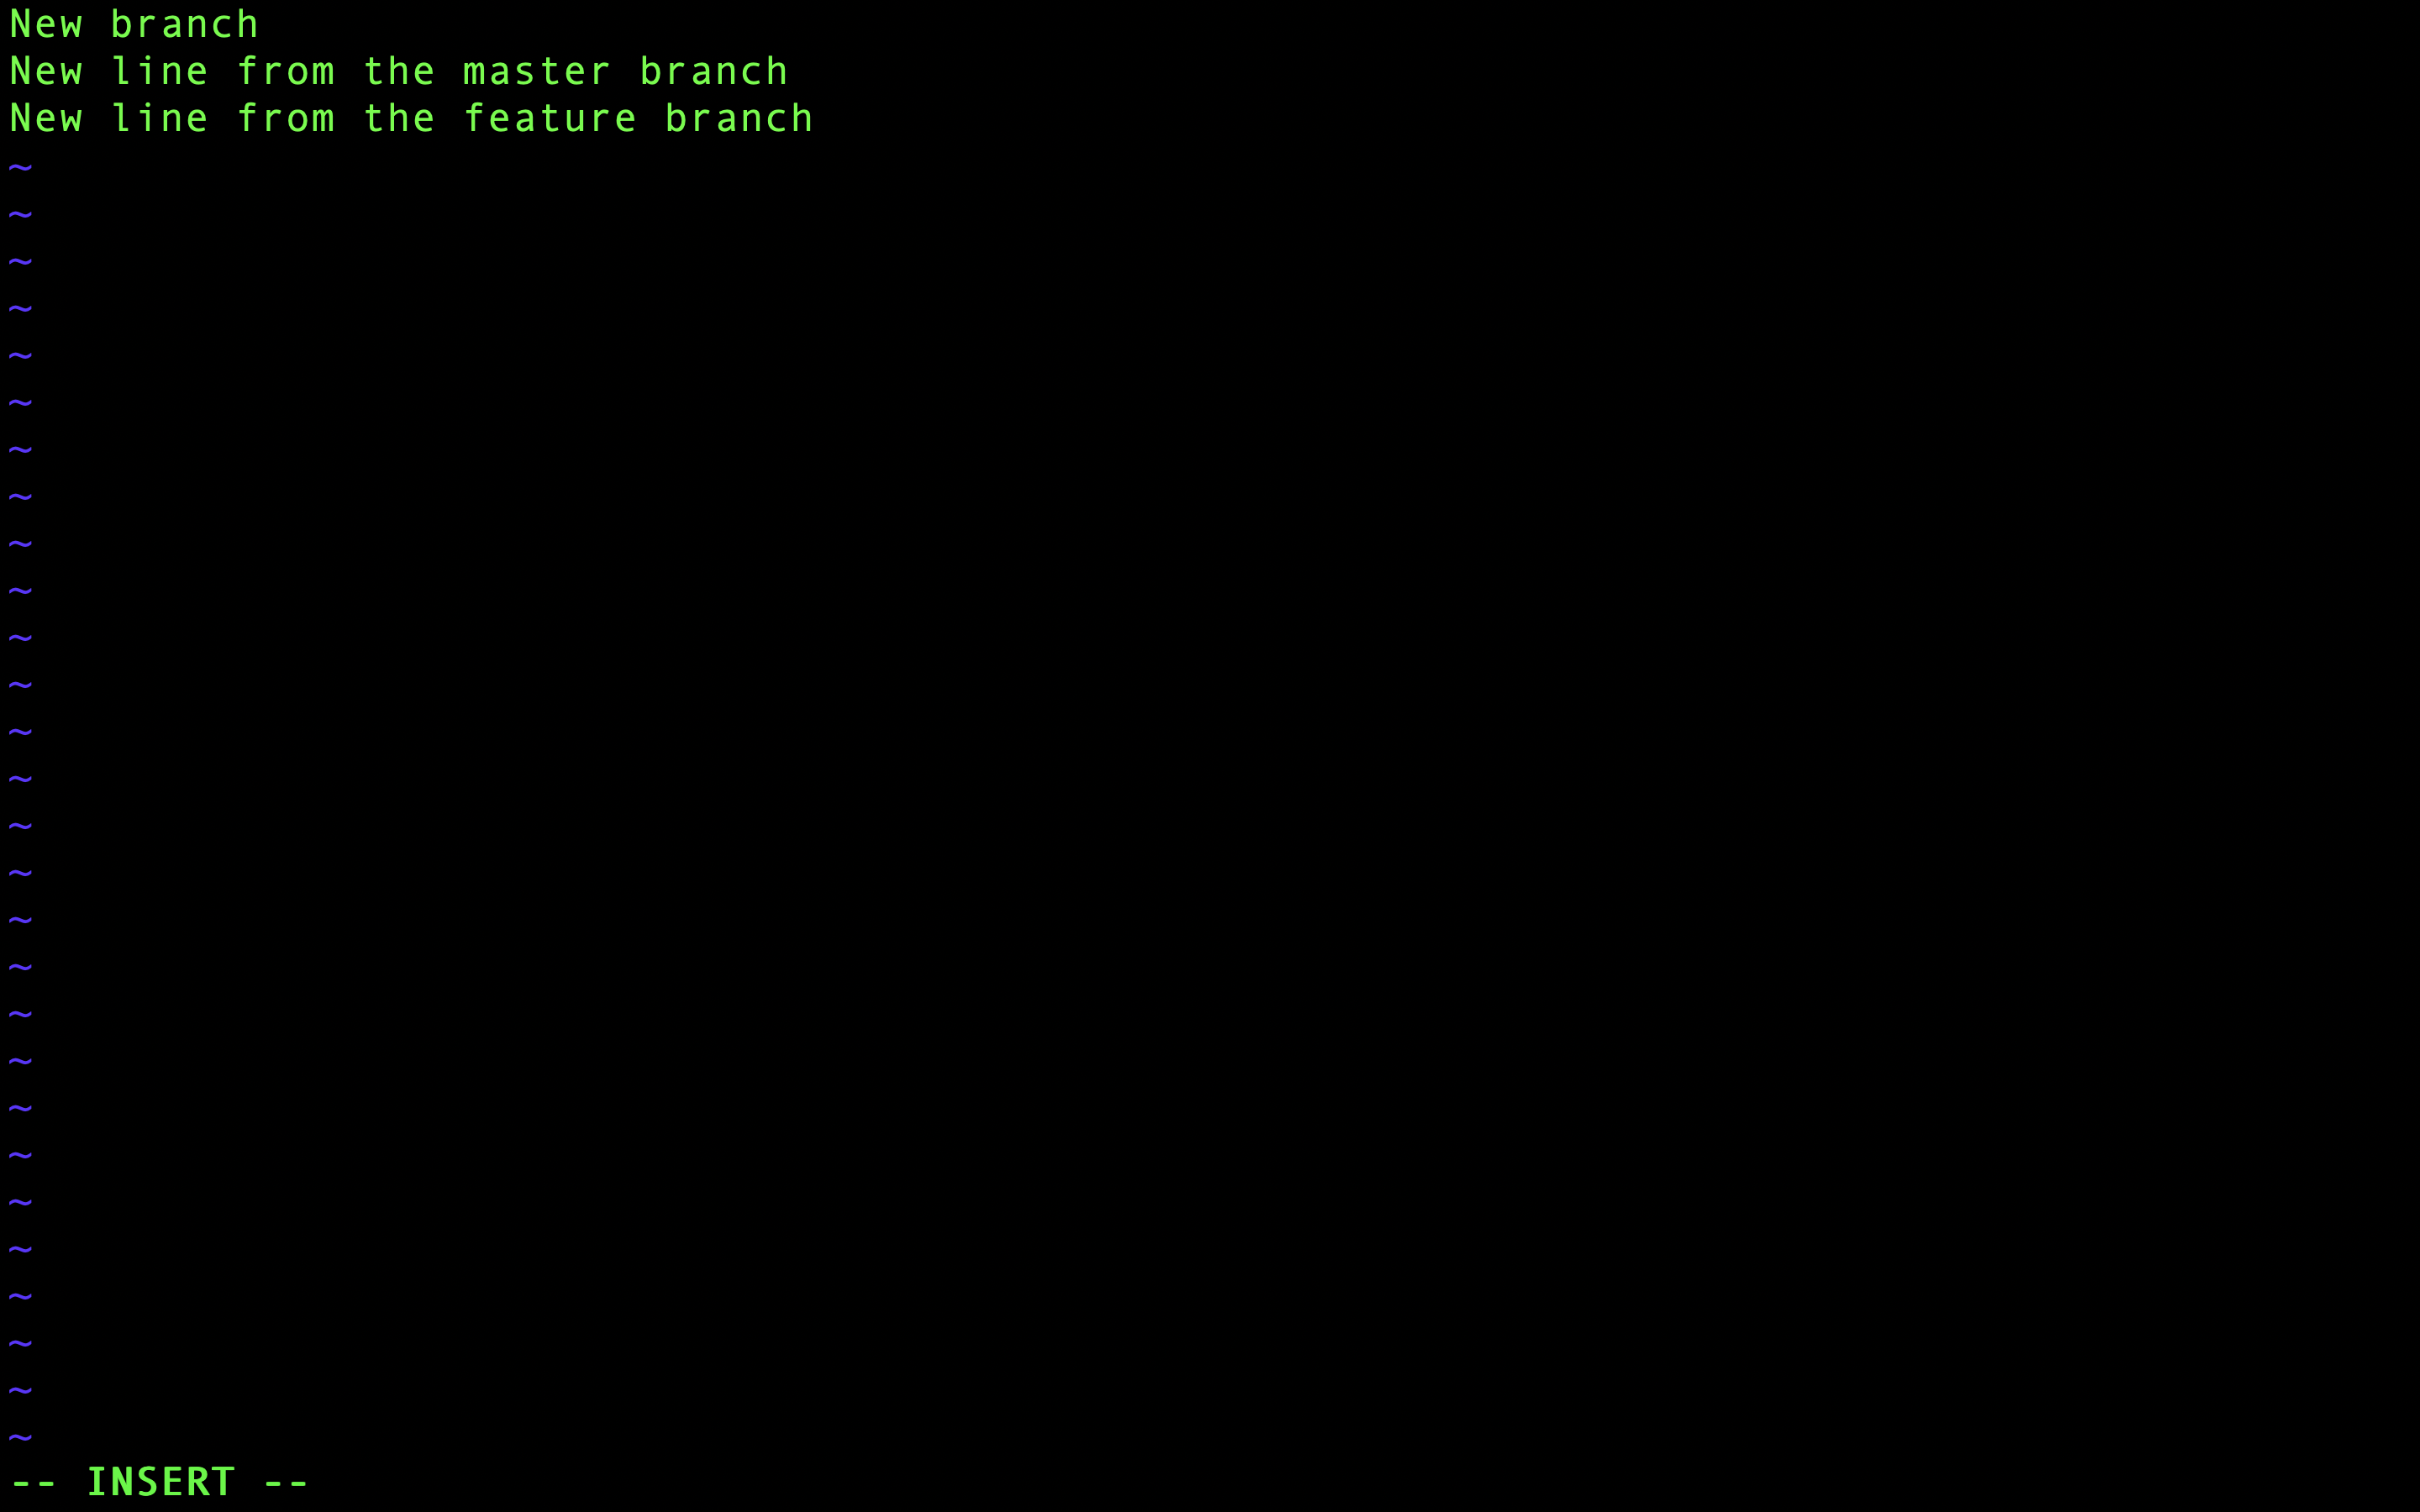
Redigera filen manuellt genom att kombinera ändringarna från båda grenarna enligt följande steg:
1. Gå in i redigeringsläge
Börja med att gå in i insert-läge i Vim genom att trycka på i.
Detta gör det möjligt att redigera texten.
2. Redigera den konfliktfyllda sektionen
Kombinera därefter raderna från båda grenarna i ordningsföljd. Det resulterande innehållet i filen ska se ut så här:
New branch
New line from the master branch
New line from the feature branch
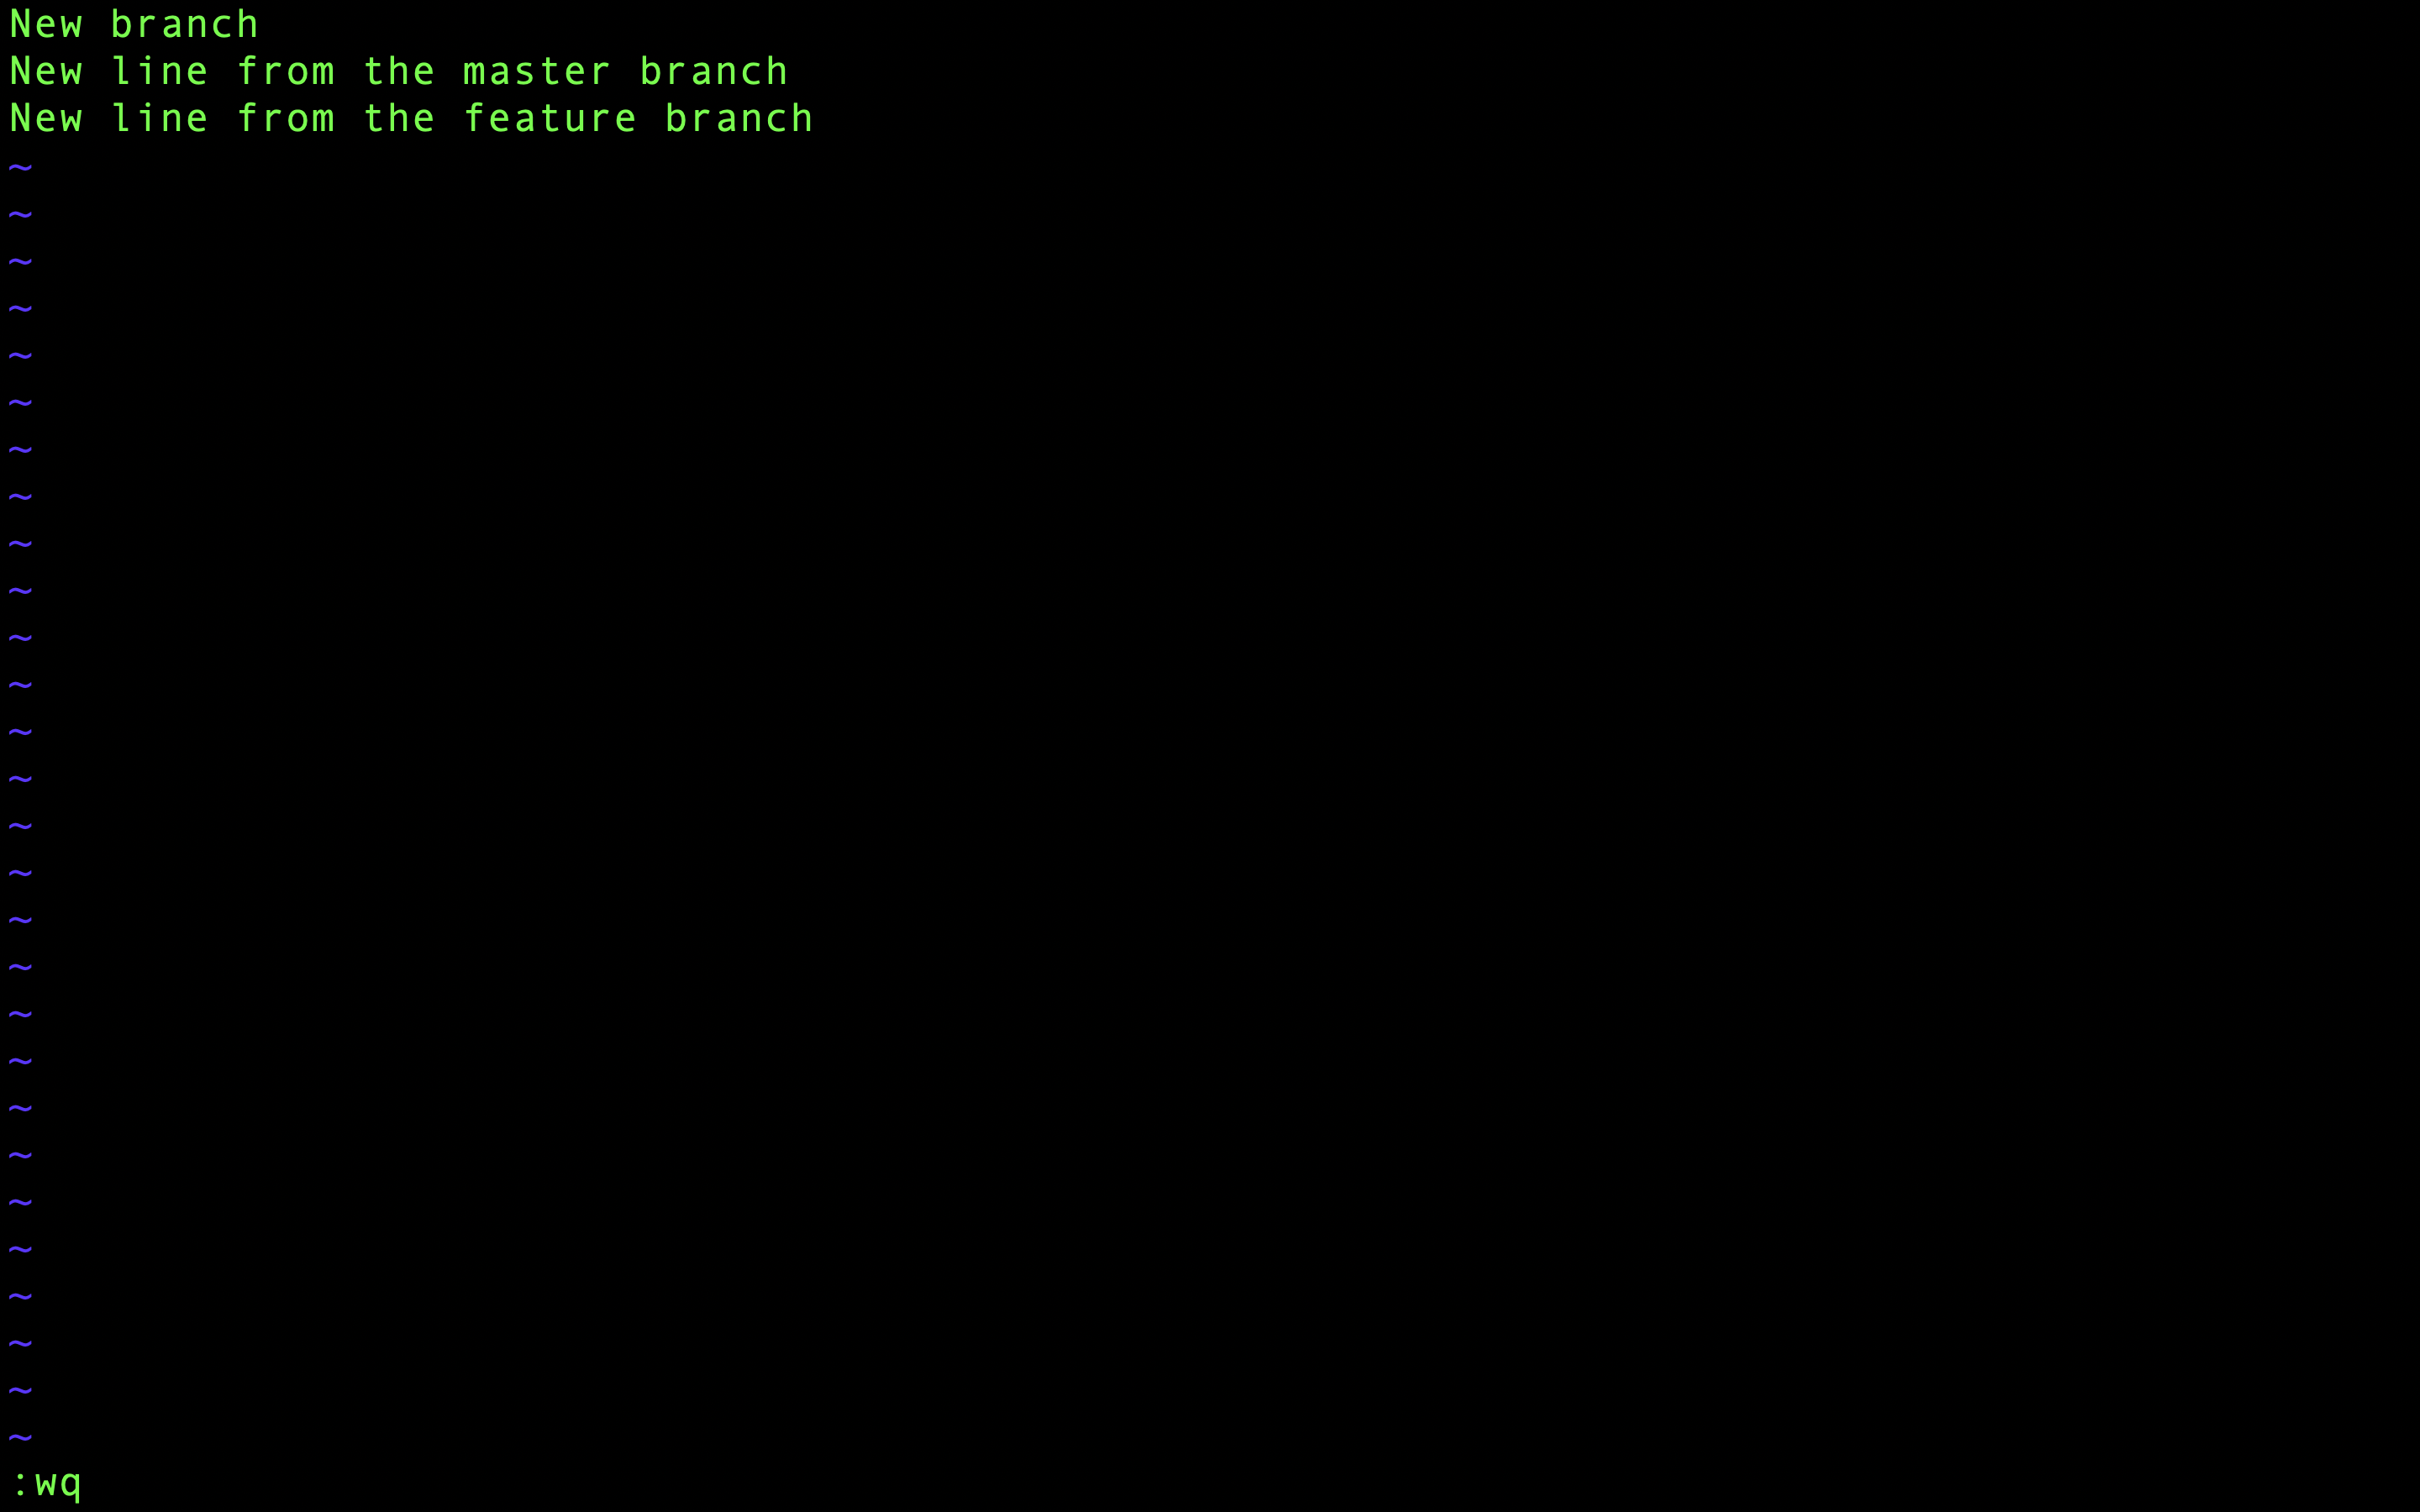
3. Avsluta redigeringsläge, spara och avsluta
Tryck på Escape-tangenten för att lämna infogningsläget.
Skriv sedan :wq och tryck på Enter för att spara ändringarna och avsluta Vim:
Committa filen
Eftersom konflikterna är lösta, lägg till filen branch_learning.txt i staging area och kontrollera statusen:
git add branch_learning.txt
git status

Filen har ändrats och lagts till i staging-området. Fortsätt nu med att committa den:
git commit

Återigen öppnas standardtextredigeraren (Vim i mitt fall) med det förvalda commit-meddelandet angående sammanslagningen:
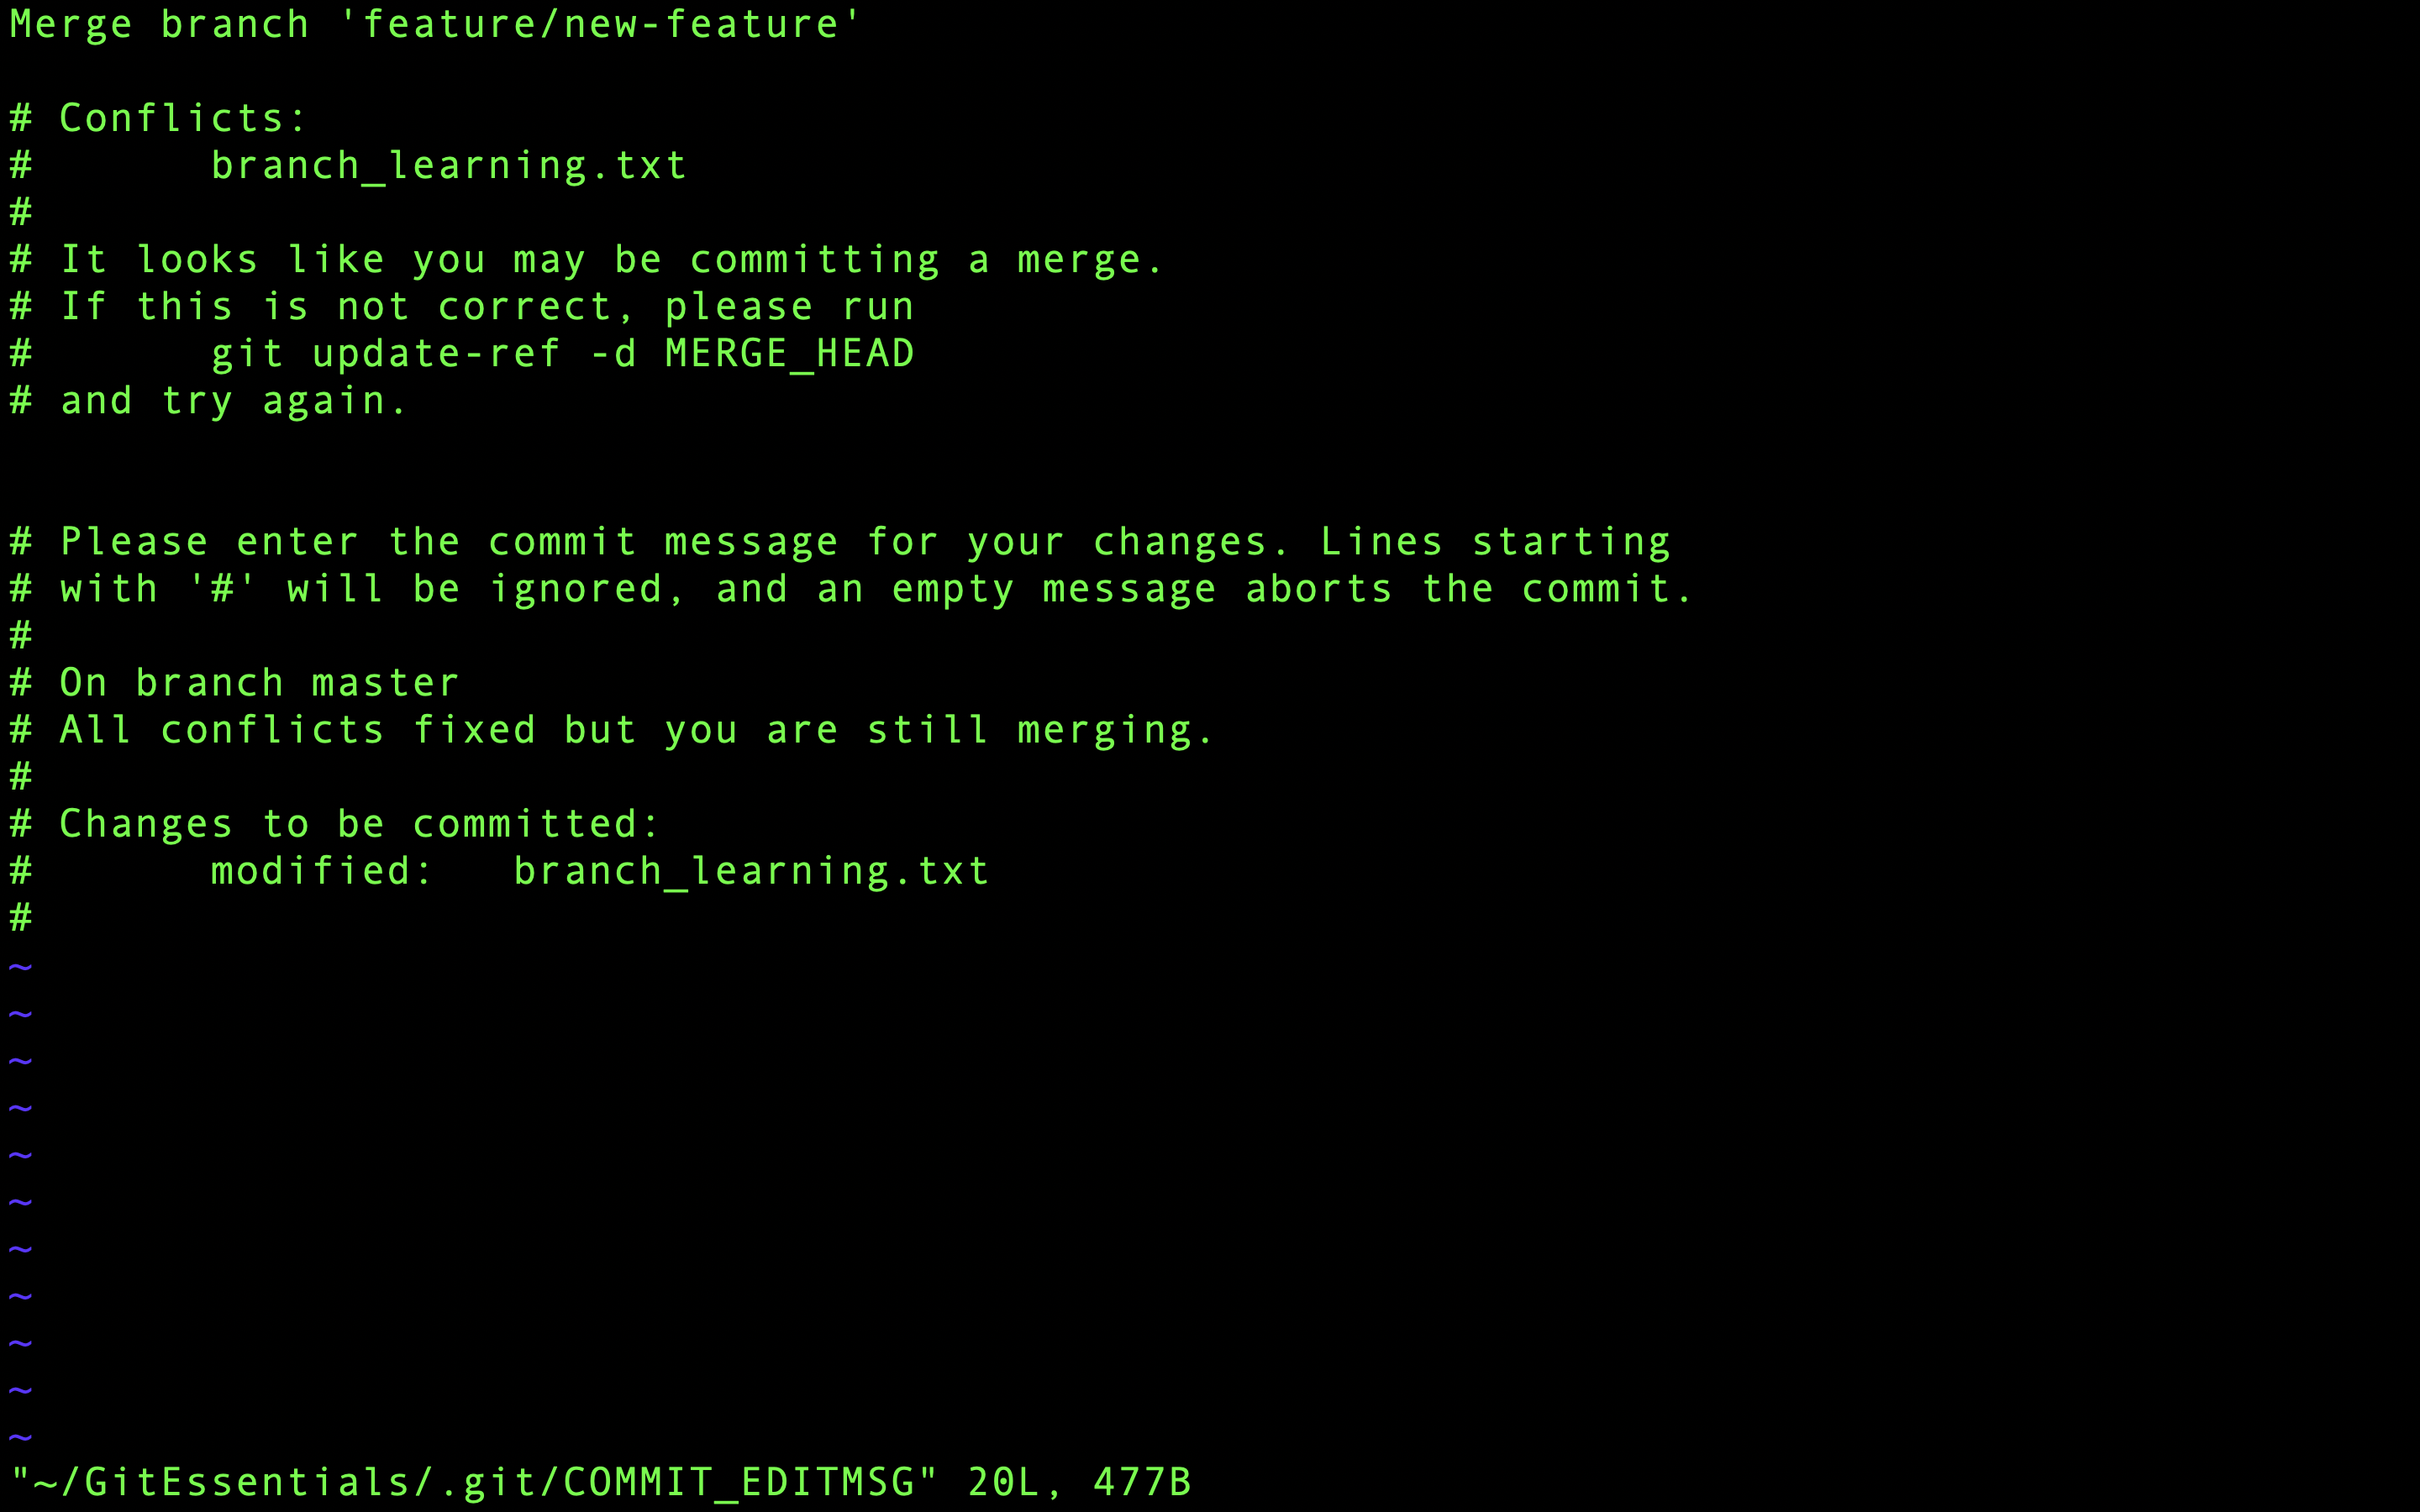
Gå in i insert mode i Vim genom att trycka på i, och ändra sedan meddelandet genom att lägga till raden
Kept lines from both branches
för att beskriva hur konflikterna löstes.
Här är det kompletta commit-meddelandet:
Merge branch 'feature/new-feature'

Kept lines from both branches
För att lämna insert-läge, spara ändringarna och stänga Vim, tryck på Escape-tangenten, skriv sedan :wq och tryck på Enter.
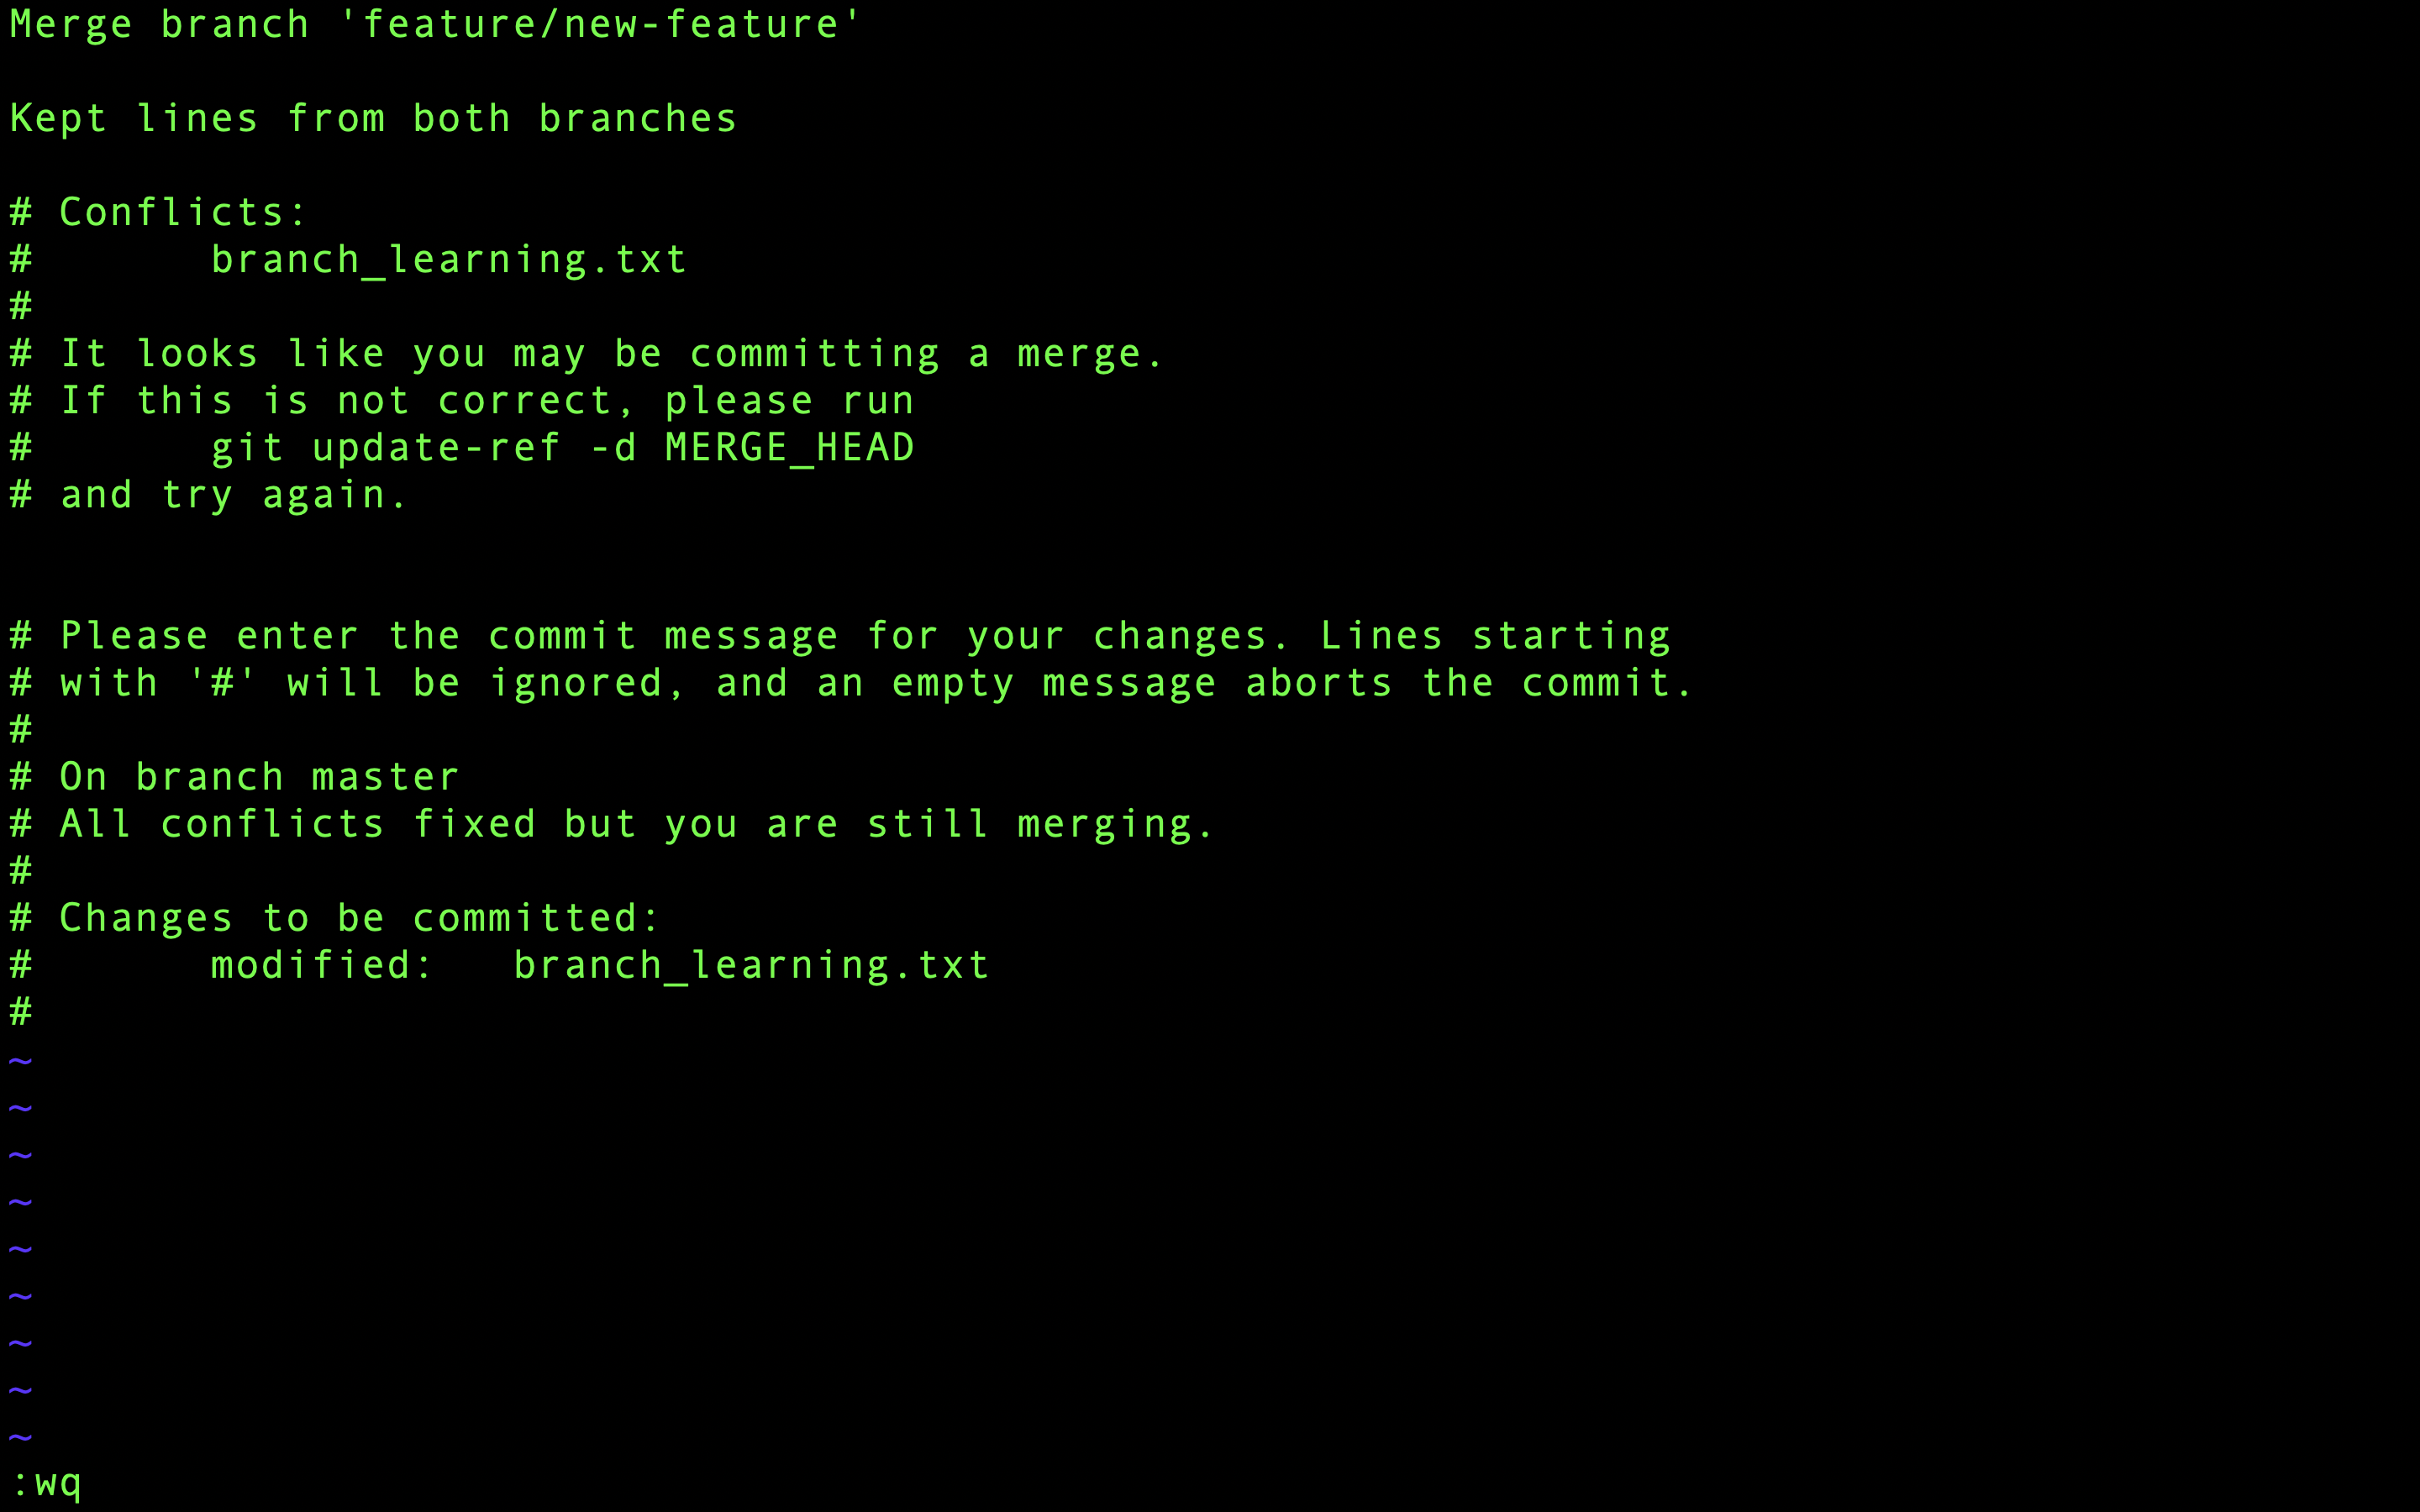
Committen är genomförd och sammanslagningskonflikten är nu löst.

Låt oss nu titta på vår commithistorik som en graf (--graph flagga) med en rad per commit (--oneline flagga):
git log --graph --oneline
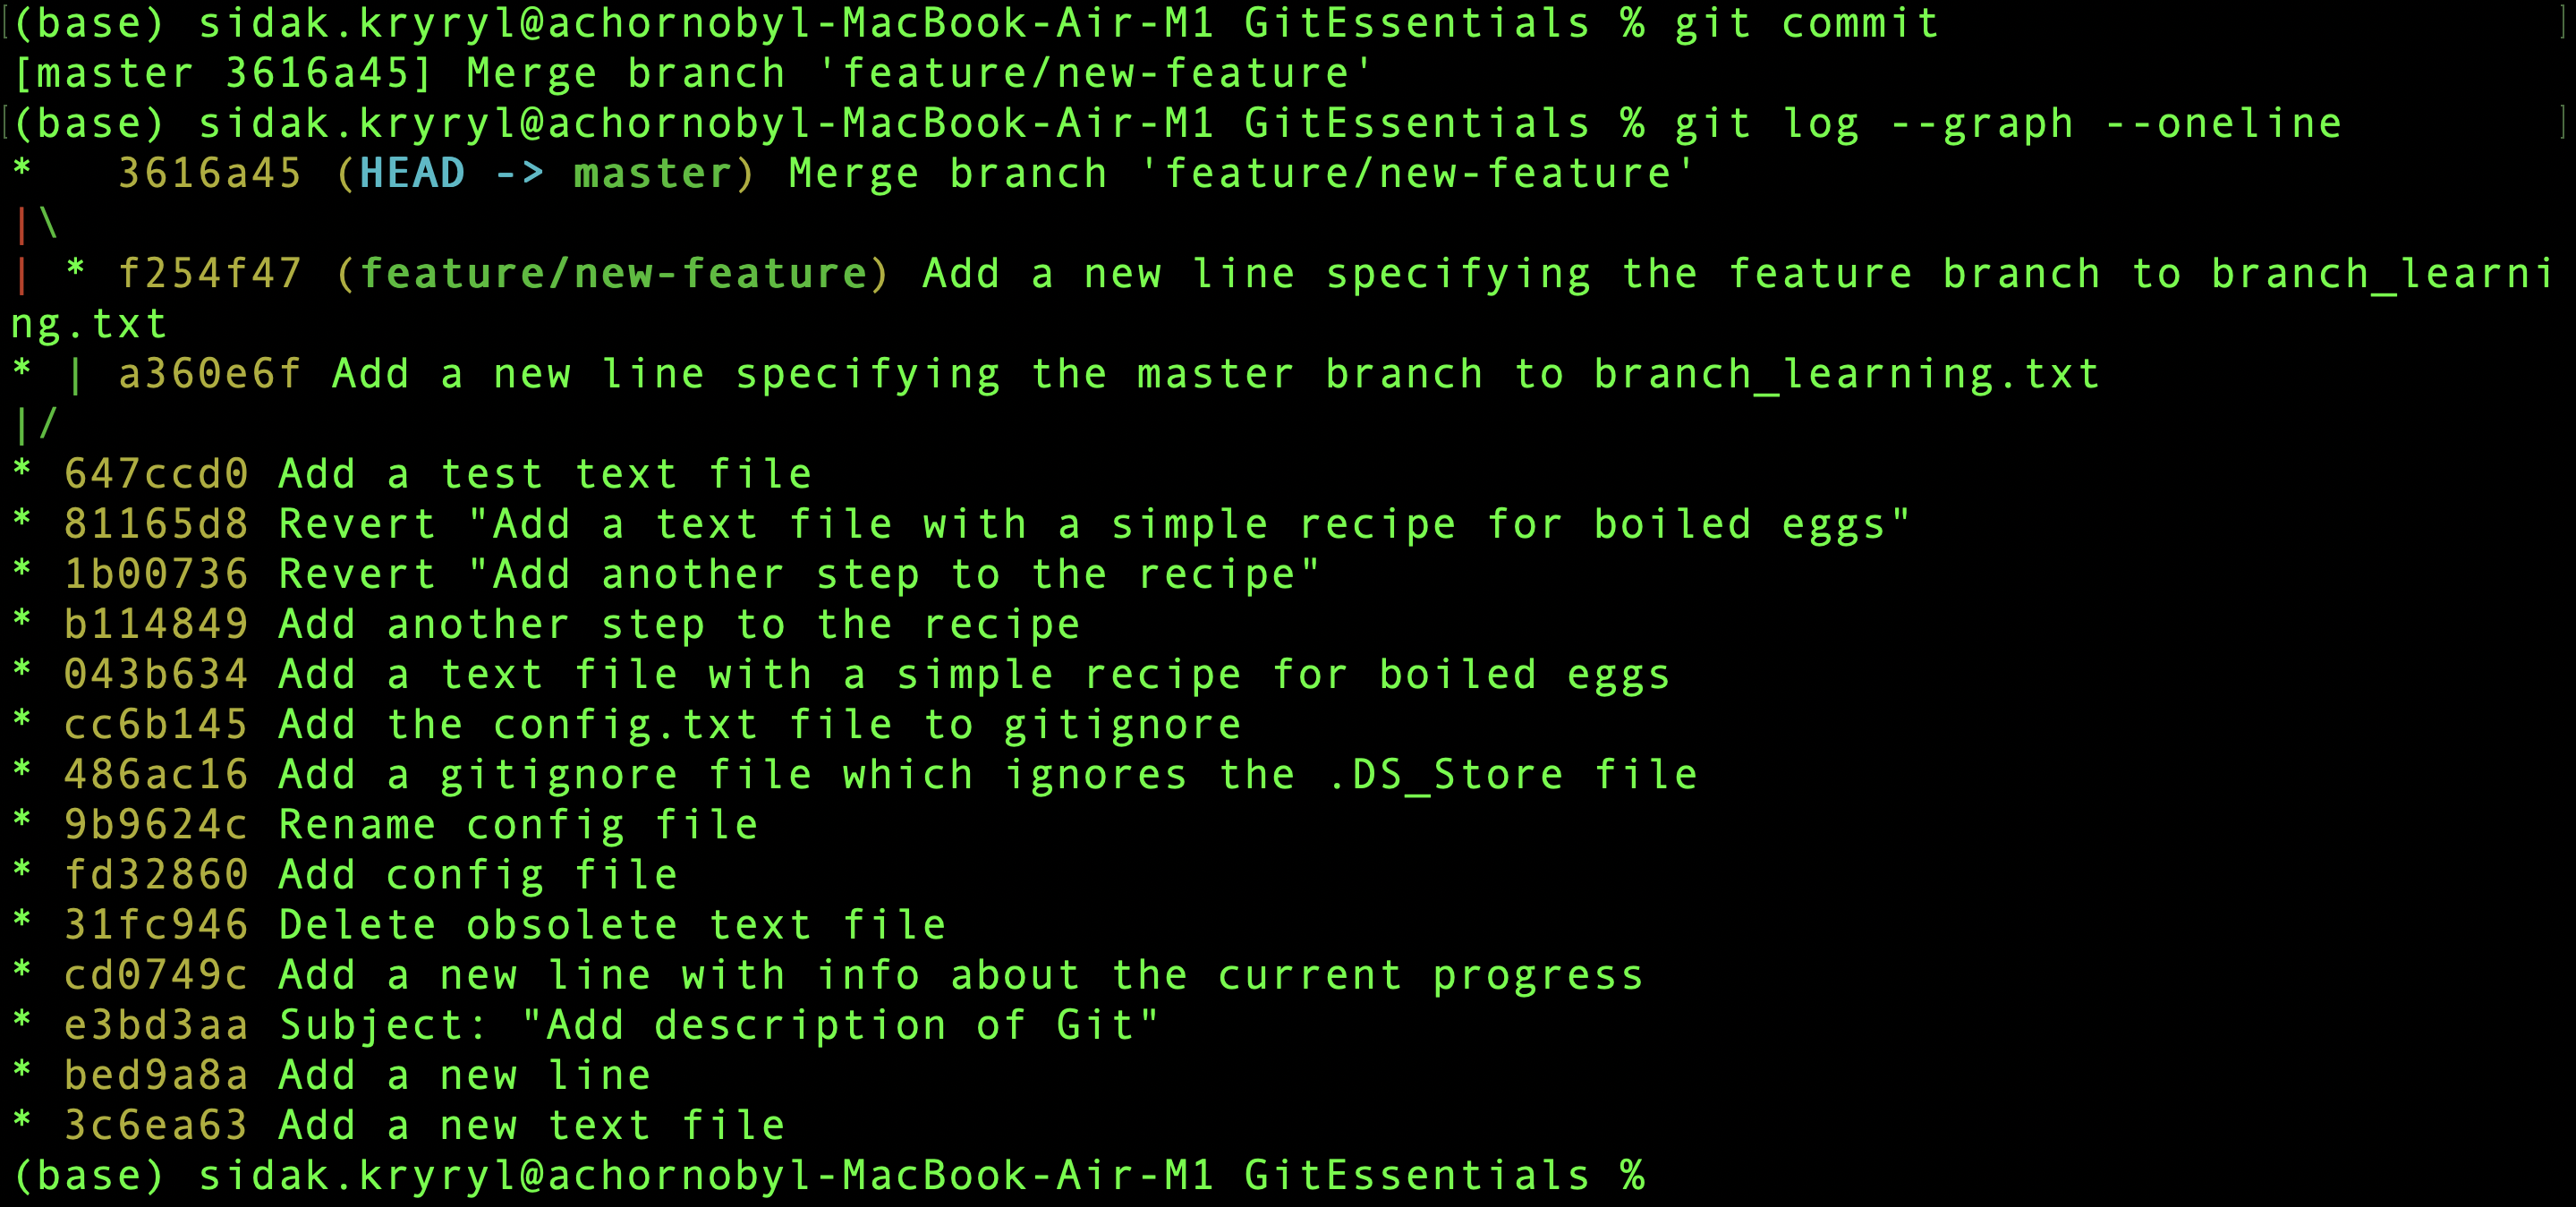
Här kan du se den senaste sammanslagningskommittén tillsammans med den karakteristiska strukturen för en trevägssammanslagning.
Tack för dina kommentarer!
Fråga AI
Fråga AI

Fråga vad du vill eller prova någon av de föreslagna frågorna för att starta vårt samtal
Att Lösa Sammanslagningskonflikter
Åtgärda konflikter
I föregående kapitel uppstod en sammanslagningskonflikt, så nu är det dags att lösa den.
Öppna först filen branch_learning.txt i Vim-editorn med följande kommando:
vim branch_learning.txt
Om Vim inte är installerat kan du använda en annan texteditor, till exempel nano eller atom, genom att ersätta vim med din editors namn i kommandot ovan.
Det rekommenderas dock att använda Vim för att enklare följa stegen som visas här.
Här är filen öppnad i Vim-editorn:
Nu visas konfliktmarkörer som indikerar de konfliktande avsnitten.
Dessa markörer använder pilar och speciella symboler för att markera skillnader mellan grenar:
<<<<<<< HEAD: markerar början på ändringarna från nuvarande gren (master);=======: separerar ändringarna från nuvarande gren (HEAD) och de från grenen som slås ihop;>>>>>>> feature/new-feature: markerar slutet på ändringarna från grenen som slås ihop.
För att lösa konflikten, välj ett av följande alternativ:
- Behåll ändringarna från nuvarande gren (
master); - Behåll ändringarna från sammanslagen gren (
feature/new-feature); - Redigera manuellt innehållet.
Redigera filen manuellt genom att kombinera ändringarna från båda grenarna enligt följande steg:
1. Gå in i redigeringsläge
Börja med att gå in i insert-läge i Vim genom att trycka på i.
Detta gör det möjligt att redigera texten.
2. Redigera den konfliktfyllda sektionen
Kombinera därefter raderna från båda grenarna i ordningsföljd. Det resulterande innehållet i filen ska se ut så här:
New branch
New line from the master branch
New line from the feature branch
3. Avsluta redigeringsläge, spara och avsluta
Tryck på Escape-tangenten för att lämna infogningsläget.
Skriv sedan :wq och tryck på Enter för att spara ändringarna och avsluta Vim:
Committa filen
Eftersom konflikterna är lösta, lägg till filen branch_learning.txt i staging area och kontrollera statusen:
git add branch_learning.txt
git status
Filen har ändrats och lagts till i staging-området. Fortsätt nu med att committa den:
git commit
Återigen öppnas standardtextredigeraren (Vim i mitt fall) med det förvalda commit-meddelandet angående sammanslagningen:
Gå in i insert mode i Vim genom att trycka på i, och ändra sedan meddelandet genom att lägga till raden
Kept lines from both branches
för att beskriva hur konflikterna löstes.
Här är det kompletta commit-meddelandet:
Merge branch 'feature/new-feature'

Kept lines from both branches
För att lämna insert-läge, spara ändringarna och stänga Vim, tryck på Escape-tangenten, skriv sedan :wq och tryck på Enter.
Committen är genomförd och sammanslagningskonflikten är nu löst.
Låt oss nu titta på vår commithistorik som en graf (--graph flagga) med en rad per commit (--oneline flagga):
git log --graph --oneline
Här kan du se den senaste sammanslagningskommittén tillsammans med den karakteristiska strukturen för en trevägssammanslagning.
Tack för dina kommentarer!
