Working with Ranges
Swipe to show menu
Selecting Ranges
You'll do this while exploring, production code avoids .Select in favor of referencing ranges directly:
ws.Range("A1:I1").Select        ' fine for exploring
ws.Range("A1:I1").Font.Bold = True    ' better — skips Select entirely
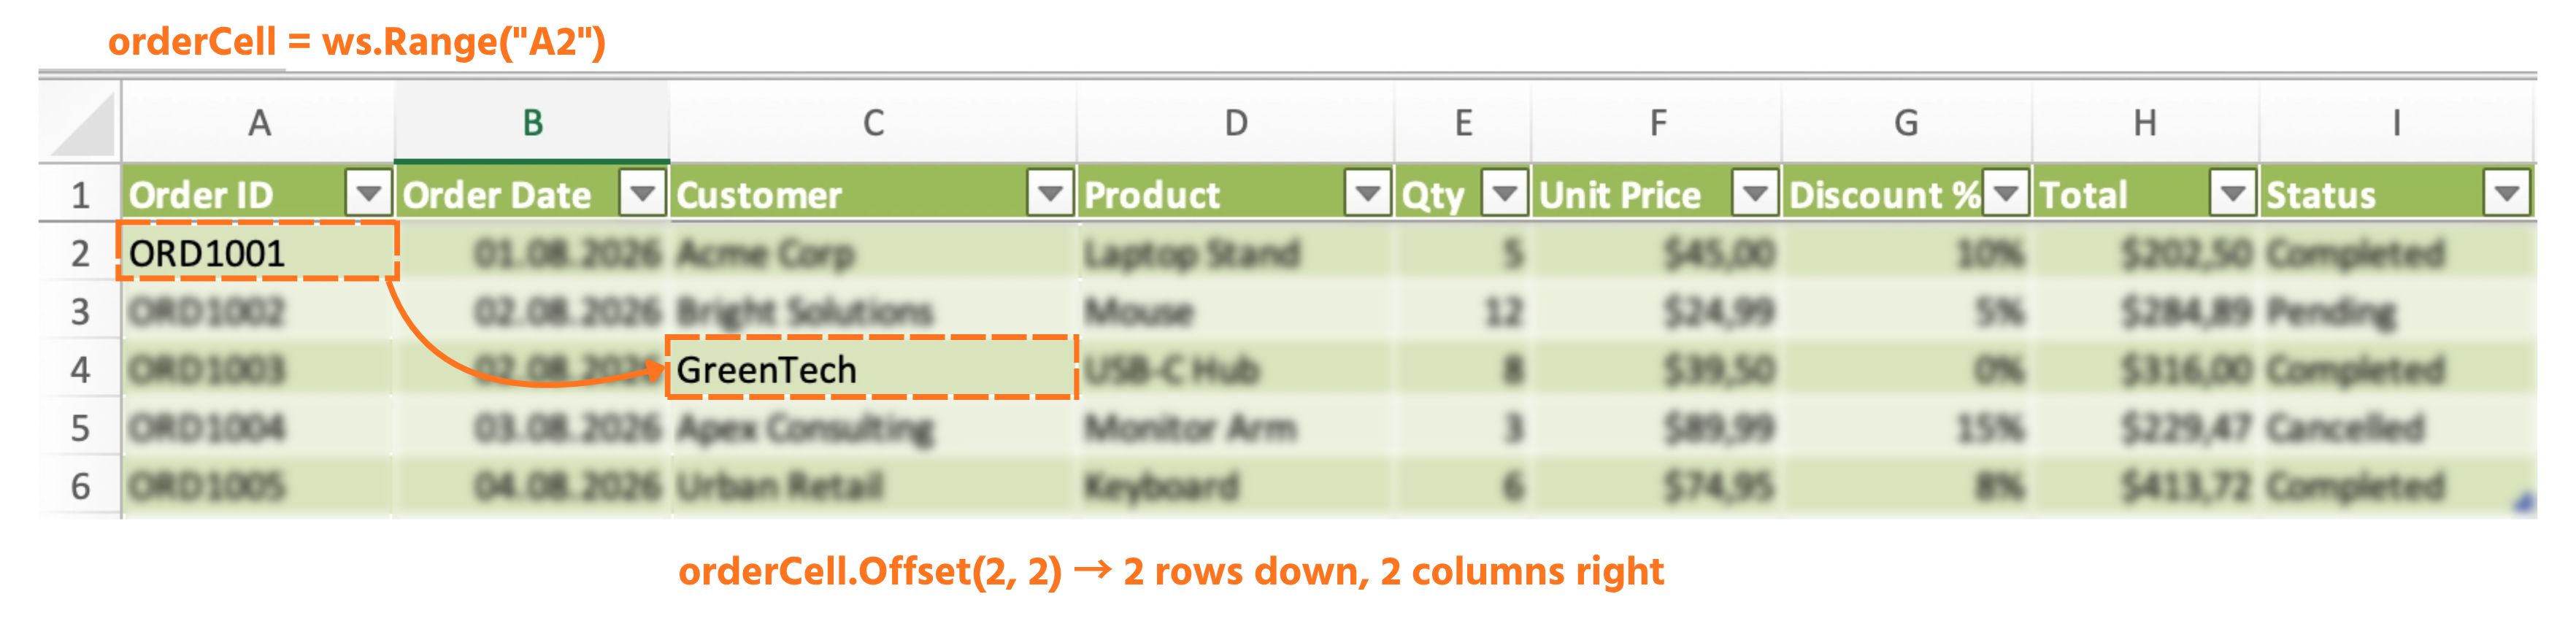
Offset
Moves a reference relative to itself — read as (rows down, columns right), with negative numbers moving up or left:
Dim orderCell As Range
Set orderCell = ws.Range("A2")             ' ORD1001
Debug.Print orderCell.Offset(1, 0).Value    ' one row down → ORD1002
Debug.Print orderCell.Offset(0, 2).Value    ' two columns right → Acme Corp
Debug.Print orderCell.Offset(-1, 0).Value   ' one row up → the header, "Order ID"
Resize
Changes how many rows or columns a range covers, keeping its top-left corner fixed:
Dim headerRow As Range
Set headerRow = ws.Range("A1")
Set headerRow = headerRow.Resize(1, 9)    ' now covers A1:I1, the full header
Combine Offset and Resize and you can grab "everything below the header" without knowing the row count in advance:
Dim dataRange As Range
Set dataRange = ws.Range("A1").CurrentRegion
Set dataRange = dataRange.Offset(1, 0).Resize(dataRange.Rows.Count - 1)
' dataRange now covers A2:I6 — every order, no header
Named Ranges
Give a range a plain-English name you can reference instead of an address:
ThisWorkbook.Names.Add Name:="OrdersTable", RefersTo:=ws.Range("A1:I6")
Debug.Print ws.Range("OrdersTable").Rows.Count
Task
- Starting from Range("A2") (ORD1001), use
Offsetto print the Product and Total for the order two rows below it (ORD1003) — without ever typing "A4", "D4", or "H4". - Use
CurrentRegion,Offset, andResizetogether to select just the data rows (no header) and print how many rows that range contains. - Create a named range called
OrdersDatacovering the same data-only range and confirm you can reference it by name in the Immediate Window.

1. Using Offset from A2 to reach ORD1003
- Start by setting a
Rangevariable toA2— that's your anchor cell, exactly like the chapter's worked example. - "Two rows below" and "same column" means the first
Offsetargument (rows) is 2 and the second (columns) is 0 — for the Product column. - Total is a different column but the same row — so only the column-offset number changes between your two
Offsetcalls, not the row one. - Count columns from A2's position: Product is 3 columns to the right of Order ID; Total is 7 columns to the right.
2. Combining CurrentRegion, Offset, and Resize
CurrentRegiononA1gives you the whole table, header included.Offset(1, 0)shifts that entire block down by one row — enough to drop the header off the top.Resizeneeds to shrink the row count by exactly the same amount you shifted, or the bottom edge will spill one row past the real data.
3. Creating and testing a named range
- Named ranges are added through
ThisWorkbook.Names.Add, giving it aName:=and aRefersTo:=— you can reuse the exact range expression from hint 2 rather than building it again from scratch. - To reference it afterward, use
Range("OrdersData")— the name becomes a plain string, not a variable.
Sub NavigateWithoutHardcoding()
    Dim ws As Worksheet
    Set ws = ThisWorkbook.Worksheets("Orders")

    ' --- 1. Offset from A2 to reach ORD1003 ---
    Dim orderCell As Range
    Set orderCell = ws.Range("A2")

    Debug.Print orderCell.Offset(2, 3).Value   ' Product
    Debug.Print orderCell.Offset(2, 7).Value   ' Total

    ' --- 2. CurrentRegion + Offset + Resize ---
    Dim dataRange As Range
    Set dataRange = ws.Range("A1").CurrentRegion
    Set dataRange = dataRange.Offset(1, 0).Resize(dataRange.Rows.Count - 1)

    Debug.Print "Data rows: " & dataRange.Rows.Count

    ' --- 3. Named range ---
    ThisWorkbook.Names.Add Name:="OrdersData", RefersTo:=dataRange
End Sub
Run the Sub (F5), then in the Immediate Window (Ctrl+G) type:
?Range("OrdersData").Rows.Count
Thanks for your feedback!
Ask AI

Ask AI

Ask anything or try one of the suggested questions to begin our chat
