Вирішення Конфліктів Злиття
Свайпніть щоб показати меню
Виправлення конфліктів
У попередньому розділі виник конфлікт злиття, тож зараз настав час його виправити.
Спочатку відкрийте файл branch_learning.txt у редакторі Vim за допомогою наступної команди:
vim branch_learning.txt
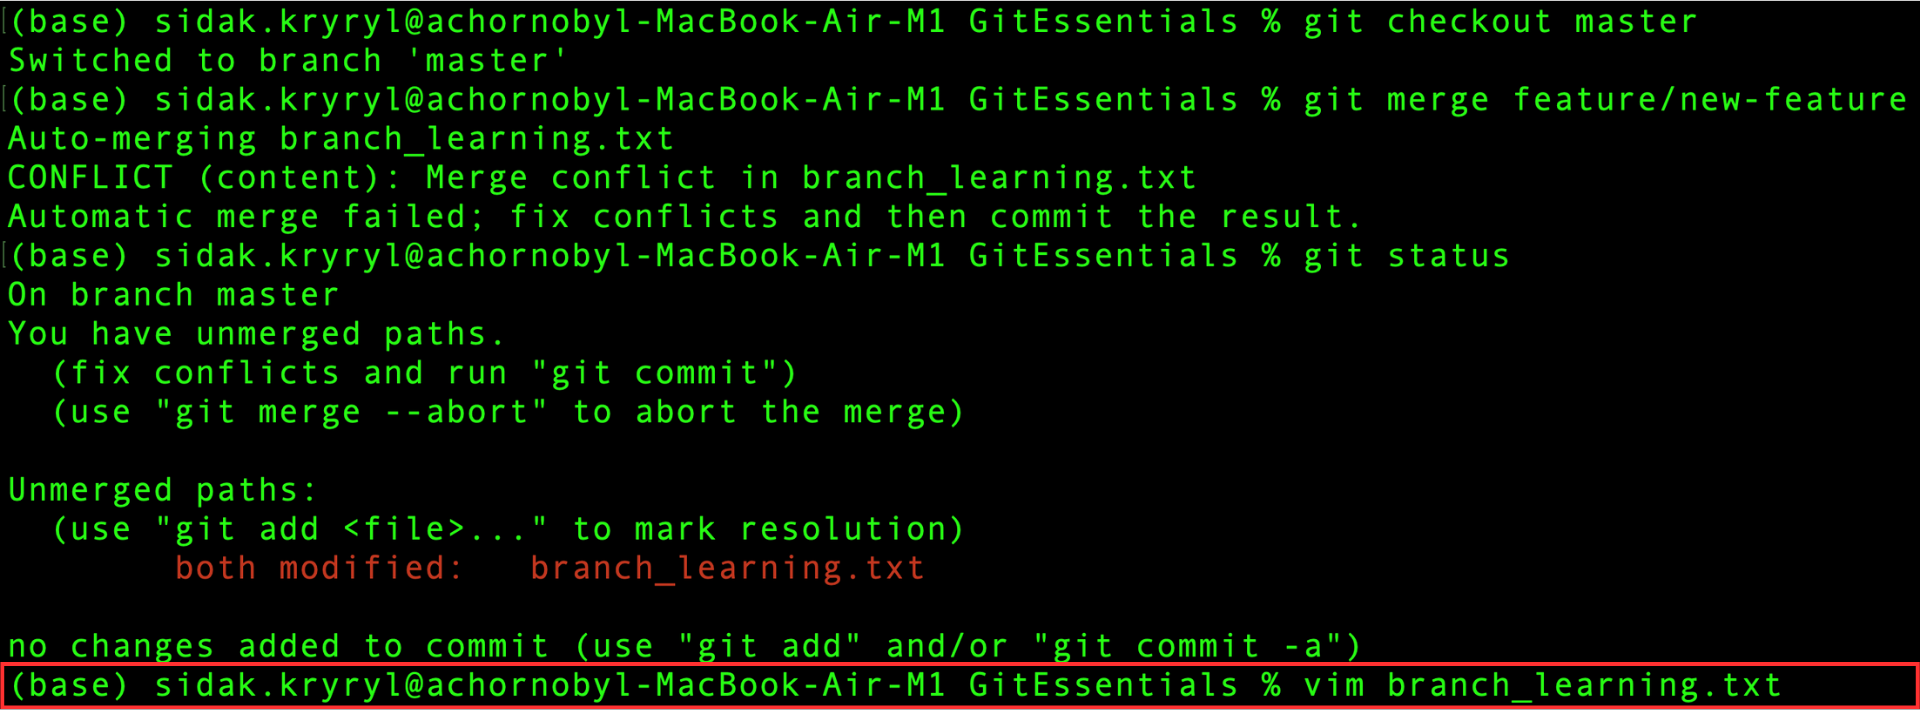
Якщо Vim не встановлено, можна скористатися іншим текстовим редактором, наприклад nano або atom, замінивши vim на назву вашого редактора у наведеній вище команді.
Однак рекомендується використовувати Vim для кращої відповідності наведеним тут крокам.
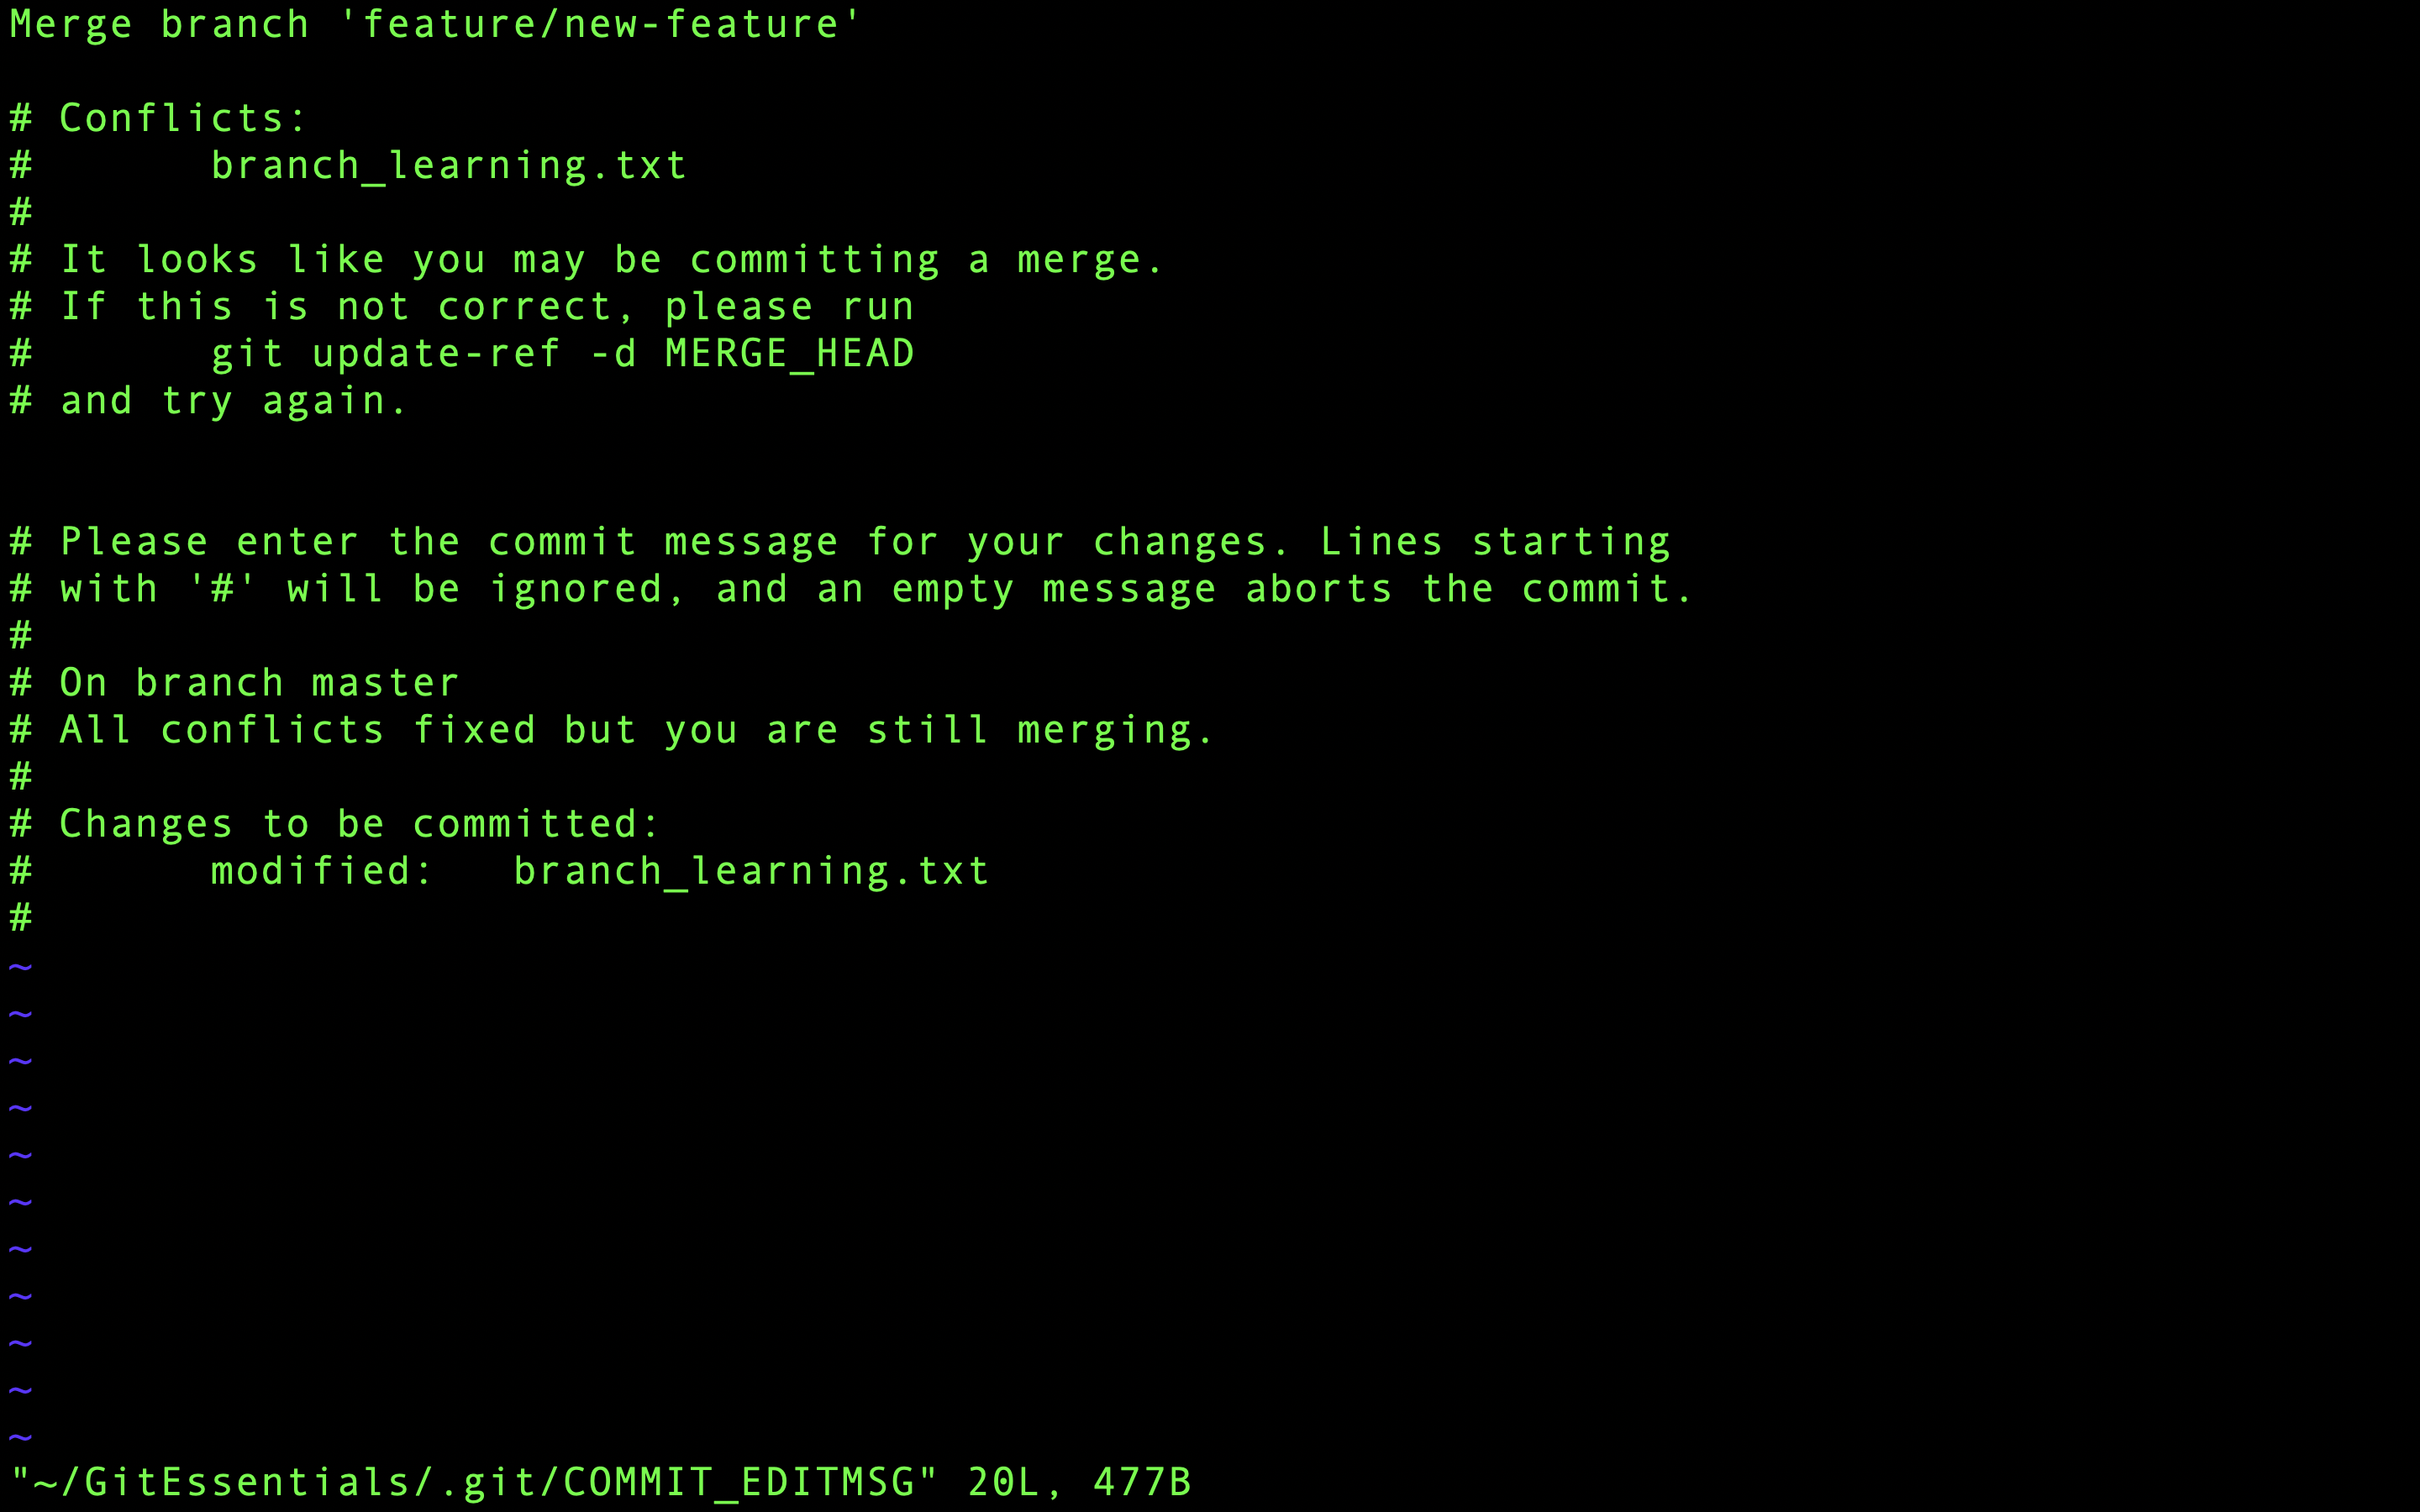
Ось як виглядає файл, відкритий у редакторі Vim:
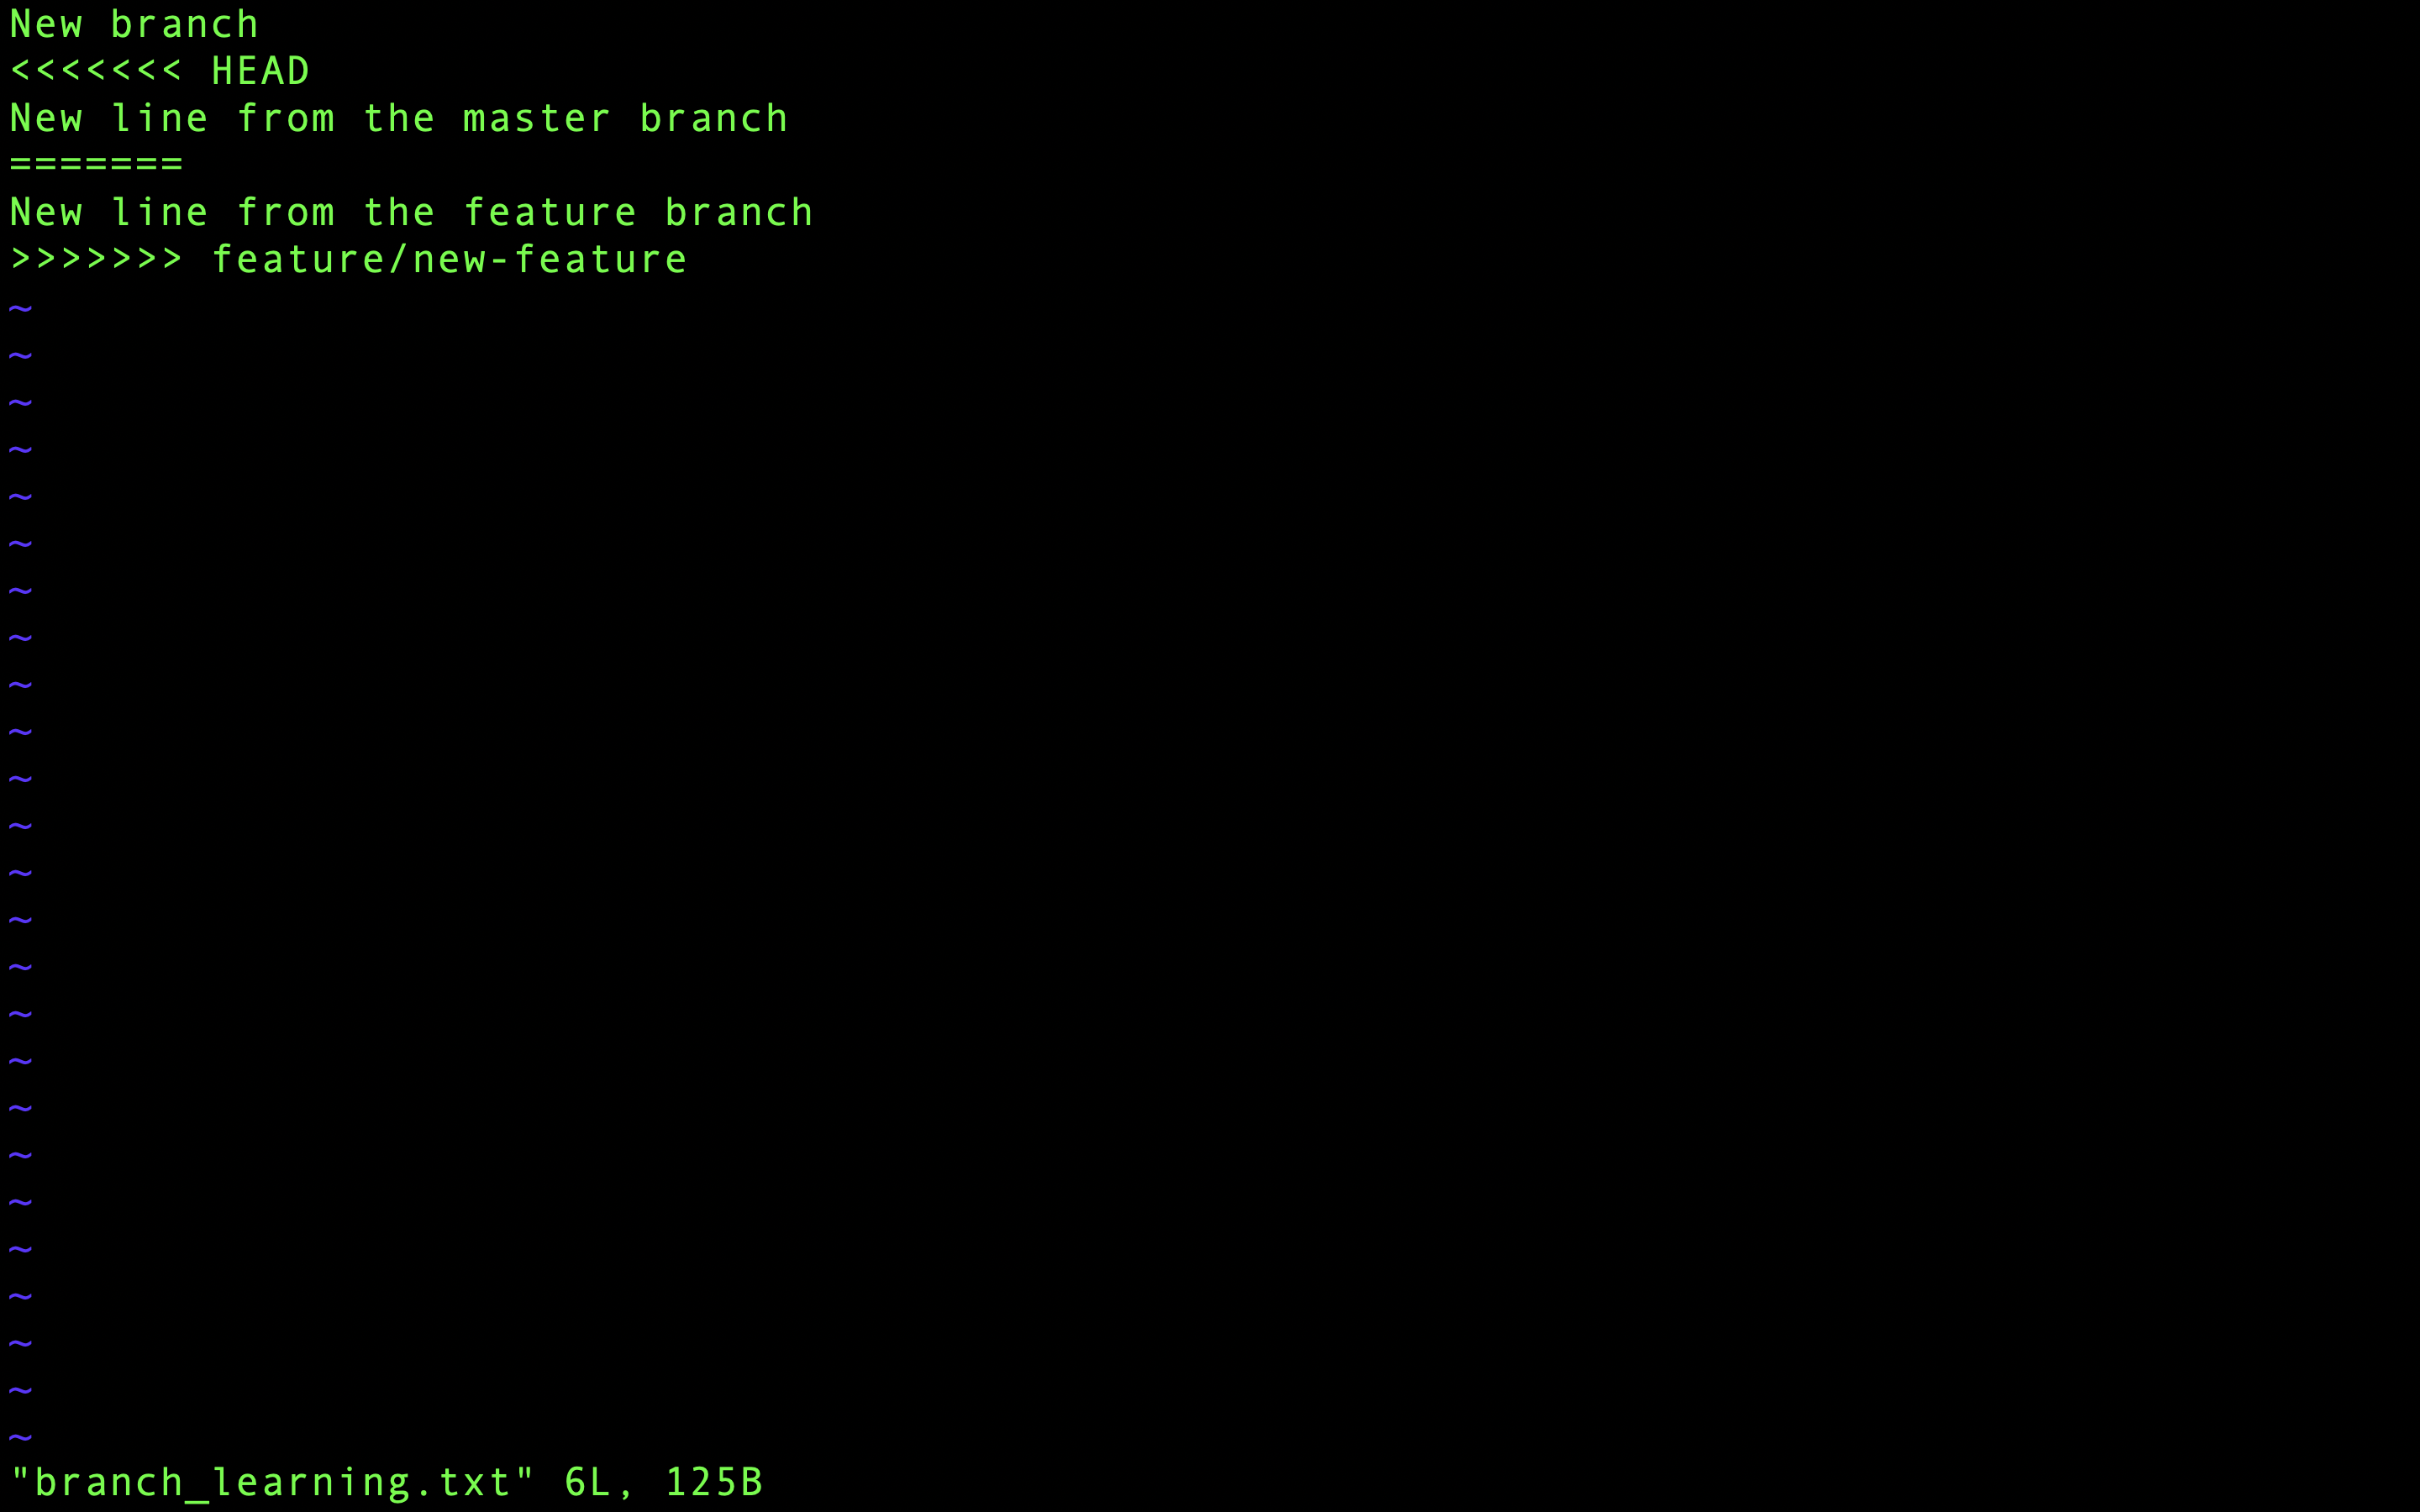
Тепер видно маркерів конфлікту, які вказують на конфліктні ділянки.
Ці маркери використовують стрілки та спеціальні символи для виділення відмінностей між гілками:
<<<<<<< HEAD: позначає початок змін з поточної гілки (master);=======: розділяє зміни з поточної гілки (HEAD) і ті, що зливаються з іншої гілки;>>>>>>> feature/new-feature: позначає кінець змін з гілки, що зливається.
Для вирішення конфлікту оберіть один із наступних варіантів:
- Зберегти зміни з поточної гілки (
master); - Зберегти зміни з гілки, що зливається (
feature/new-feature); - Вручну відредагувати вміст.
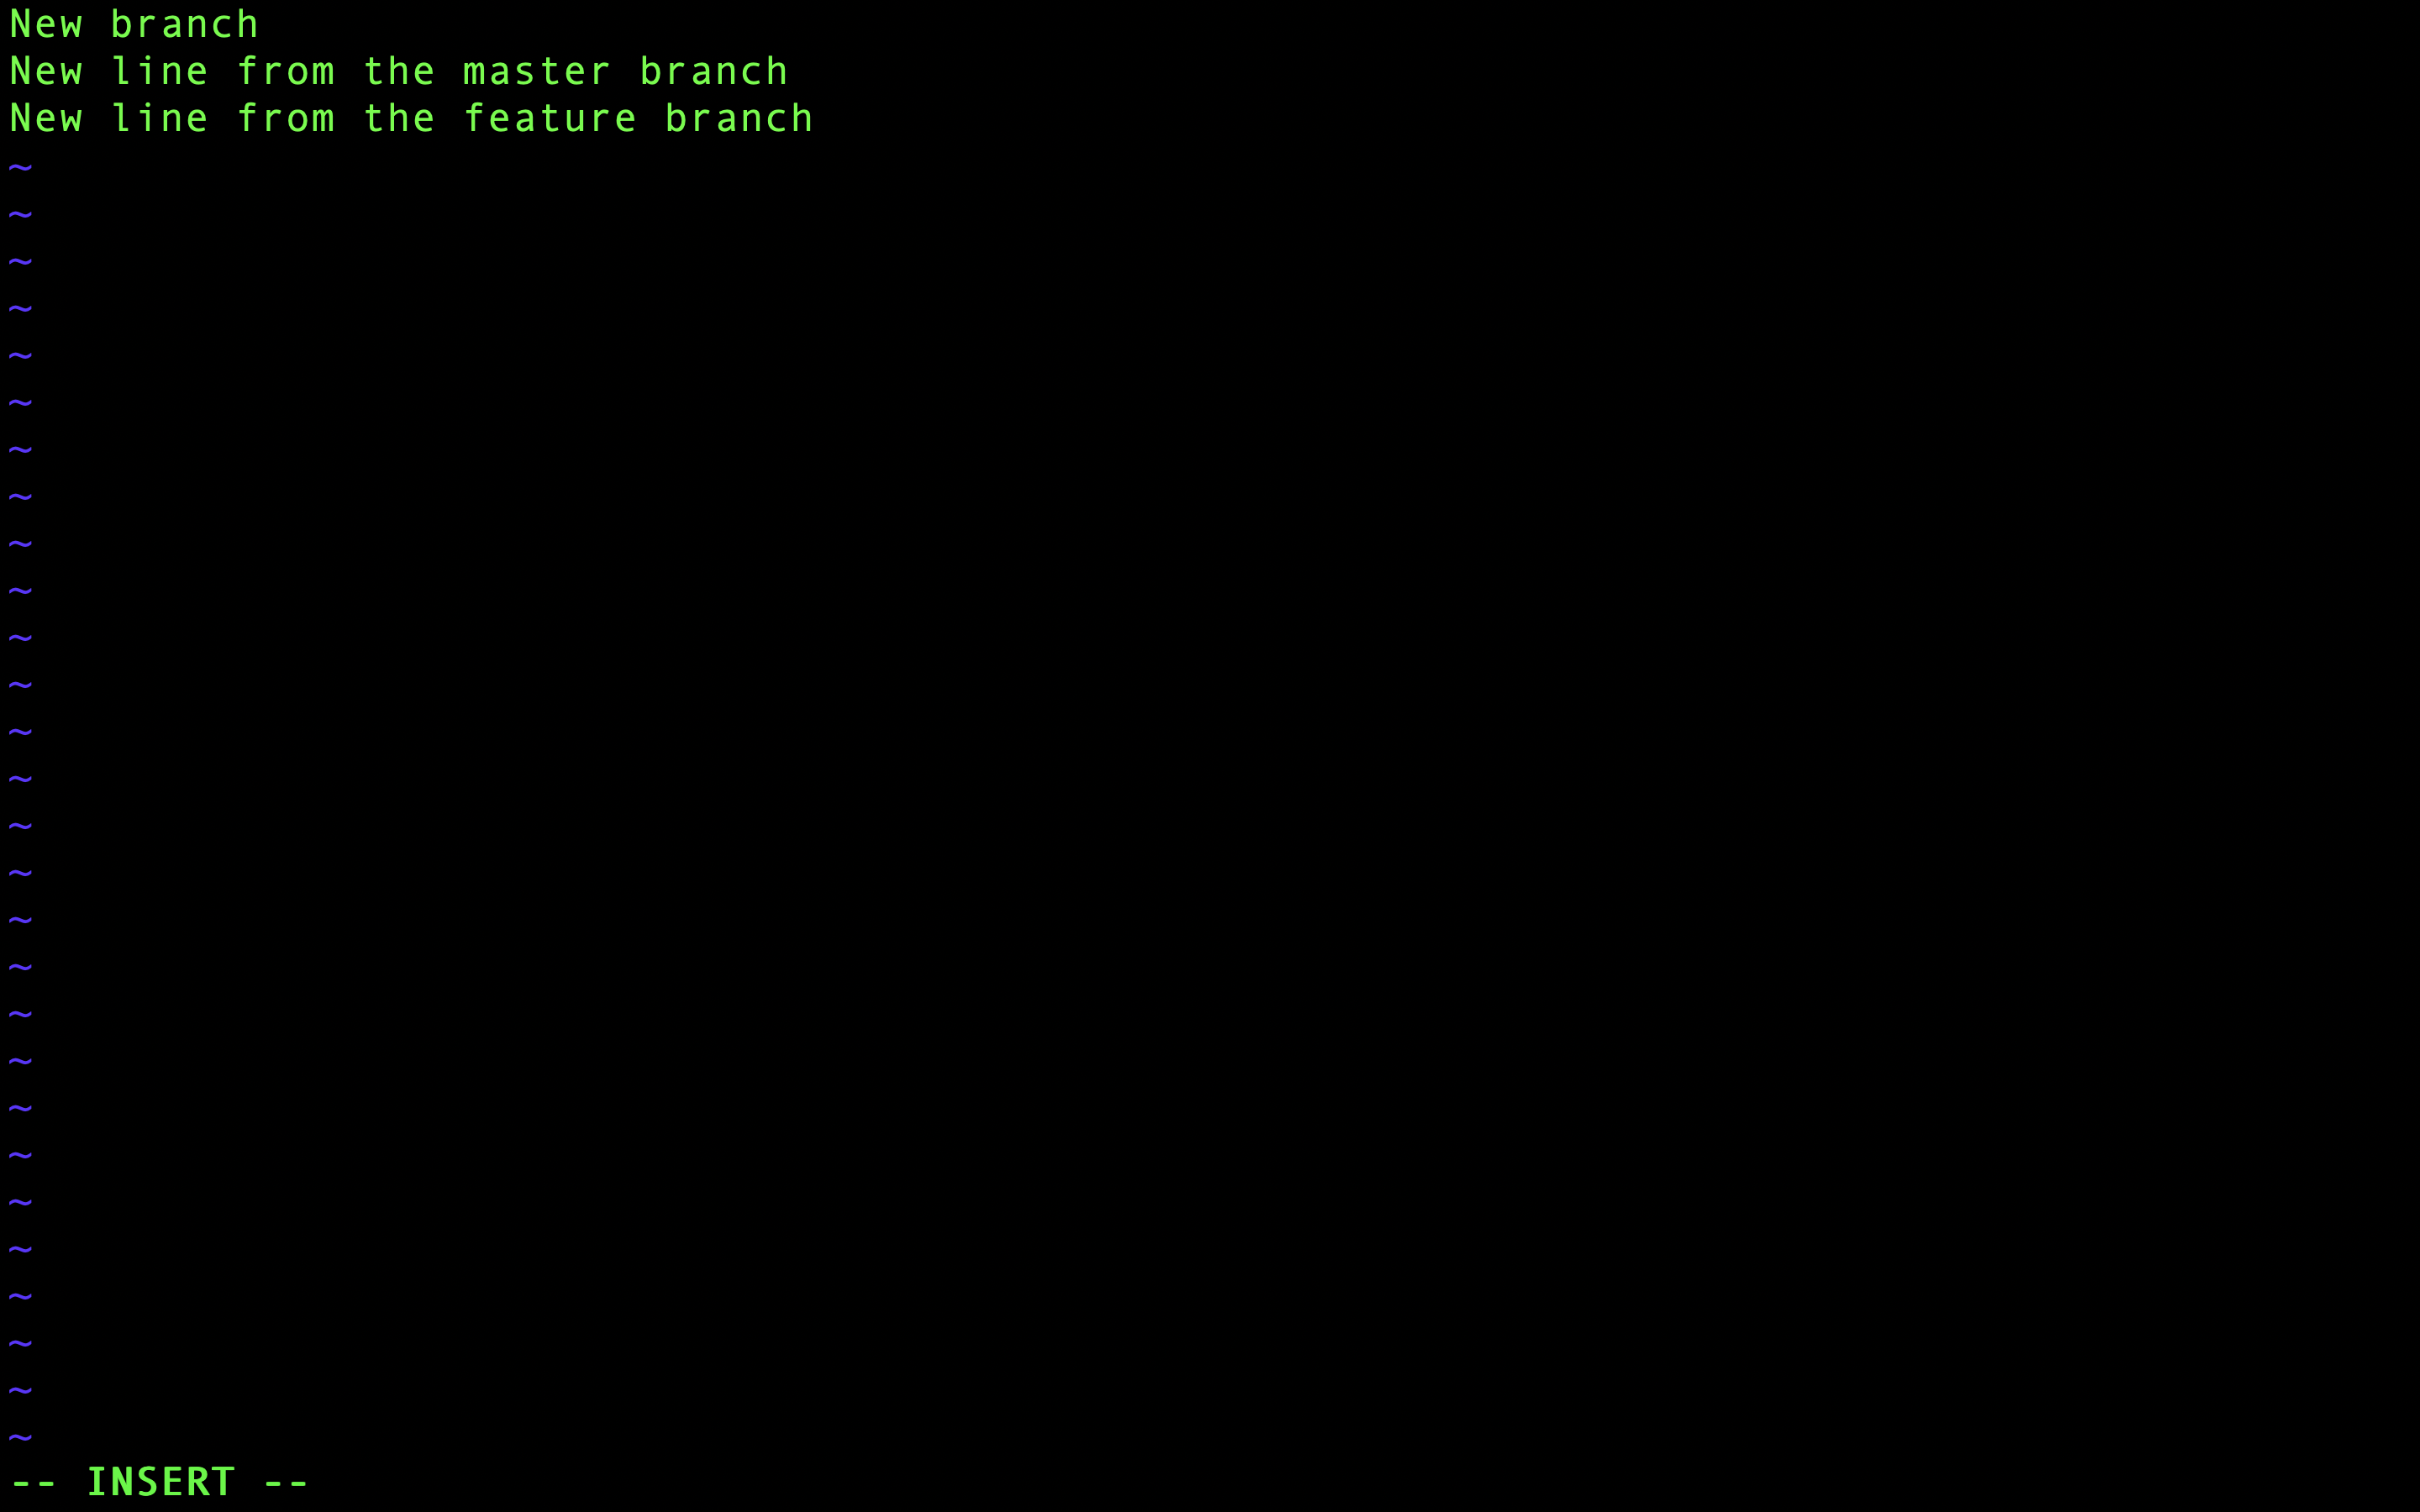
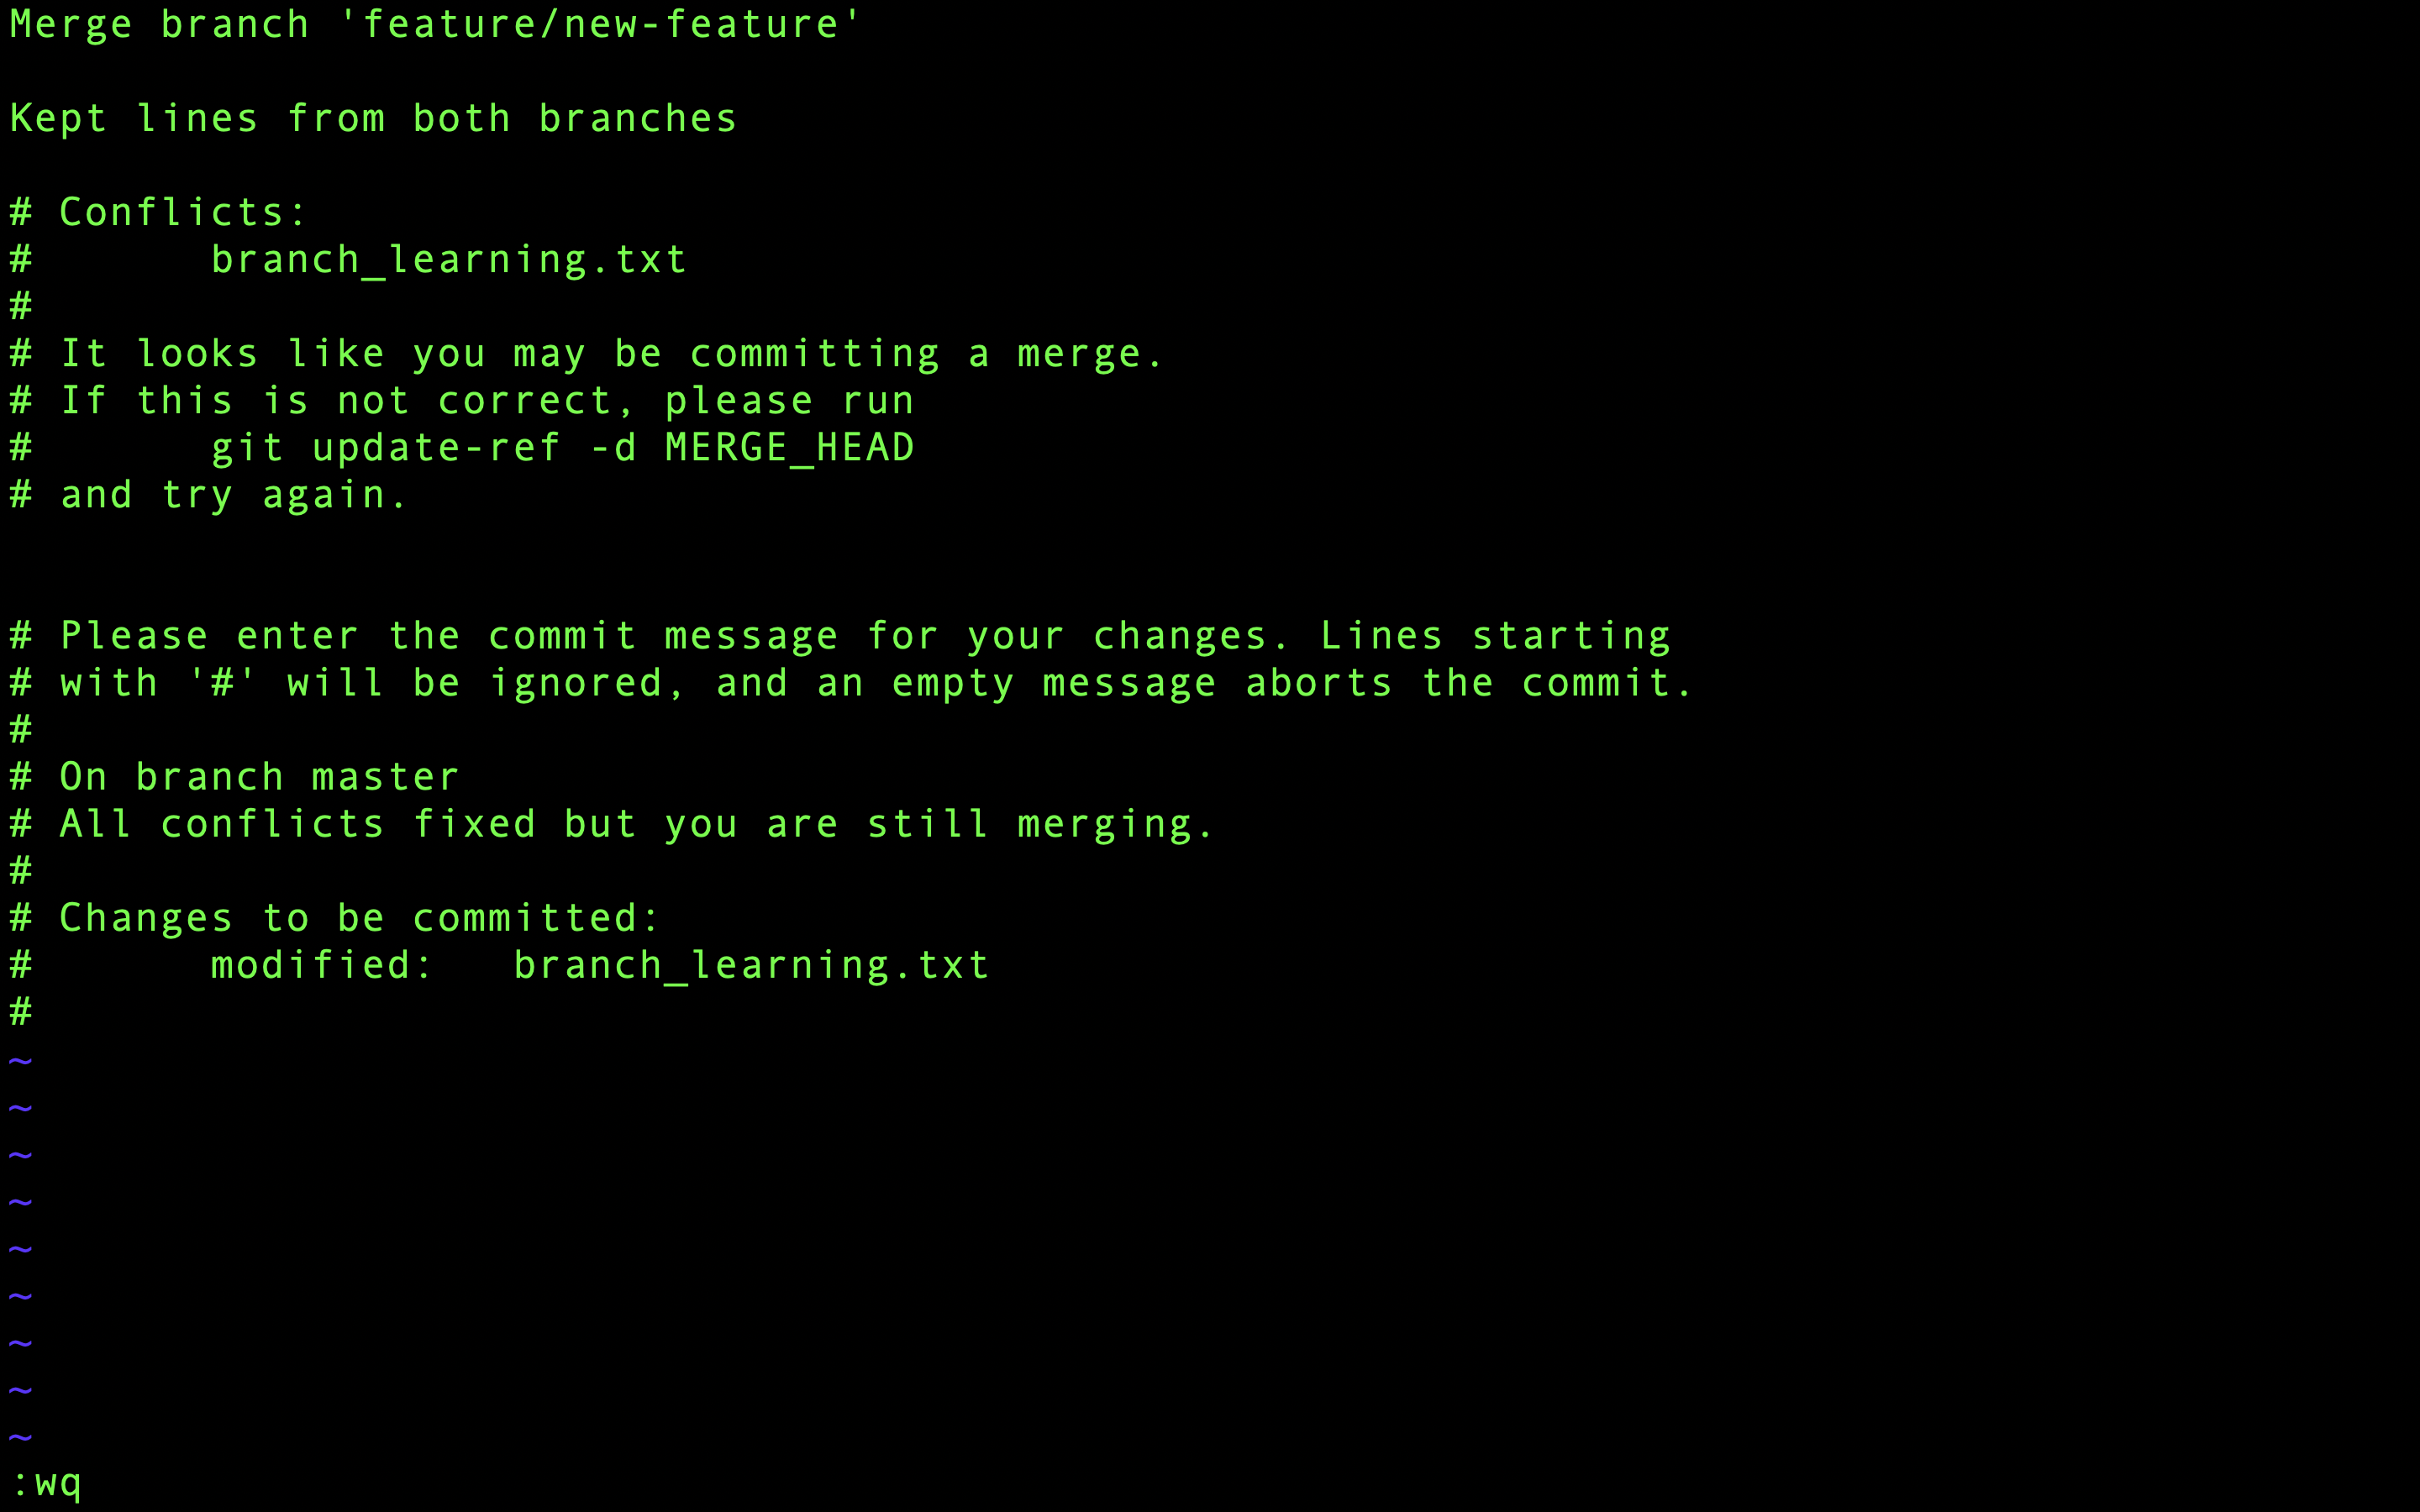
Вручну відредагуйте файл, об'єднавши зміни з обох гілок за допомогою наступних кроків:
1. Вхід у режим редагування
Спочатку перейдіть у режим insert у Vim, натиснувши i.
Це дозволяє редагувати текст.
2. Редагування конфліктної секції
Далі необхідно об'єднати рядки з обох гілок послідовно. Вміст файлу після цього має виглядати так:
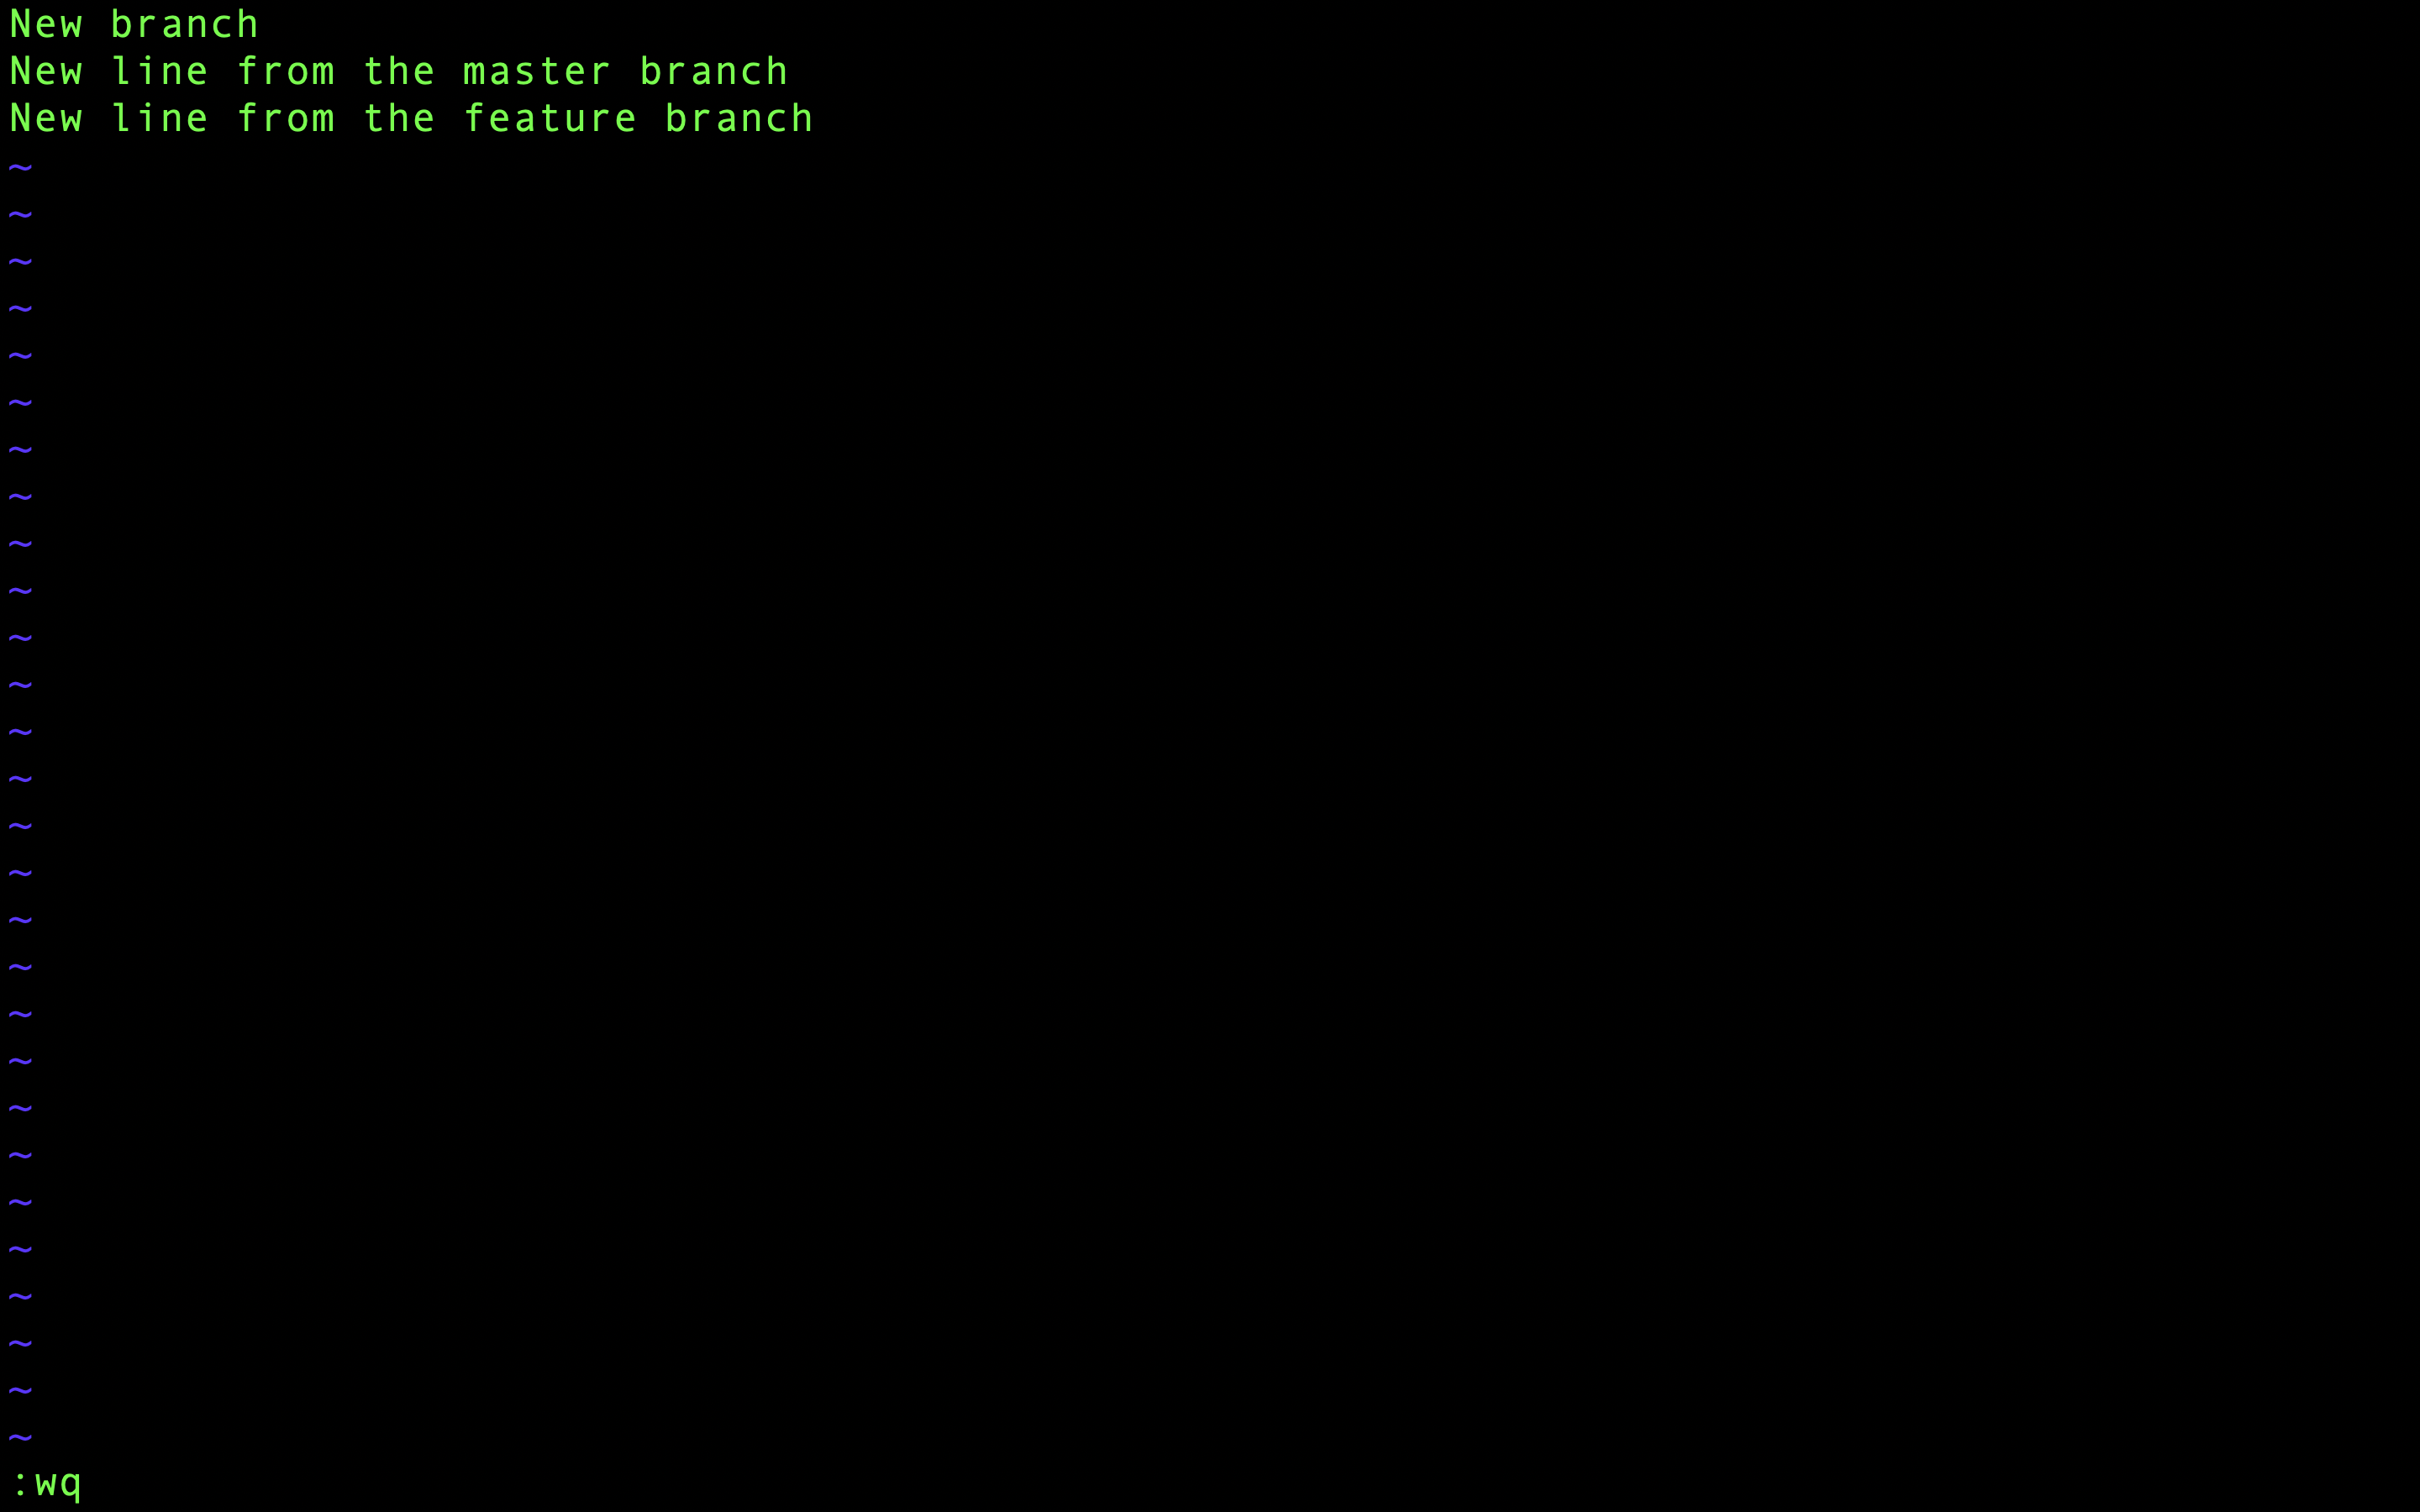
New branch
New line from the master branch
New line from the feature branch
3. Вихід з режиму редагування, збереження та вихід
Натисніть клавішу Escape, щоб вийти з режиму вставки.
Потім введіть :wq і натисніть Enter для збереження змін і виходу з Vim:
Фіксація файлу
Оскільки конфлікти вирішено, додайте файл branch_learning.txt до області індексації та перевірте статус:
git add branch_learning.txt
git status

Файл було змінено та успішно додано до області підготовки. Тепер виконайте фіксацію:
git commit

Знову відкривається текстовий редактор за замовчуванням (Vim у цьому випадку) з типовим повідомленням коміту щодо злиття:
Увійдіть у режим вставки у Vim, натиснувши i, після чого змініть повідомлення, додавши рядок
Kept lines from both branches
для опису способу вирішення конфліктів.
Ось повне повідомлення коміту:
Merge branch 'feature/new-feature'

Kept lines from both branches
Щоб вийти з режиму вставки, зберегти зміни та закрити Vim, натисніть клавішу Escape, потім введіть :wq і натисніть Enter.
Коміт виконано успішно, і конфлікт злиття вирішено.

Тепер розглянемо нашу історію комітів у вигляді графа (прапорець --graph) з одним рядком на кожен коміт (прапорець --oneline):
git log --graph --oneline
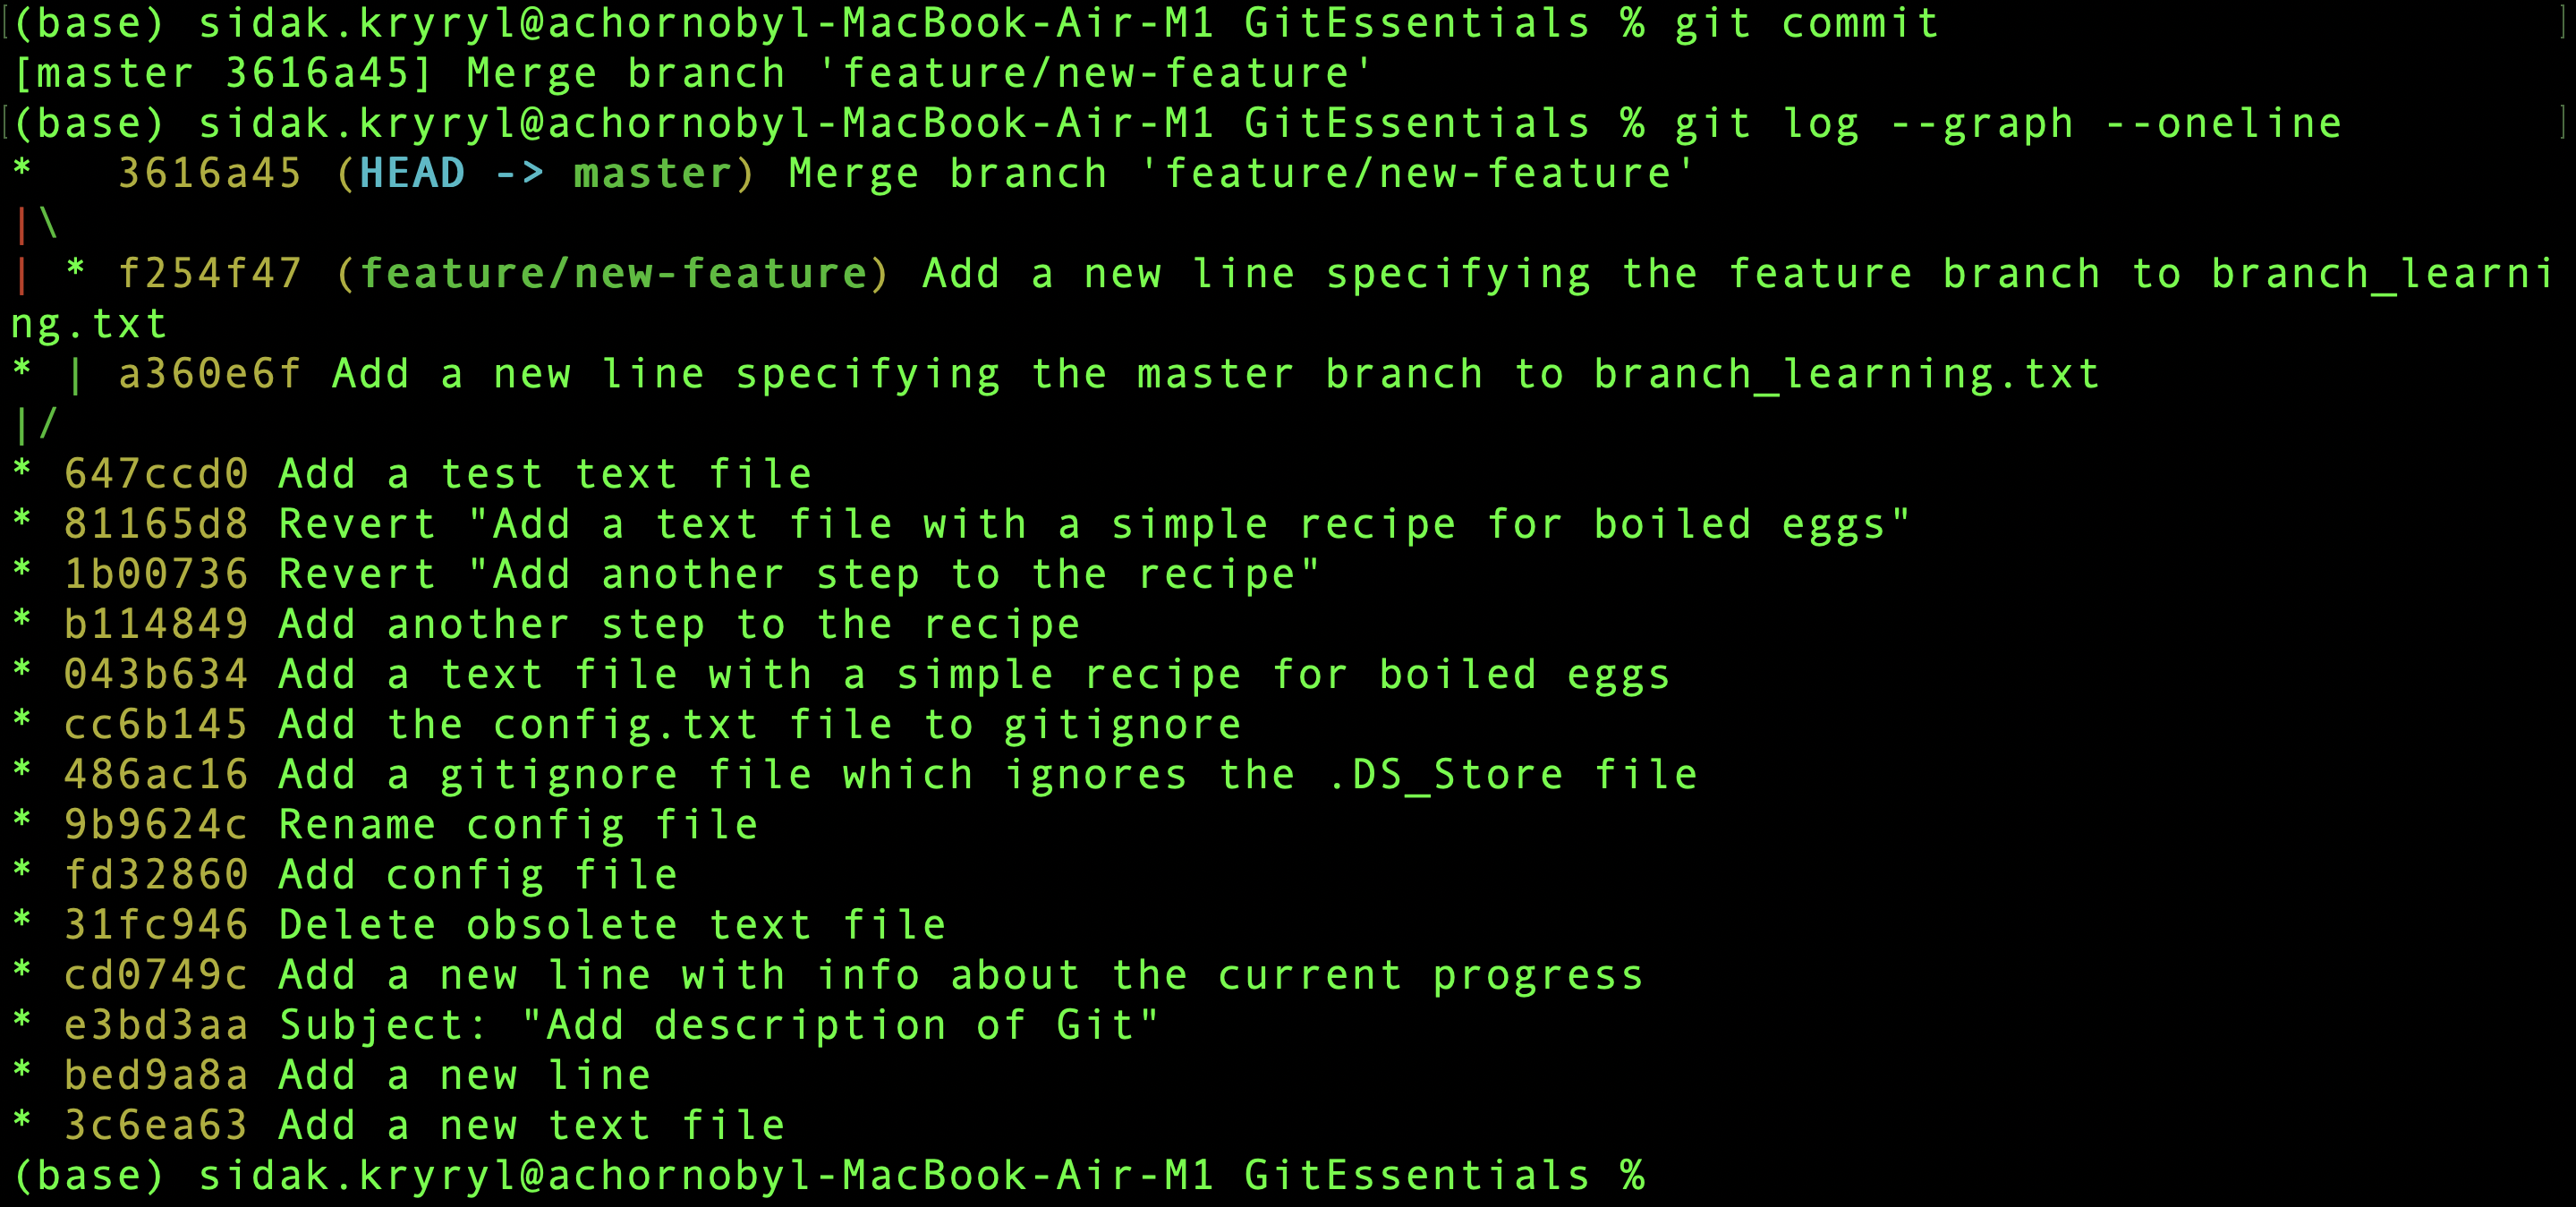
Тут можна побачити останній коміт злиття разом із характерною структурою трьохстороннього злиття.
Дякуємо за ваш відгук!
Запитати АІ
Запитати АІ

Запитайте про що завгодно або спробуйте одне із запропонованих запитань, щоб почати наш чат
