Viewing Changes
Swipe to show menu
git log -p
The git log command displays the commit history of a project.
To view the exact lines changed in each commit, use the -p (patch) flag.
This approach is helpful when you need to quickly identify a commit that introduced a bug in the code.
Full command:
git log -p
Run the command in the terminal:
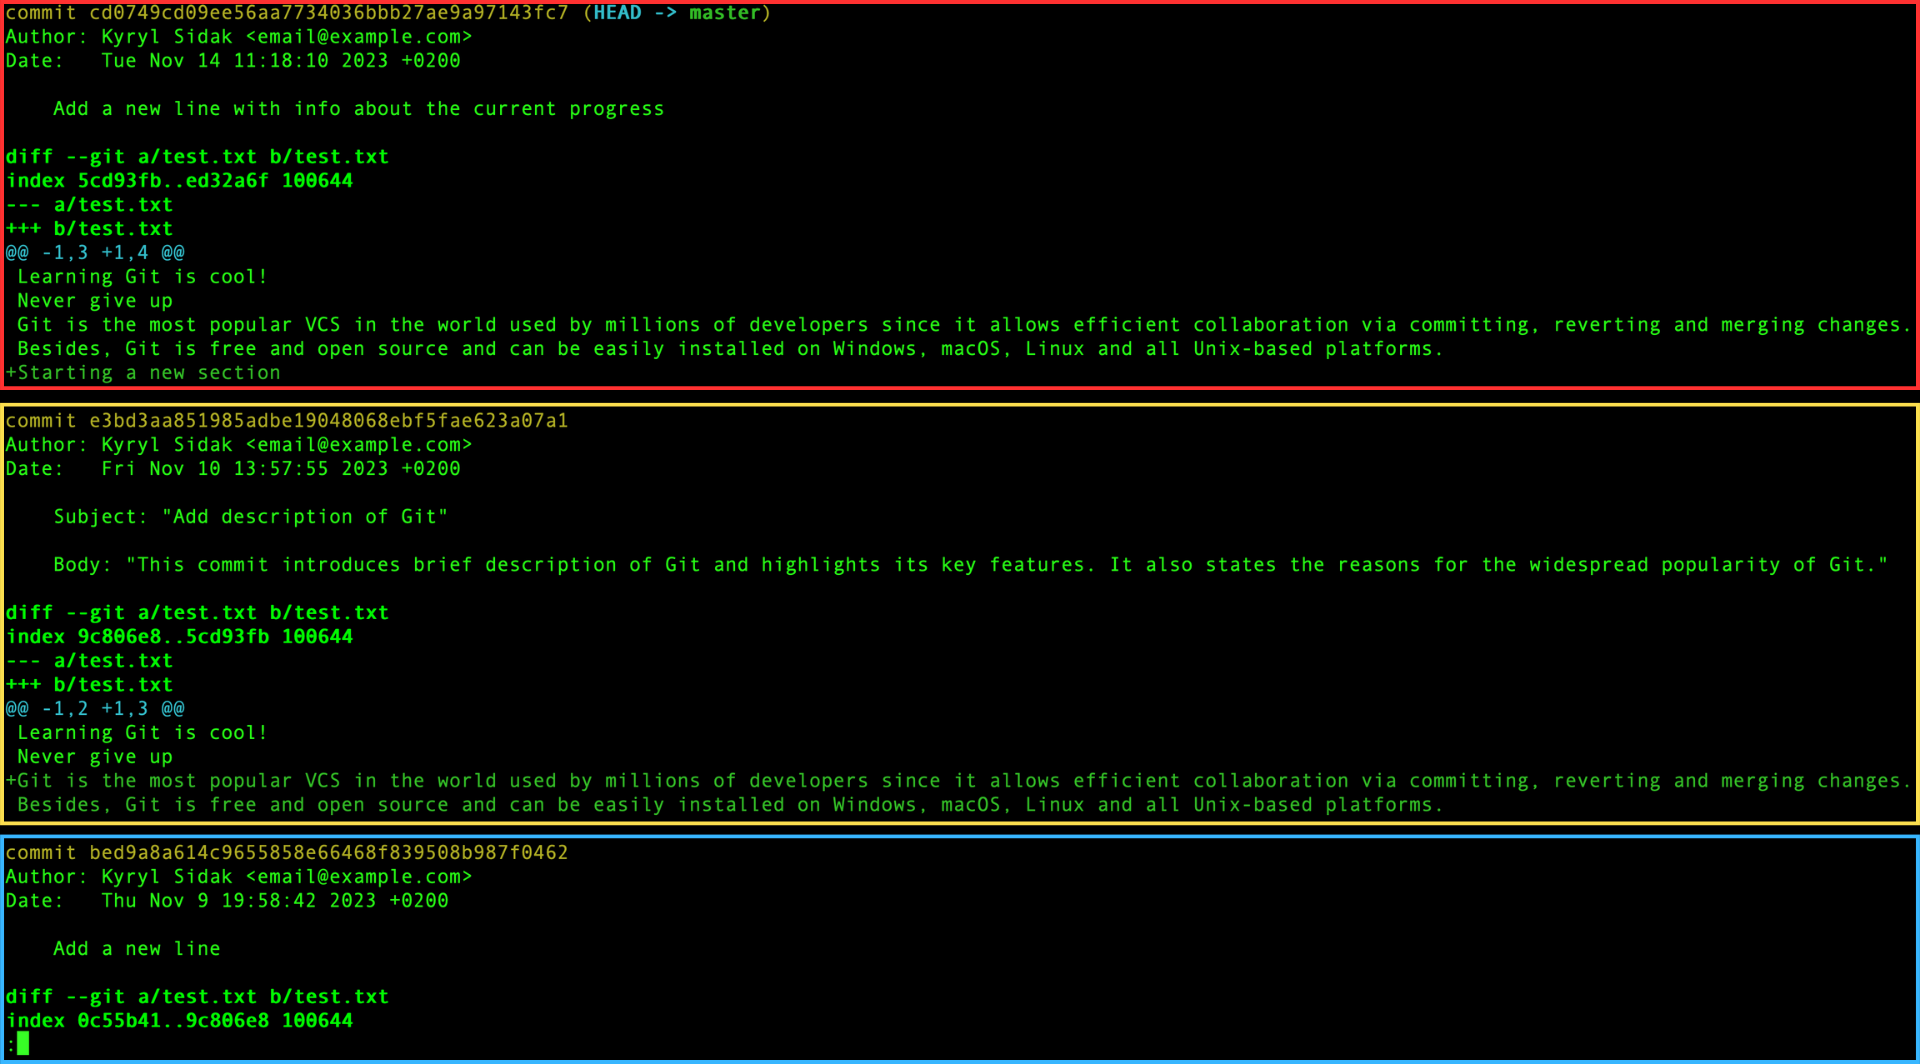
Each commit is separated by a frame of different colors to improve visual distinction. Because the detailed information about each commit may not fit on one screen, use the arrow keys to scroll up and down.
You can exit pressing the q key.
Here, plus signs indicate added lines, and if any lines were deleted, they would appear with minus (dash) symbols.
git show
The git show command displays detailed information about the changes introduced by a specific commit.
Basic syntax:
git show [commit]
Here, [commit] refers to the hash (identifier) of the commit you want to view.
Examine the output of the git log -p command, focusing on the second latest commit:
commit e3bd3aa851985adbe19048068ebf5fae623a07a1
Author: Kyryl Sidak <email@example.com>
Date:   Fri Nov 10 13:57:55 2023 +0200
Subject: "Add description of Git"
Body: "This commit introduces brief description of Git and highlights its key features. It also states the reasons for the widespread popularity of Git."
Here are the first few lines of the output for this commit. To use the git show command for this commit, copy its hash and run the following command:
git show e3bd3aa851985adbe19048068ebf5fae623a07a1
Your commit hash may be different, so be sure to use the correct hash.
Run this command in the terminal:
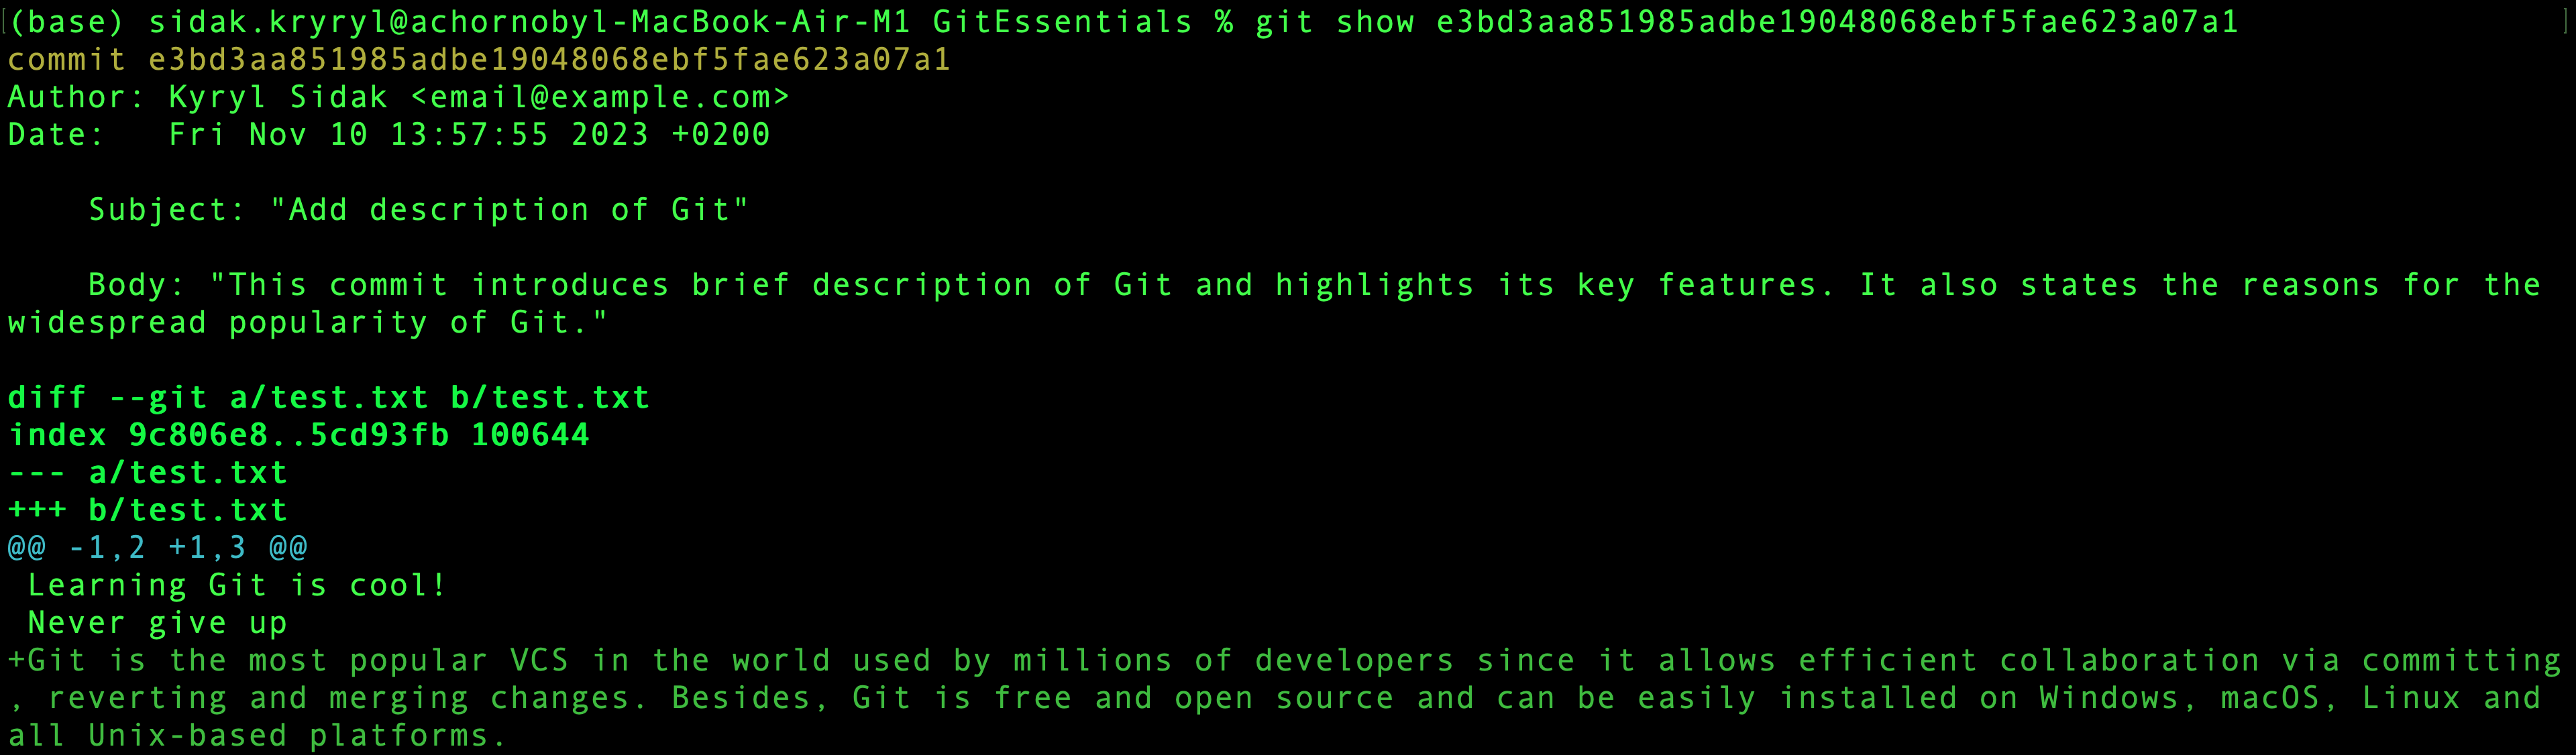
As you can see, the output is the same as for the git log -p command, but only for one commit.
Thanks for your feedback!
Ask AI
Ask AI

Ask anything or try one of the suggested questions to begin our chat
Viewing Changes
git log -p
The git log command displays the commit history of a project.
To view the exact lines changed in each commit, use the -p (patch) flag.
This approach is helpful when you need to quickly identify a commit that introduced a bug in the code.
Full command:
git log -p
Run the command in the terminal:
Each commit is separated by a frame of different colors to improve visual distinction. Because the detailed information about each commit may not fit on one screen, use the arrow keys to scroll up and down.
You can exit pressing the q key.
Here, plus signs indicate added lines, and if any lines were deleted, they would appear with minus (dash) symbols.
git show
The git show command displays detailed information about the changes introduced by a specific commit.
Basic syntax:
git show [commit]
Here, [commit] refers to the hash (identifier) of the commit you want to view.
Examine the output of the git log -p command, focusing on the second latest commit:
commit e3bd3aa851985adbe19048068ebf5fae623a07a1
Author: Kyryl Sidak <email@example.com>
Date:   Fri Nov 10 13:57:55 2023 +0200
Subject: "Add description of Git"
Body: "This commit introduces brief description of Git and highlights its key features. It also states the reasons for the widespread popularity of Git."
Here are the first few lines of the output for this commit. To use the git show command for this commit, copy its hash and run the following command:
git show e3bd3aa851985adbe19048068ebf5fae623a07a1
Your commit hash may be different, so be sure to use the correct hash.
Run this command in the terminal:
As you can see, the output is the same as for the git log -p command, but only for one commit.
Thanks for your feedback!
