Related courses
See All CoursesA step-by-step guide to Git installation
How to install Git on macOS, Windows and Linux
by Kyryl Sidak
Data Scientist, ML Engineer
Nov, 2023・
8 min read

Version control systems are essential for developers to keep track of all the changes they make to their files with code and other types of files.
Git is the most popular version control system that plays a crucial role in modern software development. Whether you're a seasoned developer or just getting started, installing Git is the first step to harnessing its capabilities.
In this guide, we'll walk you through the installation process on three major operating systems: macOS, Windows, and Linux.
Here some useful links:
Installing Git on Mac
Checking for Existing Git
Before you begin, you should check if Git is already installed on your Mac. First, open the Terminal:
- Press Command (⌘) + Space simultaneously. This will open Spotlight, a system-wide search feature.
- Type "Terminal" in the search bar, and you'll see "Terminal" or "Terminal.app" as one of the results.
- Click on "Terminal" in the search results. This will open the Terminal application.

Now type the git --version command in the Terminal and press the Return key:

Note
Typing a command in the Terminal and pressing the Return key is called running the command.
If Git is already installed, you'll see the version number. If not, the system will prompt you to install it and you should just follow the instructions. If it is not the case, we will discuss another installation option in the next step.
Installing Git via Homebrew
If you already have homebrew installed, you can simply run the brew install git command in the Terminal window.
If you don’t have homebrew installed yet, here are the steps to install it:
Step 1: Run the following command in the Terminal:
/bin/bash -c "$(curl -fsSL https://raw.githubusercontent.com/Homebrew/install/HEAD/install.sh)"

Step 2: Type the password for your computer and press the Return key
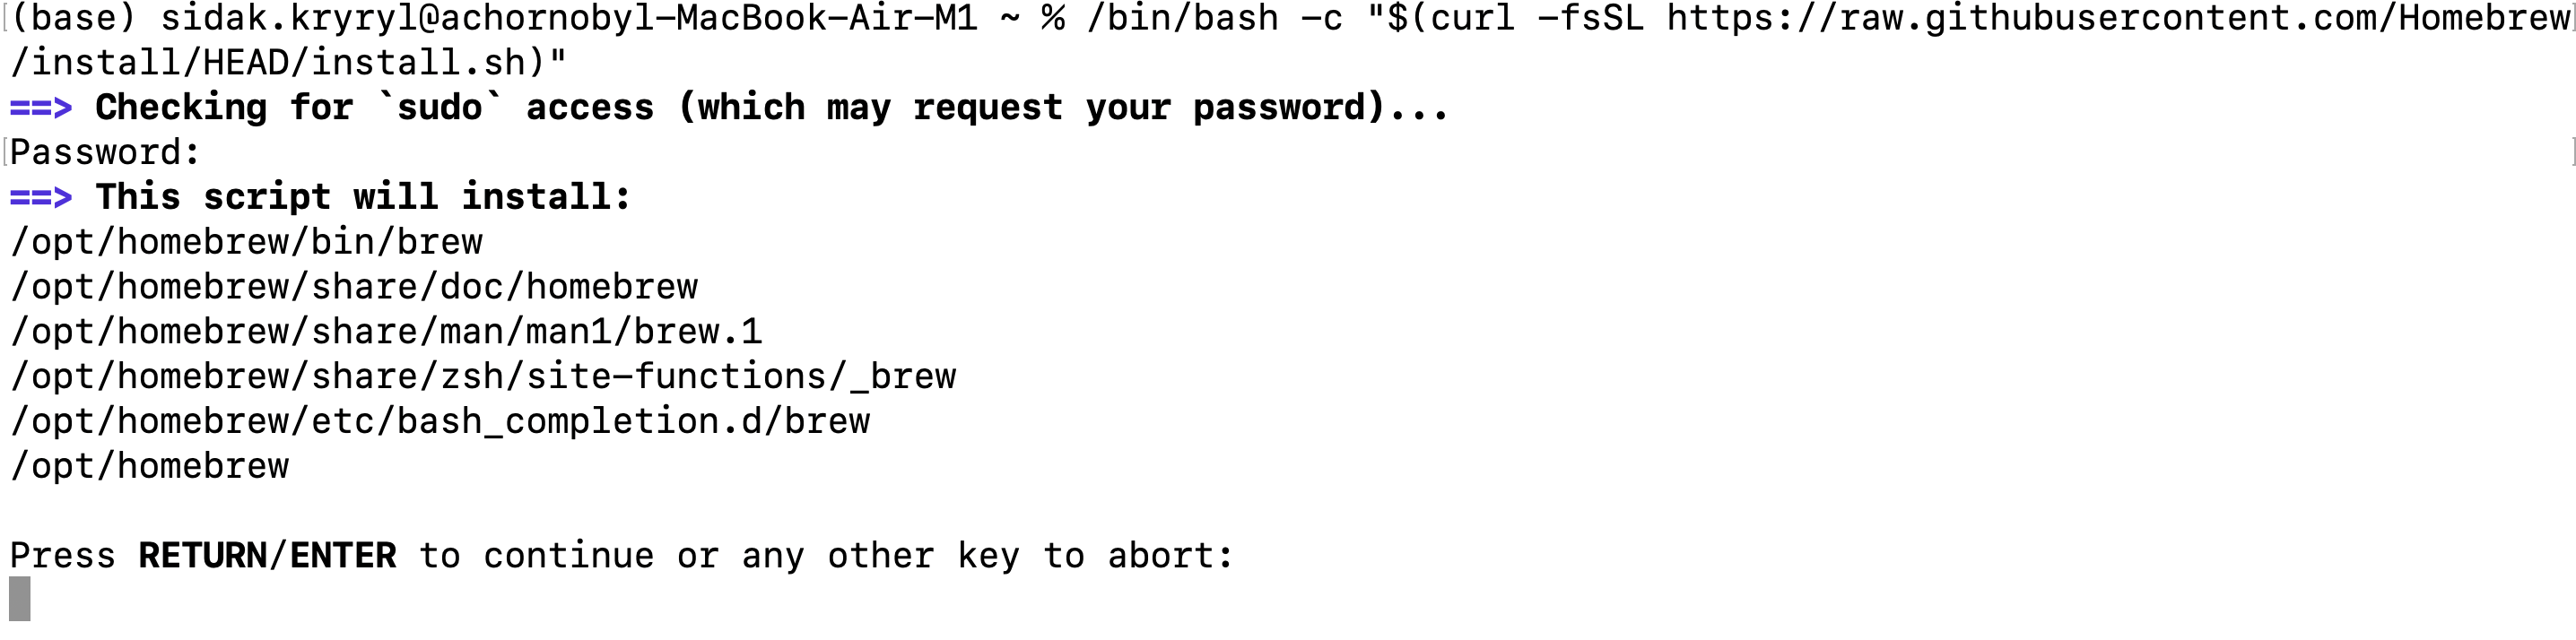
Step 3: Press the Return key
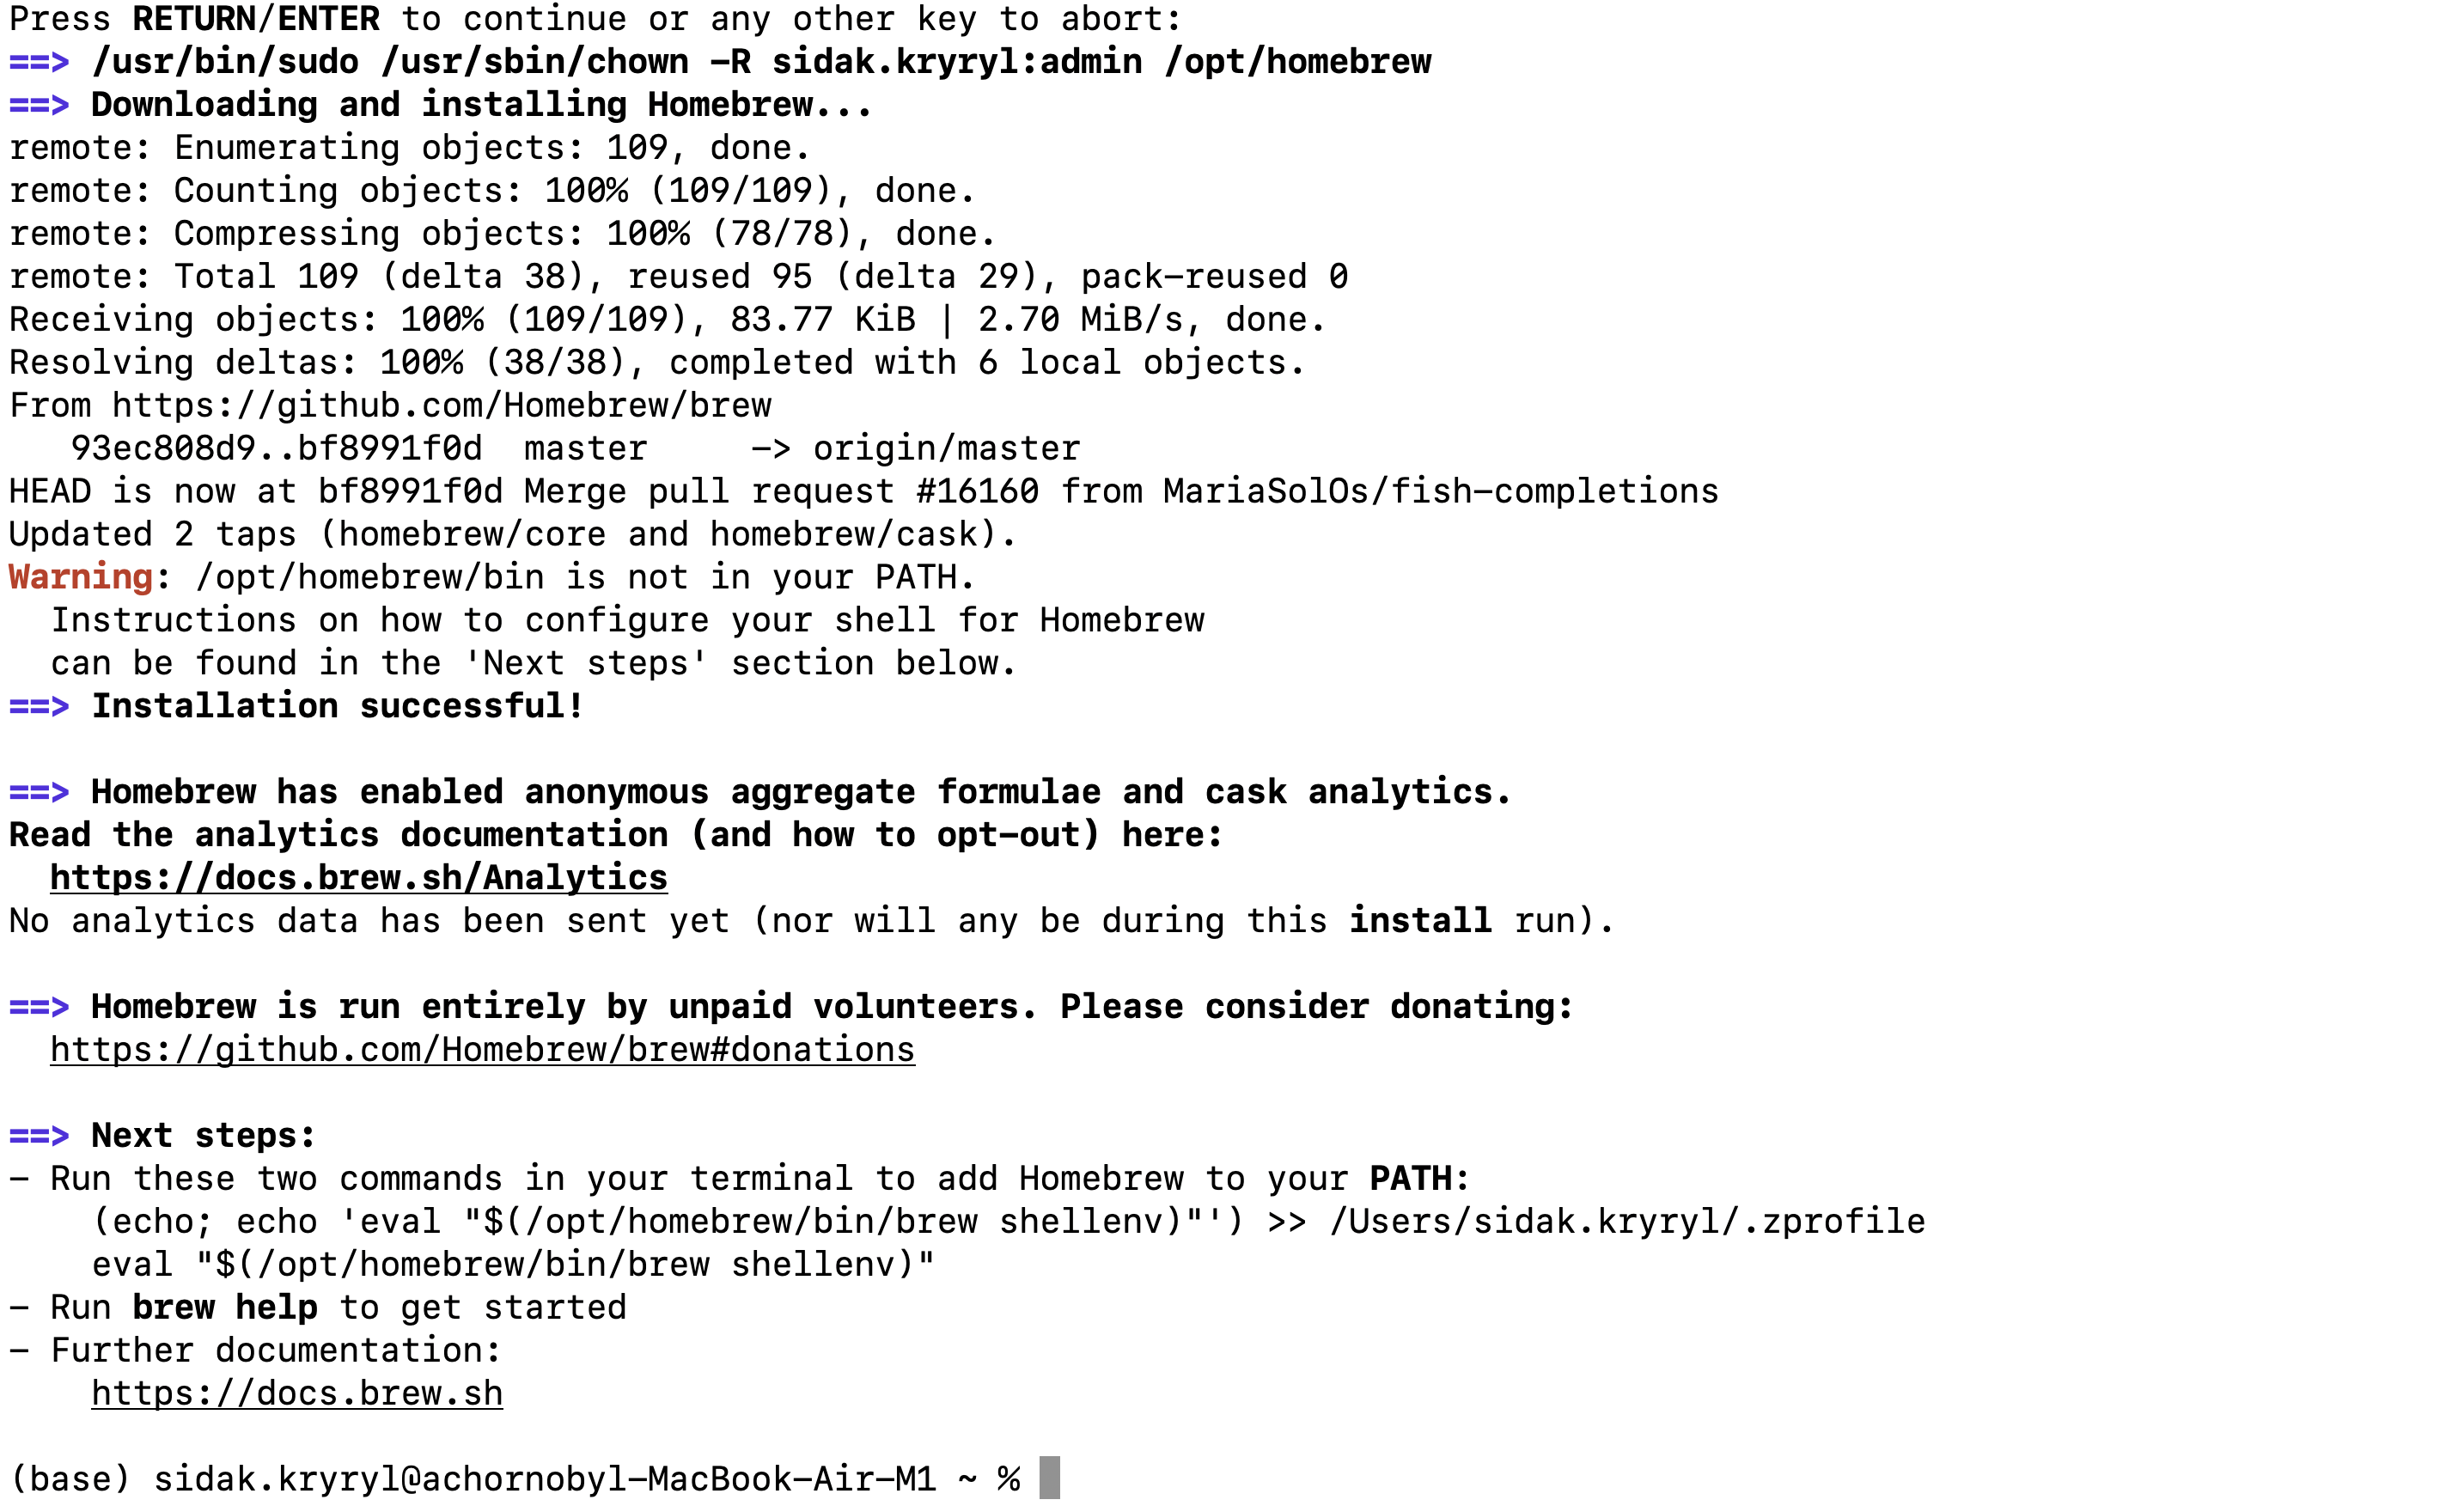
Step 4: Run two commands from the "Next steps" section
As you can see, the "Next steps" section prompts you to run two commands. Each command is written from the new line. Commands for my Mac are the following:
First command:
(echo; echo 'eval "$(/opt/homebrew/bin/brew shellenv)"') >> /Users/sidak.kryryl/.zprofile
Second command:
eval "$(/opt/homebrew/bin/brew shellenv)"
The first command, however, will look different for you, so copy it from the "Next steps" section, paste it in the Terminal and press the Return key. Then copy and paste the second command and press the Return key:

Step 5: Run the brew help command to verify that brew is installed

Step 6: Run the brew install git command to install Git and then run git --version to verify that Git has been installed


Run Code from Your Browser - No Installation Required

Installing Git on Windows
Step 1: Choose Installer
Visit the official Git website to download the Git for Windows installer. In the “Standalone Installer” section choose and click on the appropriate installer for your Windows (32-bit for 32-bit Windows or 64-bit for 64-bit Windows):
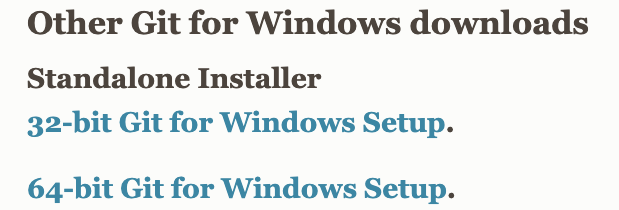
We’ll use the 64-bit installer, however, the installation process for the 32-bit version is the same.
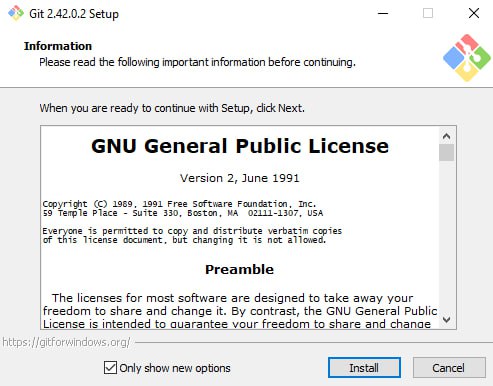
Step 2: Run the Installer
Double-click the downloaded installer to launch it. You'll be presented with the installation wizard where you should click "Install":
Step 3: Configure Installation
The default settings should work well for most users, so feel free to click "Next" throughout the installation.
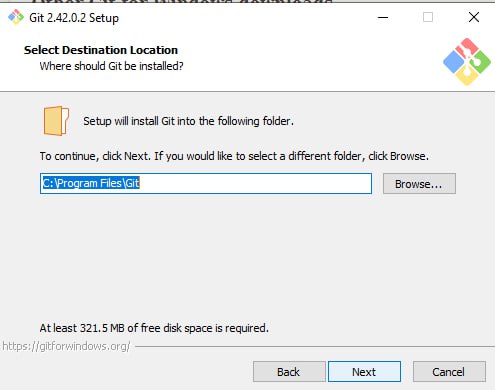
Step 4: Select destination location
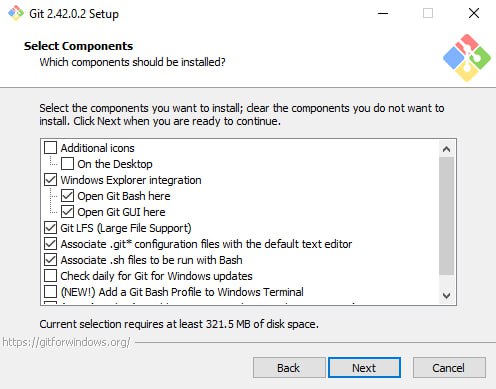
Step 5: Select components
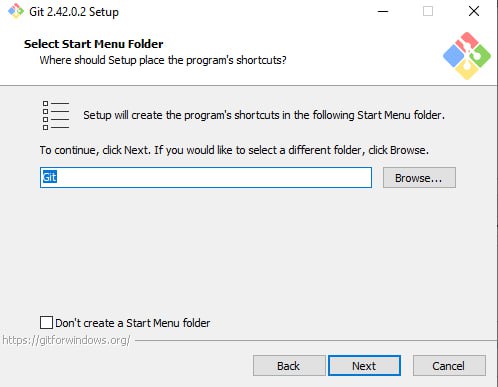
Step 6: Select start menu folder
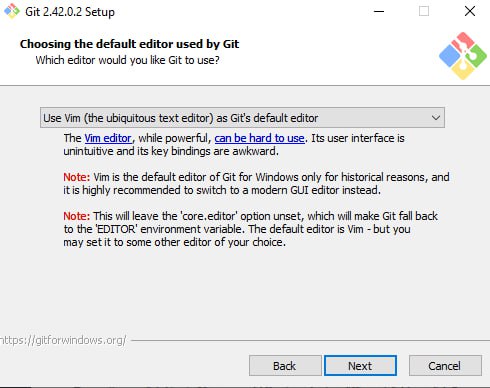
Step 7: Choose the default text editor
The default text editor used by Git for Windows is Vim, however, you can change it to Nano, for example, or the one that suits you most:
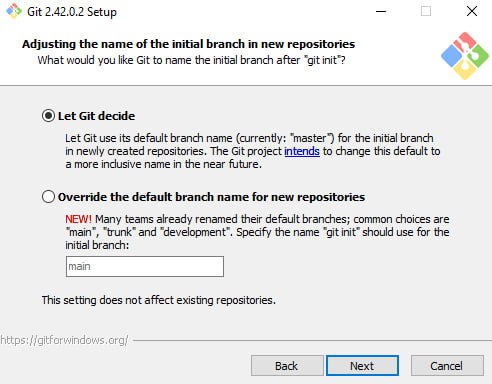
Step 8: Adjust the name of the initial branch
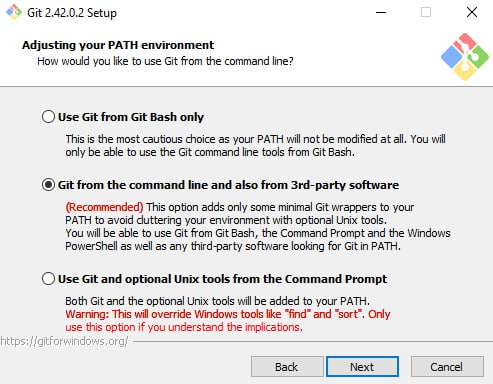
Step 9: Adjust your PATH environment
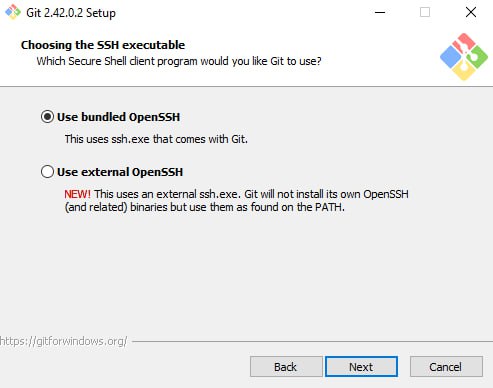
Step 10: Choose the SSH executable
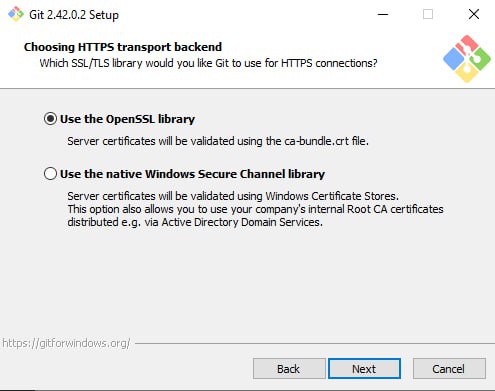
Step 11: Choose HTTPS transport backend
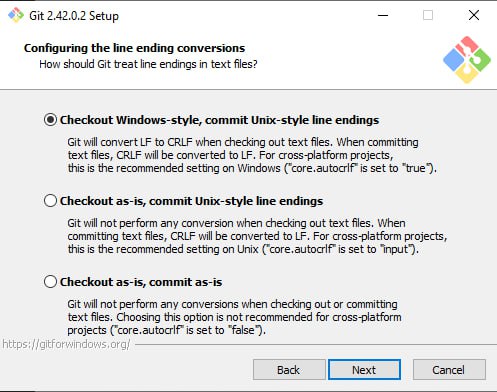
Step 12: Configure the line ending conversions:
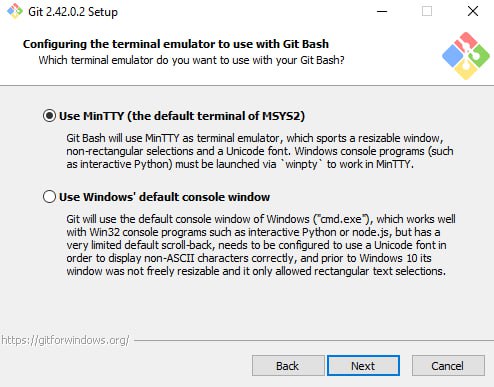
Step 13: Configure the Terminal emulator to use with Git Bash
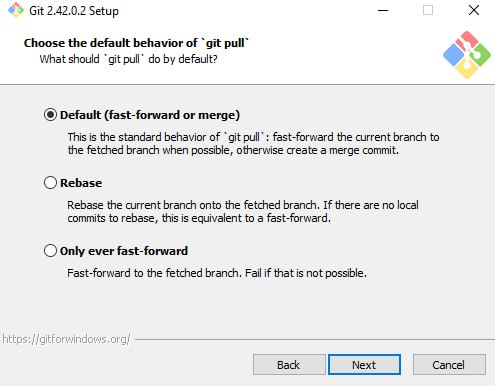
Step 14: Choose the default behaviour of git pull
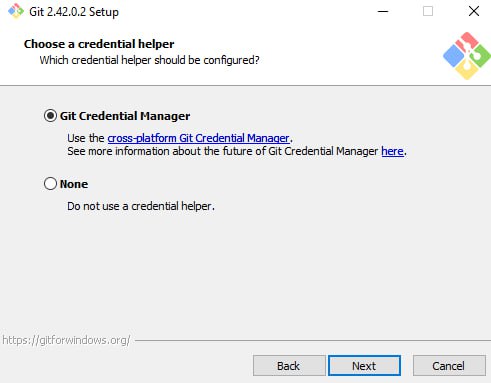
Step 15: Choose a credential helper
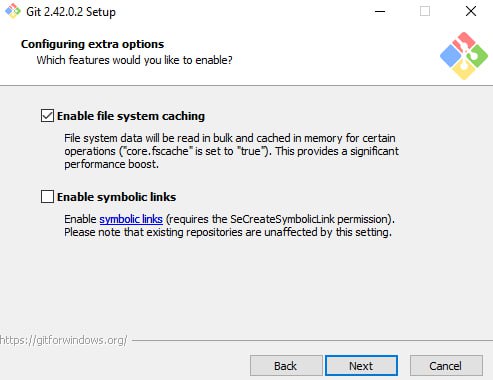
Step 16: Configure extra options
Step 17: Click "Install" to install Git

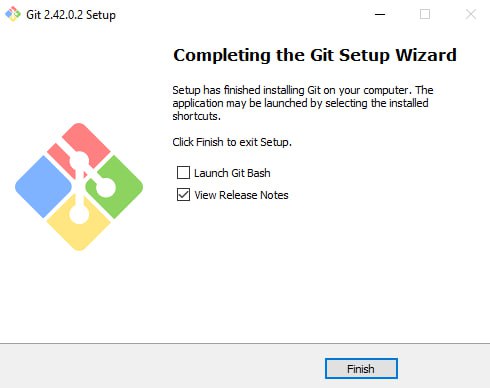
Step 18: Finish Installation
Step 19: Verify Git Installation
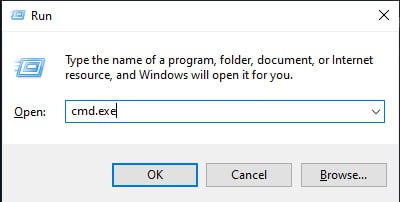
Open the Command Prompt:
- Open the Start menu or press the Windows key + R.
- Type cmd or cmd.exe in the Run command box.
- Click "Ok".
Run git --version in the Terminal:

If Git is installed, you'll see the version number.
Installing Git on Linux
Step 1: Visit the official website
Step 2: Choose the command which corresponds to your Linux distribution
Step 3: Run the command in the Terminal
Step 4: Run git --version in the Terminal to verify that Git is installed
Start Learning Coding today and boost your Career Potential
FAQs
Q: What's the purpose of installing Git?
A: Installing Git is essential for version control, enabling developers to track and manage changes in their code and collaborate effectively.
Q: How do I check if Git is already installed on my Mac?
A: Open the Terminal and type git --version, press Enter. If Git is installed, it will display the version number.
Q: Can I install Git on Mac using Homebrew?
A: Yes, if you have Homebrew, you can run brew install git in the Terminal. If you don't have Homebrew, the article provides step-by-step instructions for its installation.
Q: What's the installation process for Git on Windows?
A: Visit the official Git website, download the installer for your Windows version, and follow the installation steps, as outlined in the article.
Q: How can I verify the installation of Git on Windows?
A: Open Command Prompt, type git --version, and press Enter. If Git is installed, it will show the version number.
Q: How do I install Git on Linux?
A: The article explains the steps for different Linux distributions. You need to visit the official website, choose the command for your distribution, and run it in the Terminal.
Was this article helpful?
Share:
Was this article helpful?
Share:
Related courses
See All CoursesEssential Git Commands
Git Commands and Their Explanations
by Oleh Subotin
Full Stack Developer
Jul, 2024・6 min read

AI Agents in Intelligent Systems
Autonomous Agents
by Andrii Chornyi
Data Scientist, ML Engineer
May, 2024・9 min read
Apache Iceberg and the Modern Data Lakehouse
How an open table format quietly became the foundation of modern analytics
by Daniil Lypenets
Full Stack Developer
May, 2026・15 min read

Content of this article
