EC2 Instance Creation
Swipe to show menu
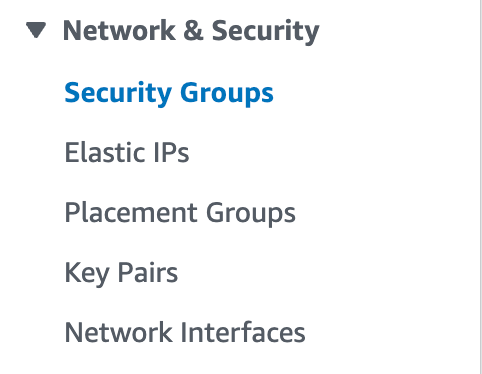
To get started with EC2, we first need to create a security group for our instance, or in simpler terms, we need to set up the security for our server. To do this, navigate to the EC2 service and select
Network & Security → Security Groups
on the left panel:
Next, click the "Create Security Group" button, and you'll be taken to a menu where you can begin filling everything out step by step:
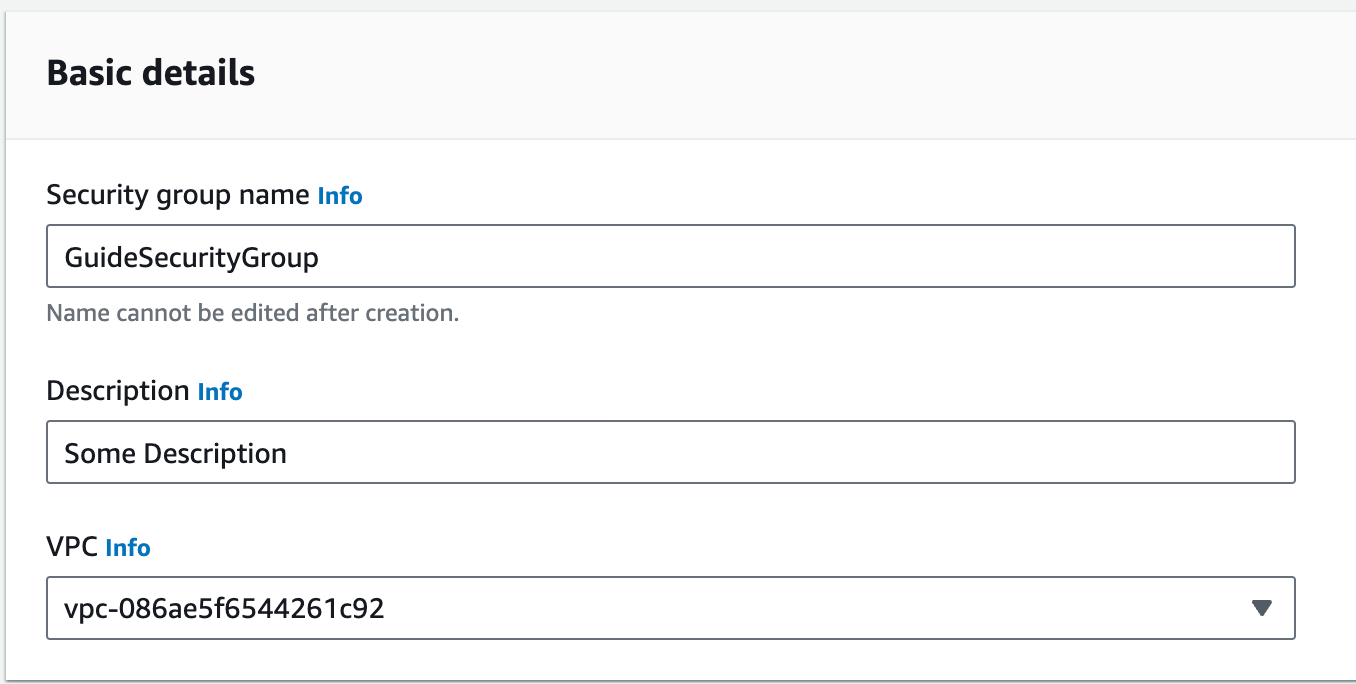
- Security group name: this is the name of the group that you'll use to locate it and that will appear when selected;
- Description: this is the description of the group. Here, you can specify the roles that this security group will serve and what it's created for;
- VPC: this is a service that allows AWS users to launch AWS resources into a virtual network they define. We're not focusing on this right now, so we'll stick with the default VPC for our educational instance.
Let's proceed to creating inbound rules:
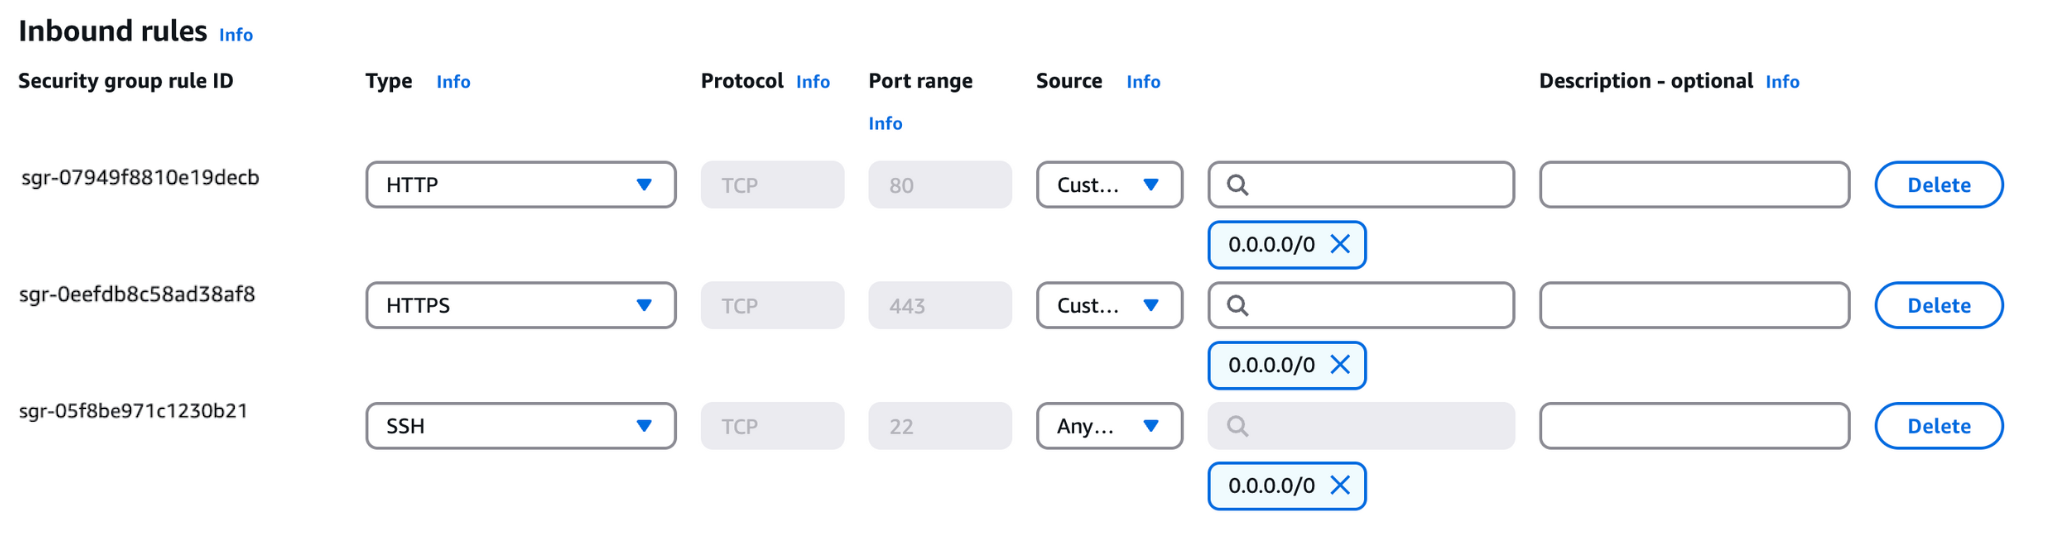
- We need 3 inbound rules: SSH, HTTP, and HTTPS;
- To create the first one, select the SSH type, and in the Source field, set the connection to Anywhere IPv4;
- The other necessary parameters will be automatically filled in;
- We need to do the same for HTTP and HTTPS.
Once you've created the Inbound Rules, you can create the Security Group and get the following result:

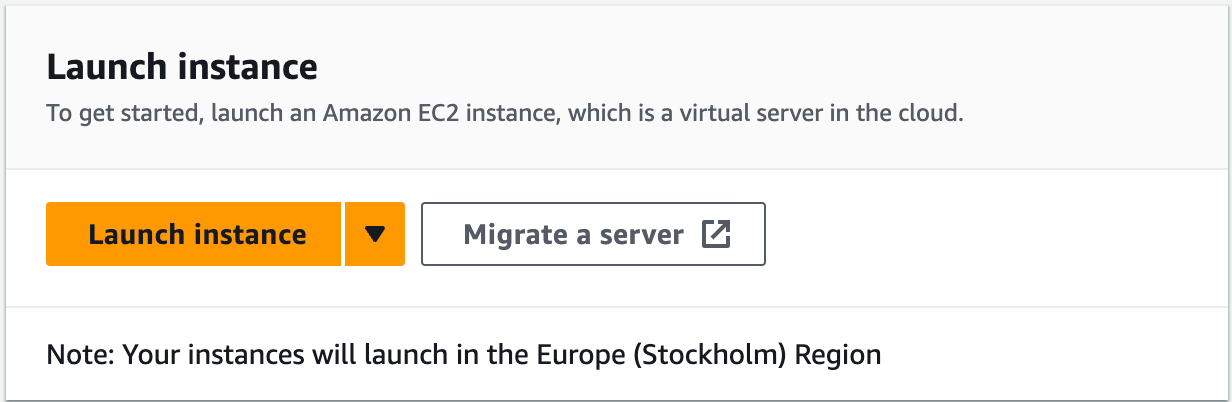
Now, we can move on to launching an instance that will use the security group we just created.
First, head to the main page and click on the "Launch Instance" button.
You will see a large menu with configuration options. Let's go through it step by step.
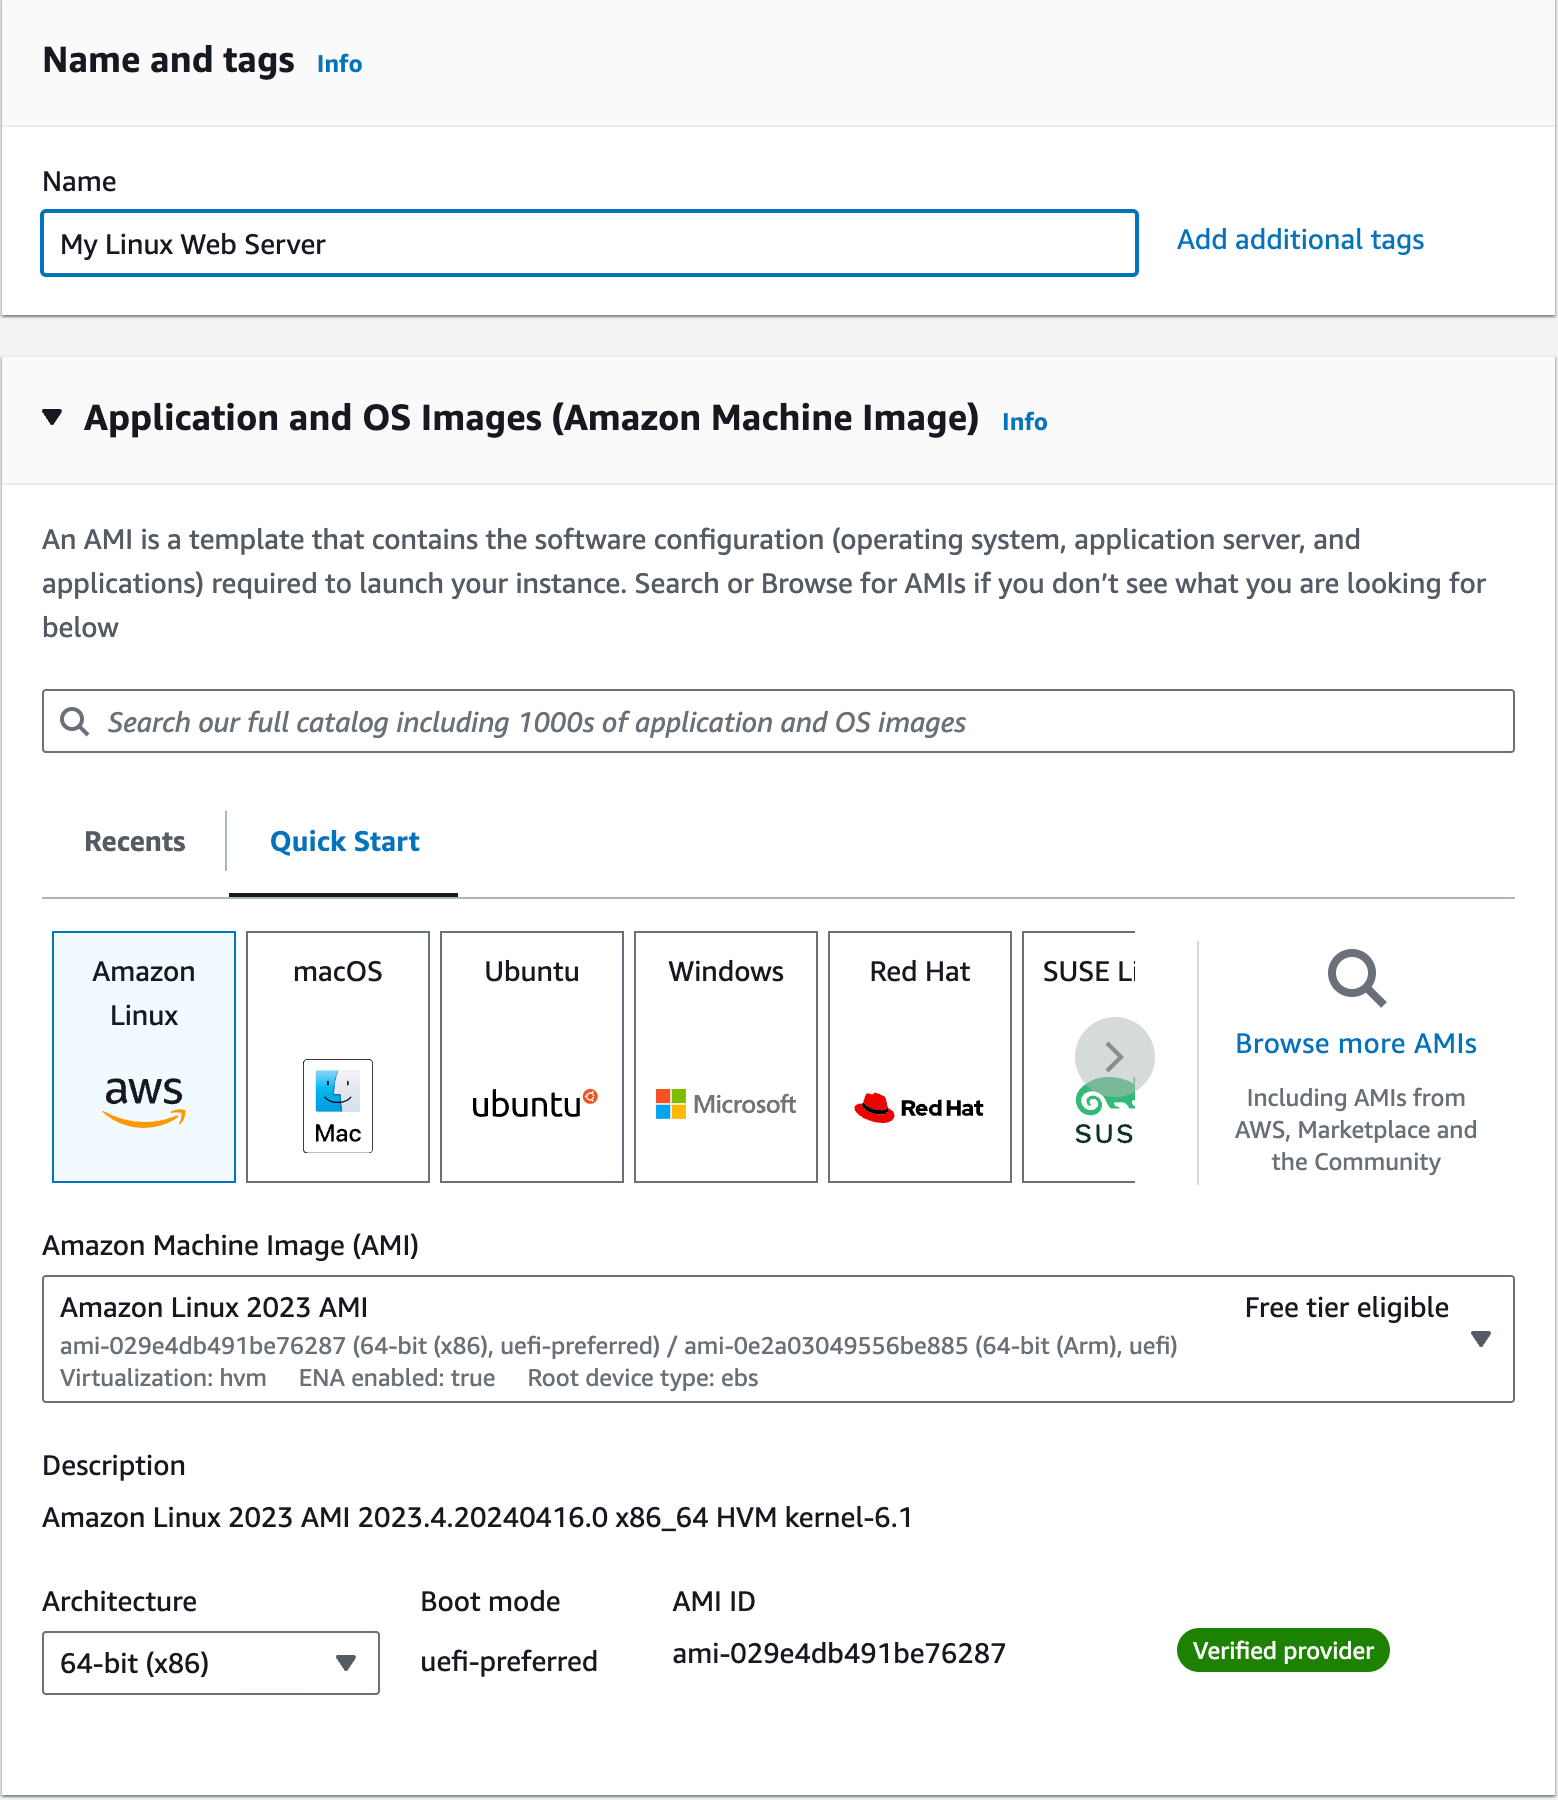
We will be using Amazon Linux, as it is one of the configurations offered in the free tier, which we want to stick to. After selecting it, EC2 notified us that this configuration is available in the free tier:
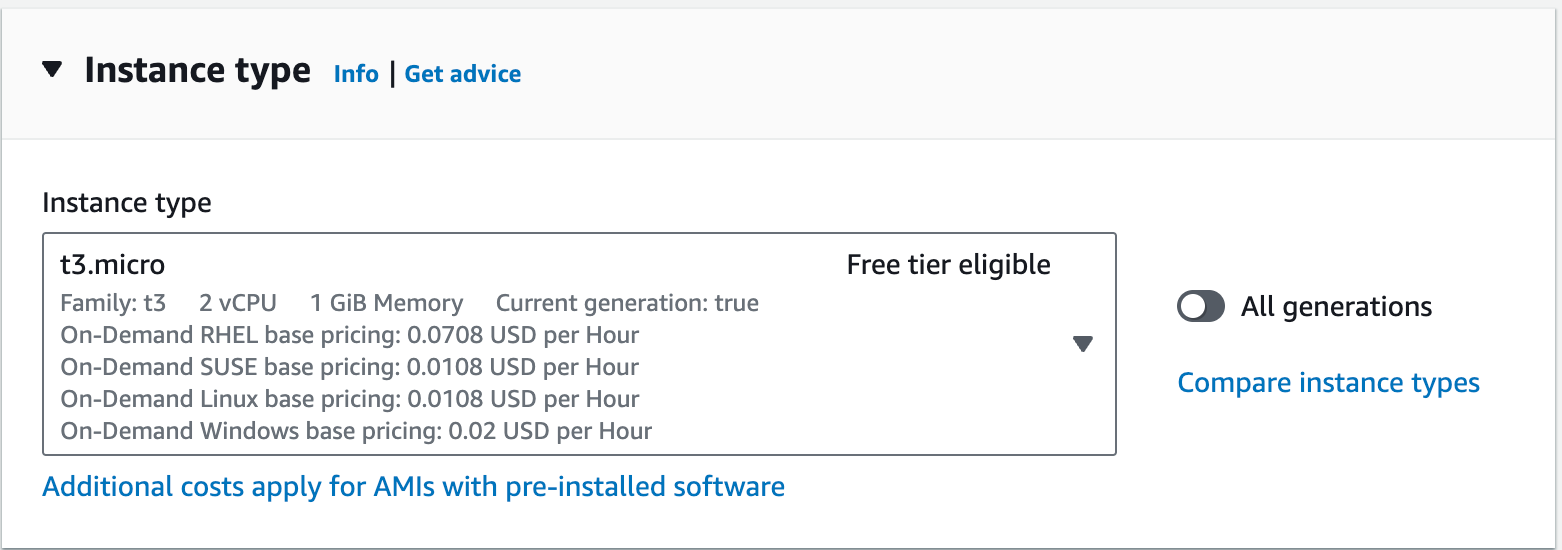
Next, we need to choose the instance type. There are many options available, but the free tier selection is more limited. Therefore, we will go with t3.micro, which is a relatively low-powered server, but it should be sufficient to demonstrate the capabilities of EC2:
Let's discuss the key pair for your instance.
A key pair in AWS EC2 is a set of keys used for secure connections to your virtual servers, or EC2 instances. This pair includes a public key and a private key.
The public key is uploaded to AWS and automatically integrated into EC2 instances when they are created. This key is used to encrypt data, which can only be decrypted using the corresponding private key.
The private key is downloaded to your local computer when the key pair is created, and it is not stored in AWS. You use it to connect to instances via SSH (Linux/Unix) or RDP (Windows). The private key acts as proof of your identity and provides secure access to instances, as only the owner of the private key can decrypt data encrypted with the public key.
Using key pairs is the recommended method for authentication and securing connections to EC2 instances, replacing traditional passwords that can be easily guessed or stolen. Essentially, it is a crucial part of the EC2 security system, ensuring the confidentiality and integrity of access to cloud resources.
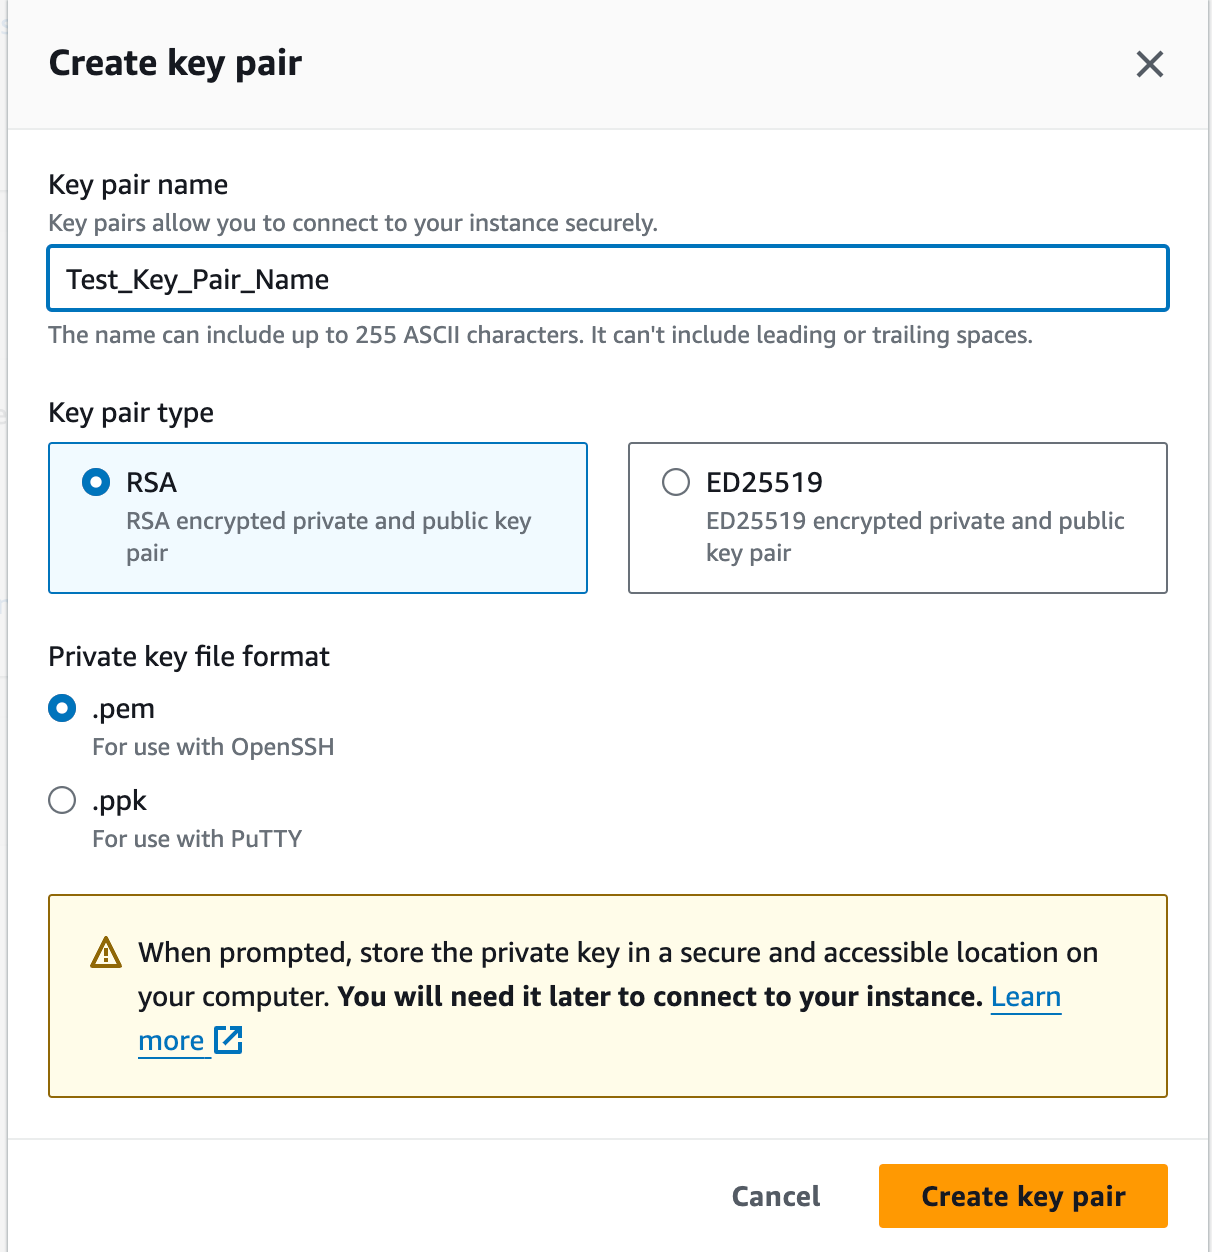
We are creating a key pair with the RPA type, but overall, it doesn't make much difference, as the private key will always be stored locally, and the public key will be stored on EC2. This ensures that our instance remains as secure as possible.
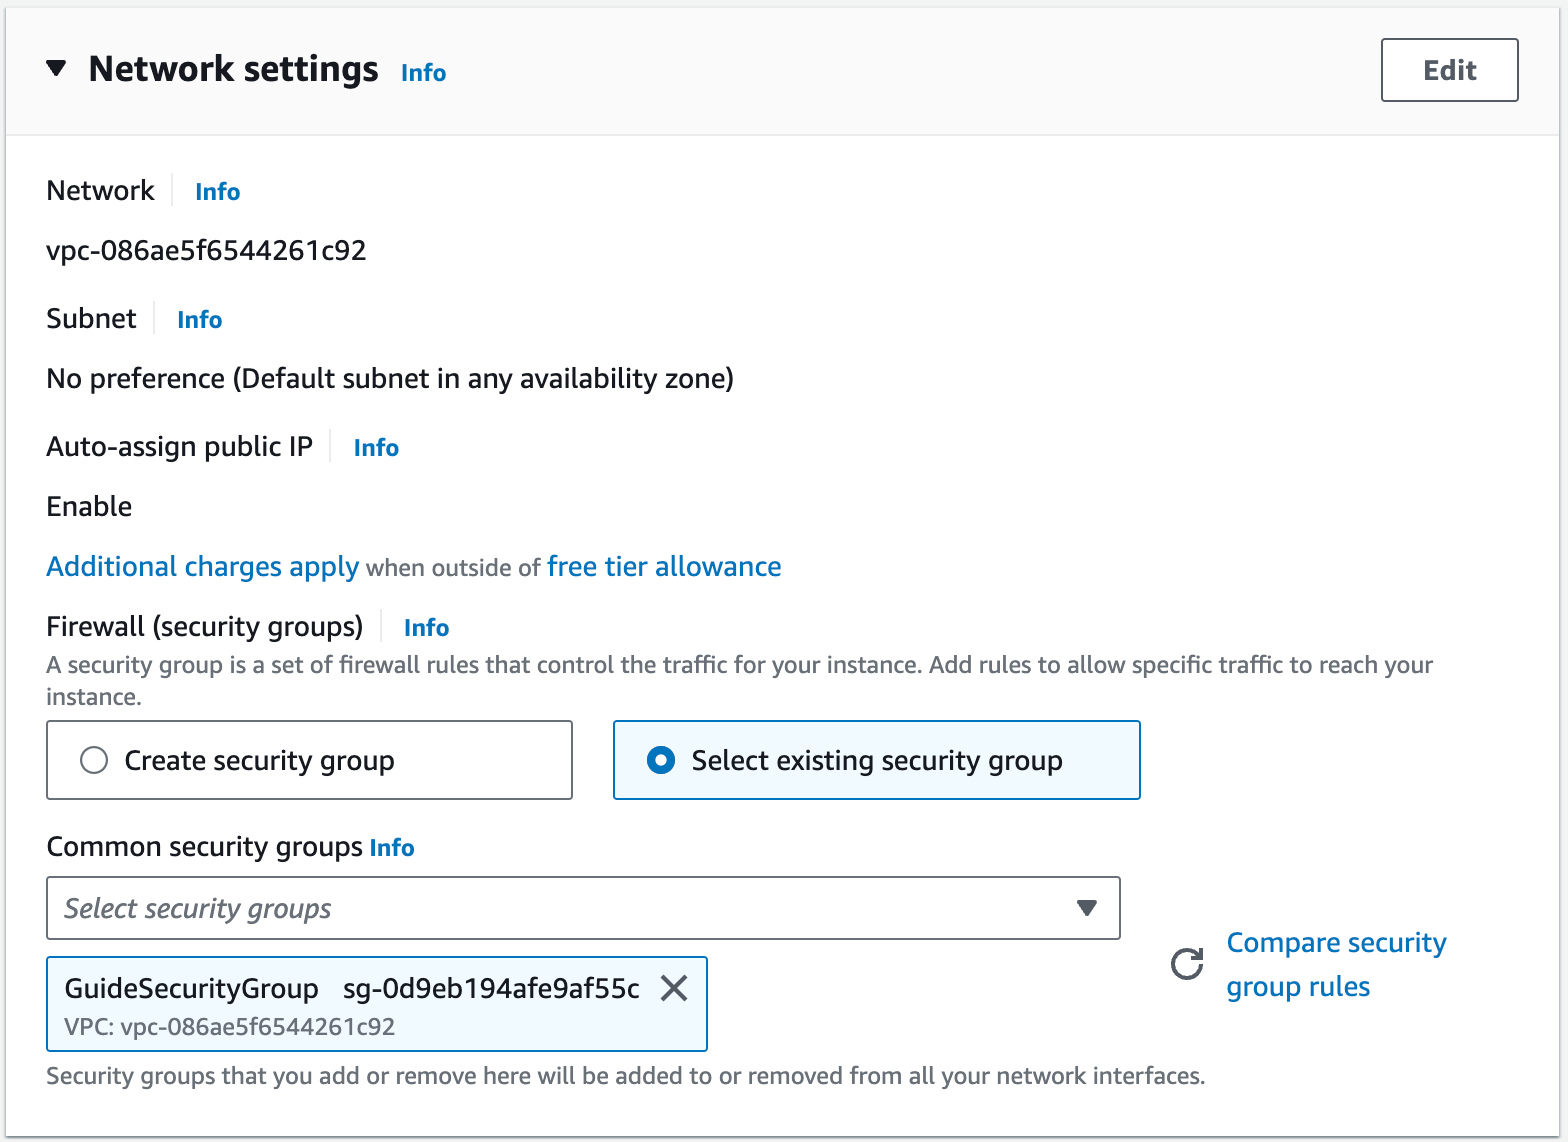
Now we need to set up the network for our instance. This is where the security group comes in. At this stage, we don't need to change anything except the security groups, as everything else should stay as the default for now. Let's go over what each parameter means:
-
VPC (Virtual Private Cloud): specifies the virtual private network within which your instance will operate. VPC provides isolated space in the cloud where you can launch and manage AWS resources. "vpc-086ae5f6544261c92" is the identifier of your VPC;
-
Subnet: a subnet is a segmented portion of the VPC that defines a range of IP addresses within your VPC. You can choose a specific subnet or leave "No preference" for automatic selection;
-
Auto-assign public IP: if enabled, your EC2 instance is automatically assigned a public IP address, allowing it to communicate with the internet. If disabled, the instance will have only a private IP address and cannot directly interact with the internet;
-
Firewall (security groups): security groups act as a virtual firewall, controlling inbound and outbound traffic to your instance. You can create a new security group with specific rules or choose an existing one:
- Create security group: choose this if you want to configure a new security group;
- Select existing security group: choose this to use an already created security group. In the example, the "GuideSecurityGroup" is already selected.
Our network setup will look like this:
Right now, we don't need to get into storage operations, as we'll cover that in the next section.
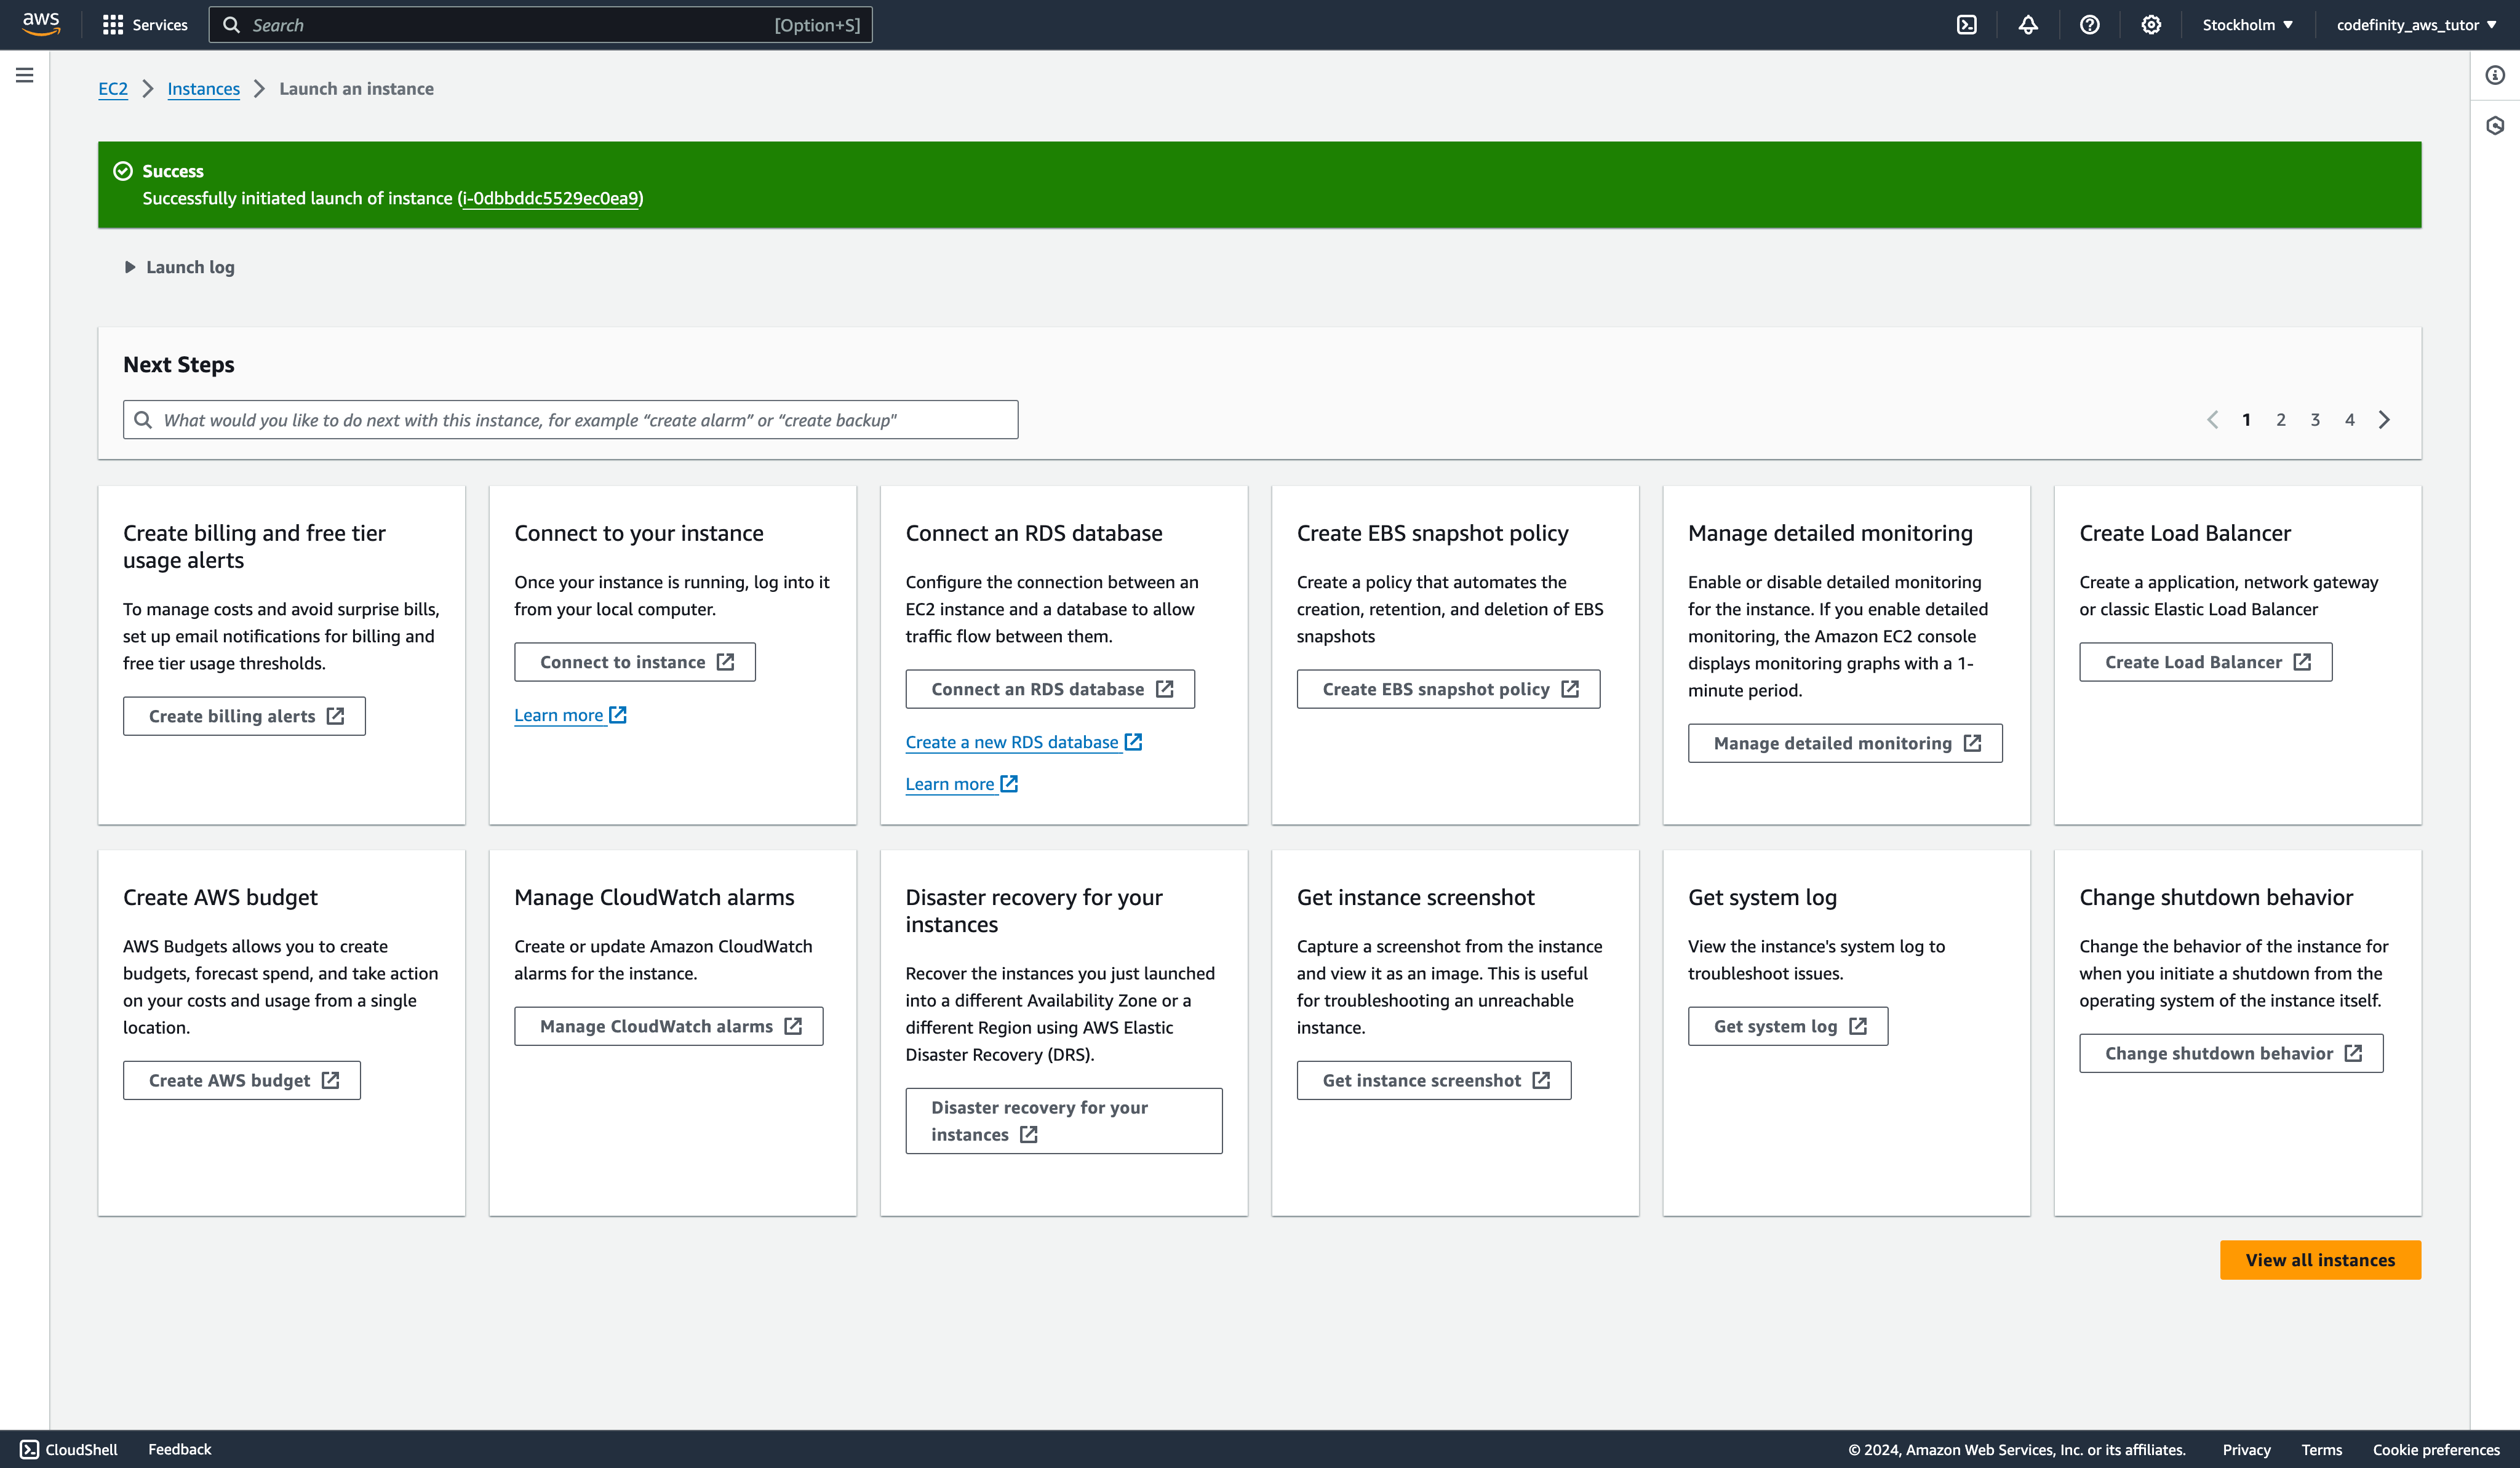
Once we've finished the configuration, we can click the instance launch button, and you'll see the next screen. In the following chapter, we'll explain what each of the items you see means.
1. What is the purpose of a Security Group in AWS EC2?
2. How many inbound rules are necessary for the security configuration as described in the material?
3. What is the role of a Key Pair in AWS EC2?
Thanks for your feedback!
Ask AI
Ask AI

Ask anything or try one of the suggested questions to begin our chat
EC2 Instance Creation
To get started with EC2, we first need to create a security group for our instance, or in simpler terms, we need to set up the security for our server. To do this, navigate to the EC2 service and select
Network & Security → Security Groups
on the left panel:
Next, click the "Create Security Group" button, and you'll be taken to a menu where you can begin filling everything out step by step:
- Security group name: this is the name of the group that you'll use to locate it and that will appear when selected;
- Description: this is the description of the group. Here, you can specify the roles that this security group will serve and what it's created for;
- VPC: this is a service that allows AWS users to launch AWS resources into a virtual network they define. We're not focusing on this right now, so we'll stick with the default VPC for our educational instance.
Let's proceed to creating inbound rules:
- We need 3 inbound rules: SSH, HTTP, and HTTPS;
- To create the first one, select the SSH type, and in the Source field, set the connection to Anywhere IPv4;
- The other necessary parameters will be automatically filled in;
- We need to do the same for HTTP and HTTPS.
Once you've created the Inbound Rules, you can create the Security Group and get the following result:
Now, we can move on to launching an instance that will use the security group we just created.
First, head to the main page and click on the "Launch Instance" button.
You will see a large menu with configuration options. Let's go through it step by step.
We will be using Amazon Linux, as it is one of the configurations offered in the free tier, which we want to stick to. After selecting it, EC2 notified us that this configuration is available in the free tier:
Next, we need to choose the instance type. There are many options available, but the free tier selection is more limited. Therefore, we will go with t3.micro, which is a relatively low-powered server, but it should be sufficient to demonstrate the capabilities of EC2:
Let's discuss the key pair for your instance.
A key pair in AWS EC2 is a set of keys used for secure connections to your virtual servers, or EC2 instances. This pair includes a public key and a private key.
The public key is uploaded to AWS and automatically integrated into EC2 instances when they are created. This key is used to encrypt data, which can only be decrypted using the corresponding private key.
The private key is downloaded to your local computer when the key pair is created, and it is not stored in AWS. You use it to connect to instances via SSH (Linux/Unix) or RDP (Windows). The private key acts as proof of your identity and provides secure access to instances, as only the owner of the private key can decrypt data encrypted with the public key.
Using key pairs is the recommended method for authentication and securing connections to EC2 instances, replacing traditional passwords that can be easily guessed or stolen. Essentially, it is a crucial part of the EC2 security system, ensuring the confidentiality and integrity of access to cloud resources.
We are creating a key pair with the RPA type, but overall, it doesn't make much difference, as the private key will always be stored locally, and the public key will be stored on EC2. This ensures that our instance remains as secure as possible.
Now we need to set up the network for our instance. This is where the security group comes in. At this stage, we don't need to change anything except the security groups, as everything else should stay as the default for now. Let's go over what each parameter means:
-
VPC (Virtual Private Cloud): specifies the virtual private network within which your instance will operate. VPC provides isolated space in the cloud where you can launch and manage AWS resources. "vpc-086ae5f6544261c92" is the identifier of your VPC;
-
Subnet: a subnet is a segmented portion of the VPC that defines a range of IP addresses within your VPC. You can choose a specific subnet or leave "No preference" for automatic selection;
-
Auto-assign public IP: if enabled, your EC2 instance is automatically assigned a public IP address, allowing it to communicate with the internet. If disabled, the instance will have only a private IP address and cannot directly interact with the internet;
-
Firewall (security groups): security groups act as a virtual firewall, controlling inbound and outbound traffic to your instance. You can create a new security group with specific rules or choose an existing one:
- Create security group: choose this if you want to configure a new security group;
- Select existing security group: choose this to use an already created security group. In the example, the "GuideSecurityGroup" is already selected.
Our network setup will look like this:
Right now, we don't need to get into storage operations, as we'll cover that in the next section.
Once we've finished the configuration, we can click the instance launch button, and you'll see the next screen. In the following chapter, we'll explain what each of the items you see means.
Thanks for your feedback!
