Related courses
See All CoursesAdvanced
Java OOP
Those who know OOP can program well. That's what many programmers say. Get ready for an important part of your Java learning journey, mastering which will greatly boost your programming skills in general. You will learn how to effectively use the Java development environment, the principles of Object-Oriented Programming (OOP), and best practices in OOP. You will learn to make your code flexible and deepen your knowledge of previously covered topics. Let's get started!
Beginner
Java Basics
Learn the fundamentals of Java and its key features in this course. By the end, you'll be able to solve simple algorithmic tasks and gain a clear understanding of how basic console Java applications operate.
Beginner
Backend Development with Spring Boot
This course covers key aspects of backend development on Spring Boot, including the basics of HTTP and Spring, designing and implementing RESTful APIs, working with relational databases, and testing applications. By the end of this course, users will have a solid understanding of backend development using Spring Boot, enabling them to design and implement robust RESTful APIs and manage data effectively with relational databases. They will also gain practical experience in testing applications, ensuring high-quality code and functionality.
How to use Spring with the IntelliJ Community Edition
Setting Up Spring and Database Integration in IntelliJ's Free Version

Using Spring with IntelliJ IDEA Community Edition is a great solution for developing Java applications. Although the Community Edition lacks built-in Spring support (like in the Ultimate Edition), you can easily set up a project and add the necessary dependencies.
Setting Up a Project
Creating a project once you have installed IntelliJ IDEA Community Edition on your computer, you’ll need to create a project.
Open IntelliJ IDEA Community Edition and select New Project.
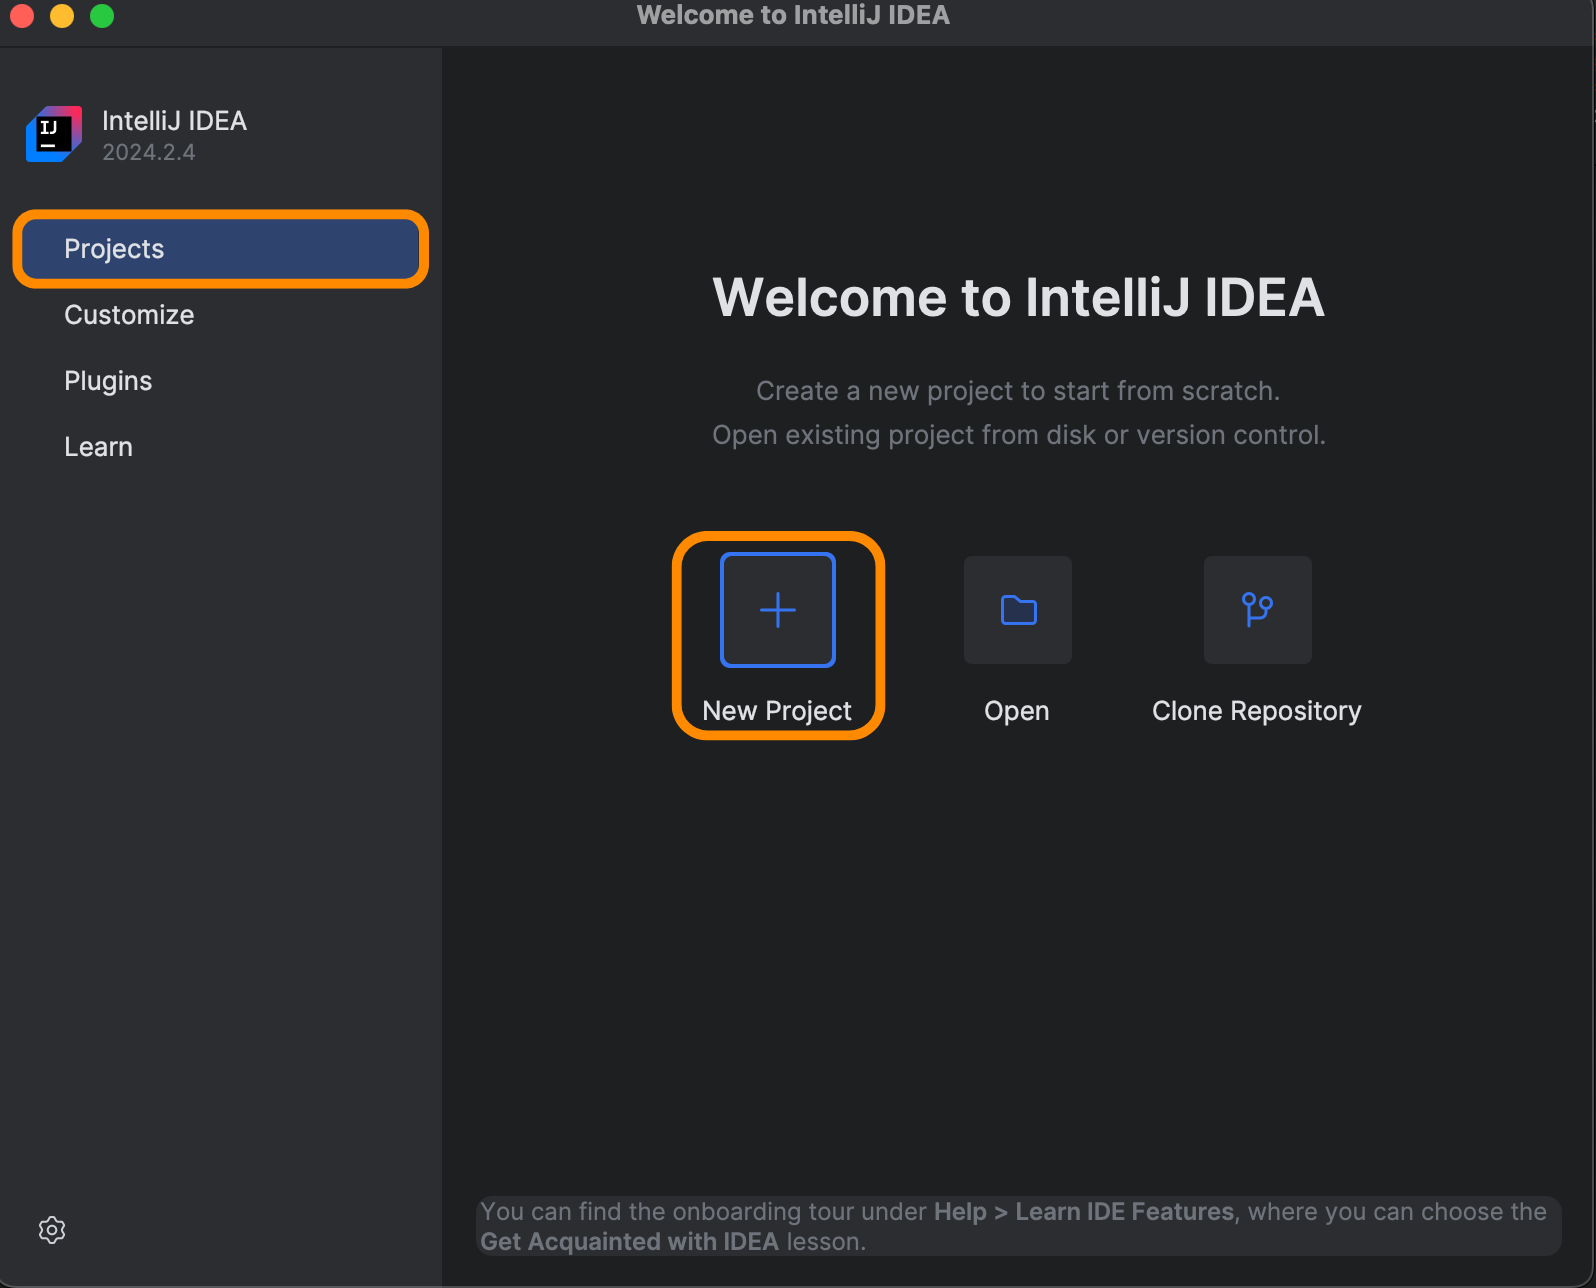
Select Java as the development language and configure the project structure. Specify the name of your project (in our example, spring-boot-test) and the location where it will be saved.
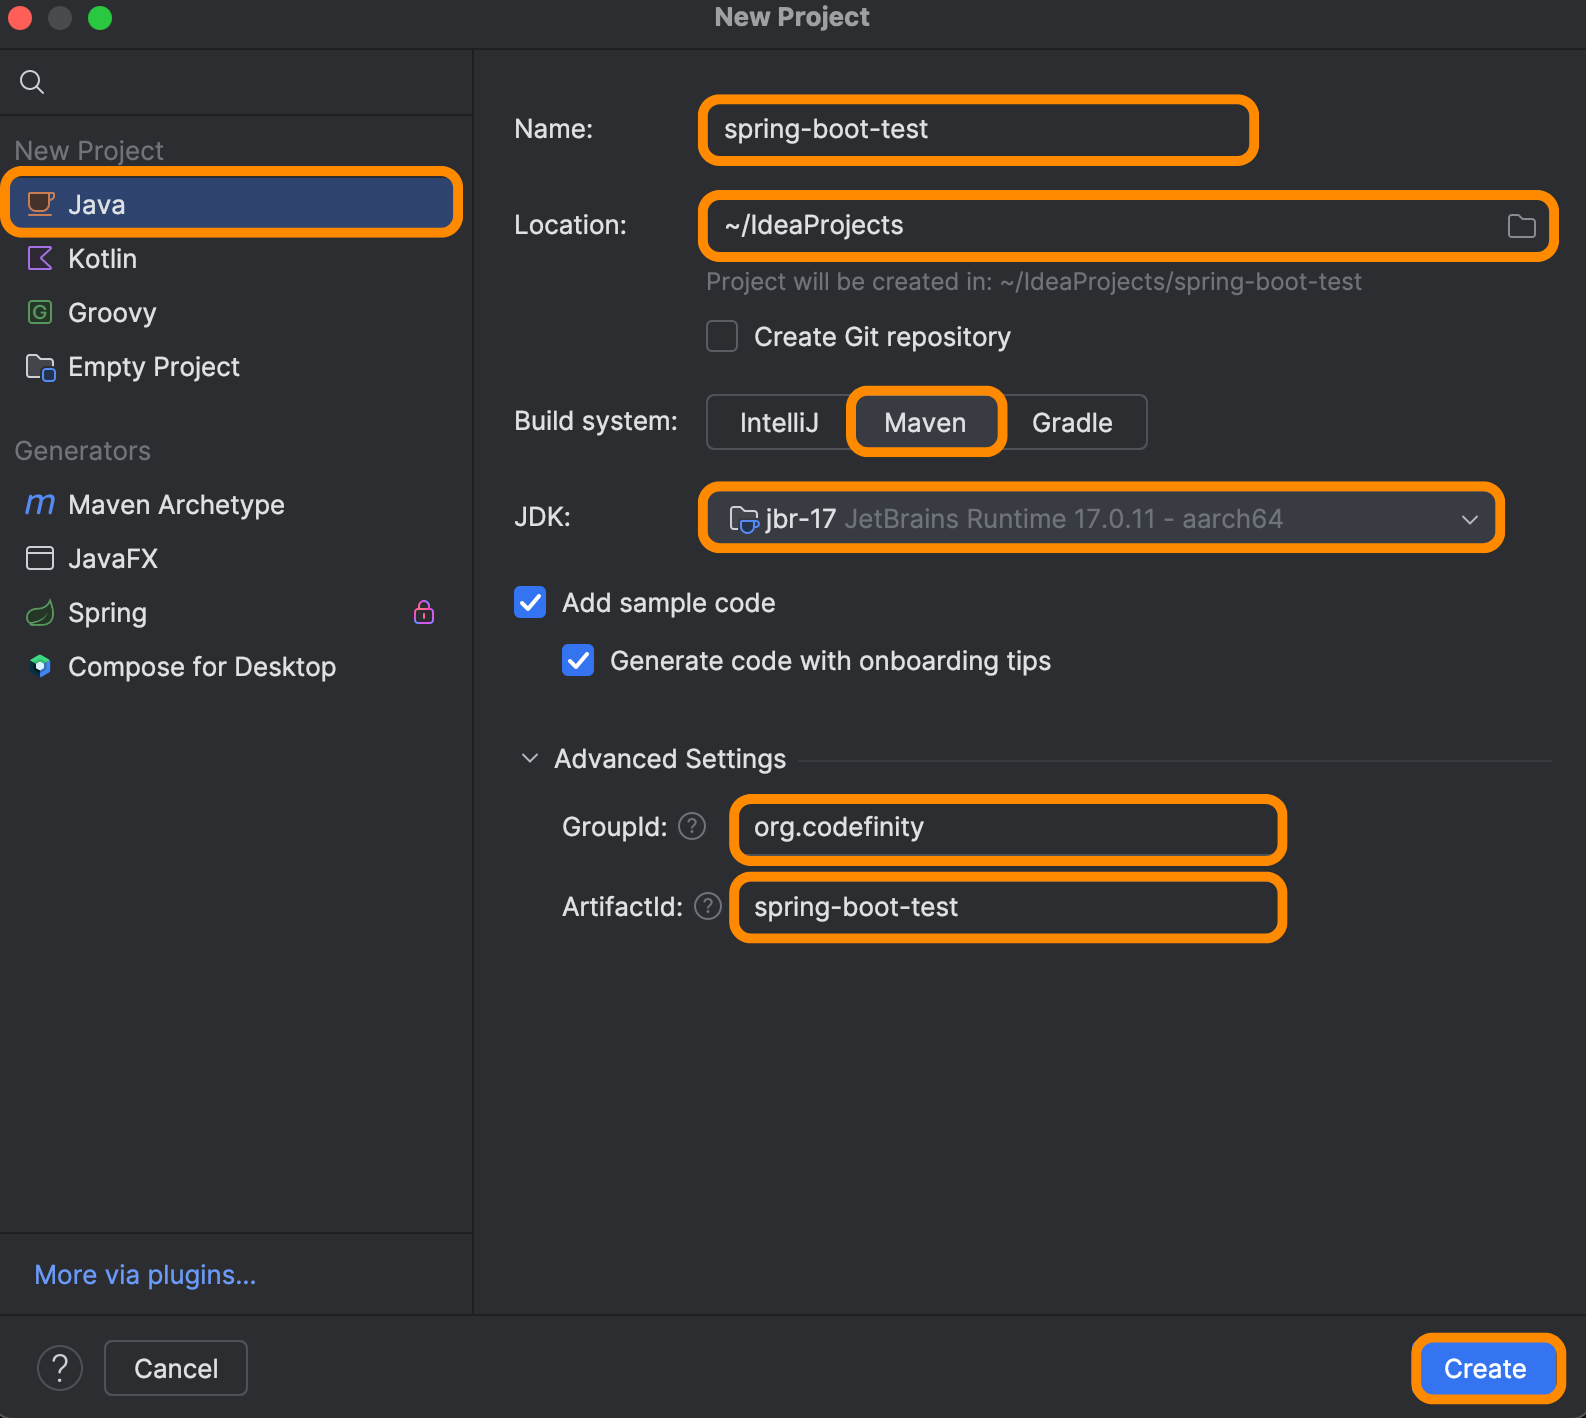
Next, you’ll need to select a build system; options include Maven, Gradle, and IntelliJ. As shown in the image, we’ll use the Maven build system. Be sure to choose the version of the JDK (Java Development Kit) that’s installed on your system.
You can also specify your groupId and artifactId — these primarily affect file naming but don’t impact functionality.
Finally, create the project by clicking the Create button.
Project Structure
Once the project is created, you’ll see a fairly complex structure at first glance.
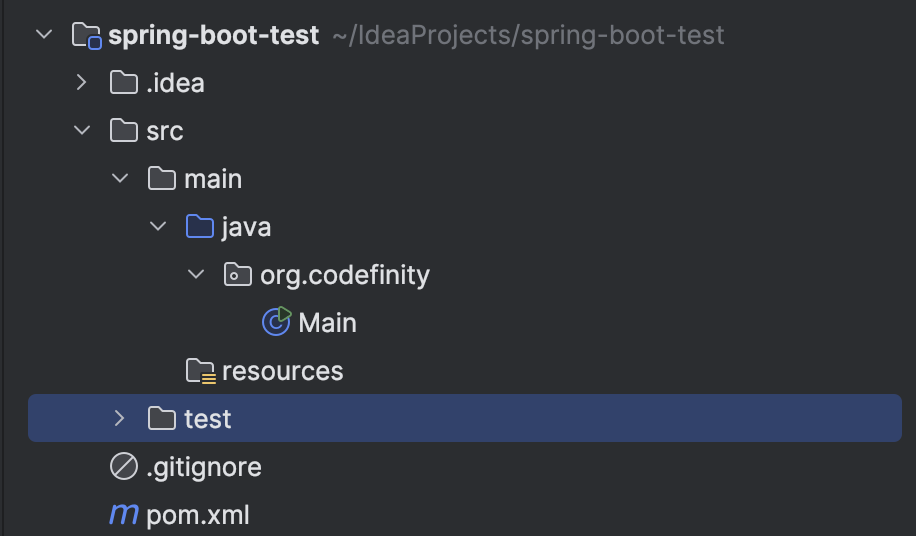
From this structure, navigate to the pom.xml file to add the necessary dependency for Spring Boot.
Inside pom.xml, add a <dependencies></dependencies> tag as shown in the image below.
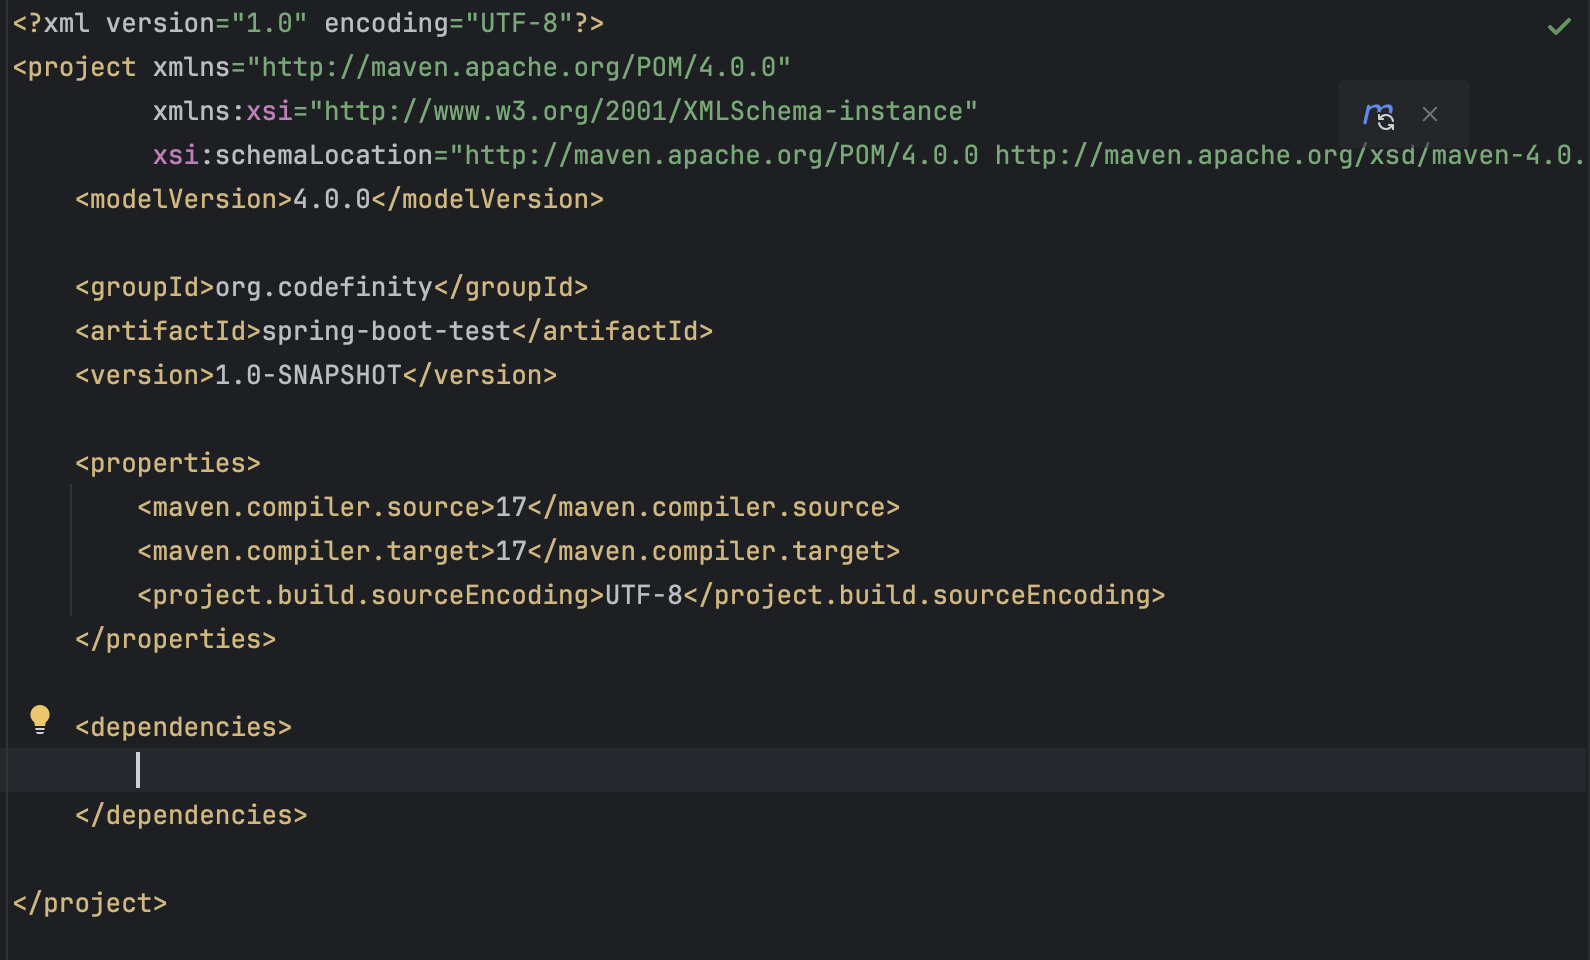
Since Spring components aren’t automatically added in IntelliJ Community Edition, you’ll need to manually add the dependencies. Within the <dependencies></dependencies> tag, add the following:
<dependency>
    <groupId>org.springframework.boot</groupId>
    <artifactId>spring-boot-starter-web</artifactId>
    <version>3.3.0</version>
</dependency>
By adding this dependency, we connect the Spring Boot starter, which provides a base set of libraries and configurations for working with Spring Boot in our application.
This starter simplifies project setup by automatically providing key components like configuration handling, logging, and an embedded web server (e.g., Tomcat).
Finally, update the Maven configuration so that all changes take effect.
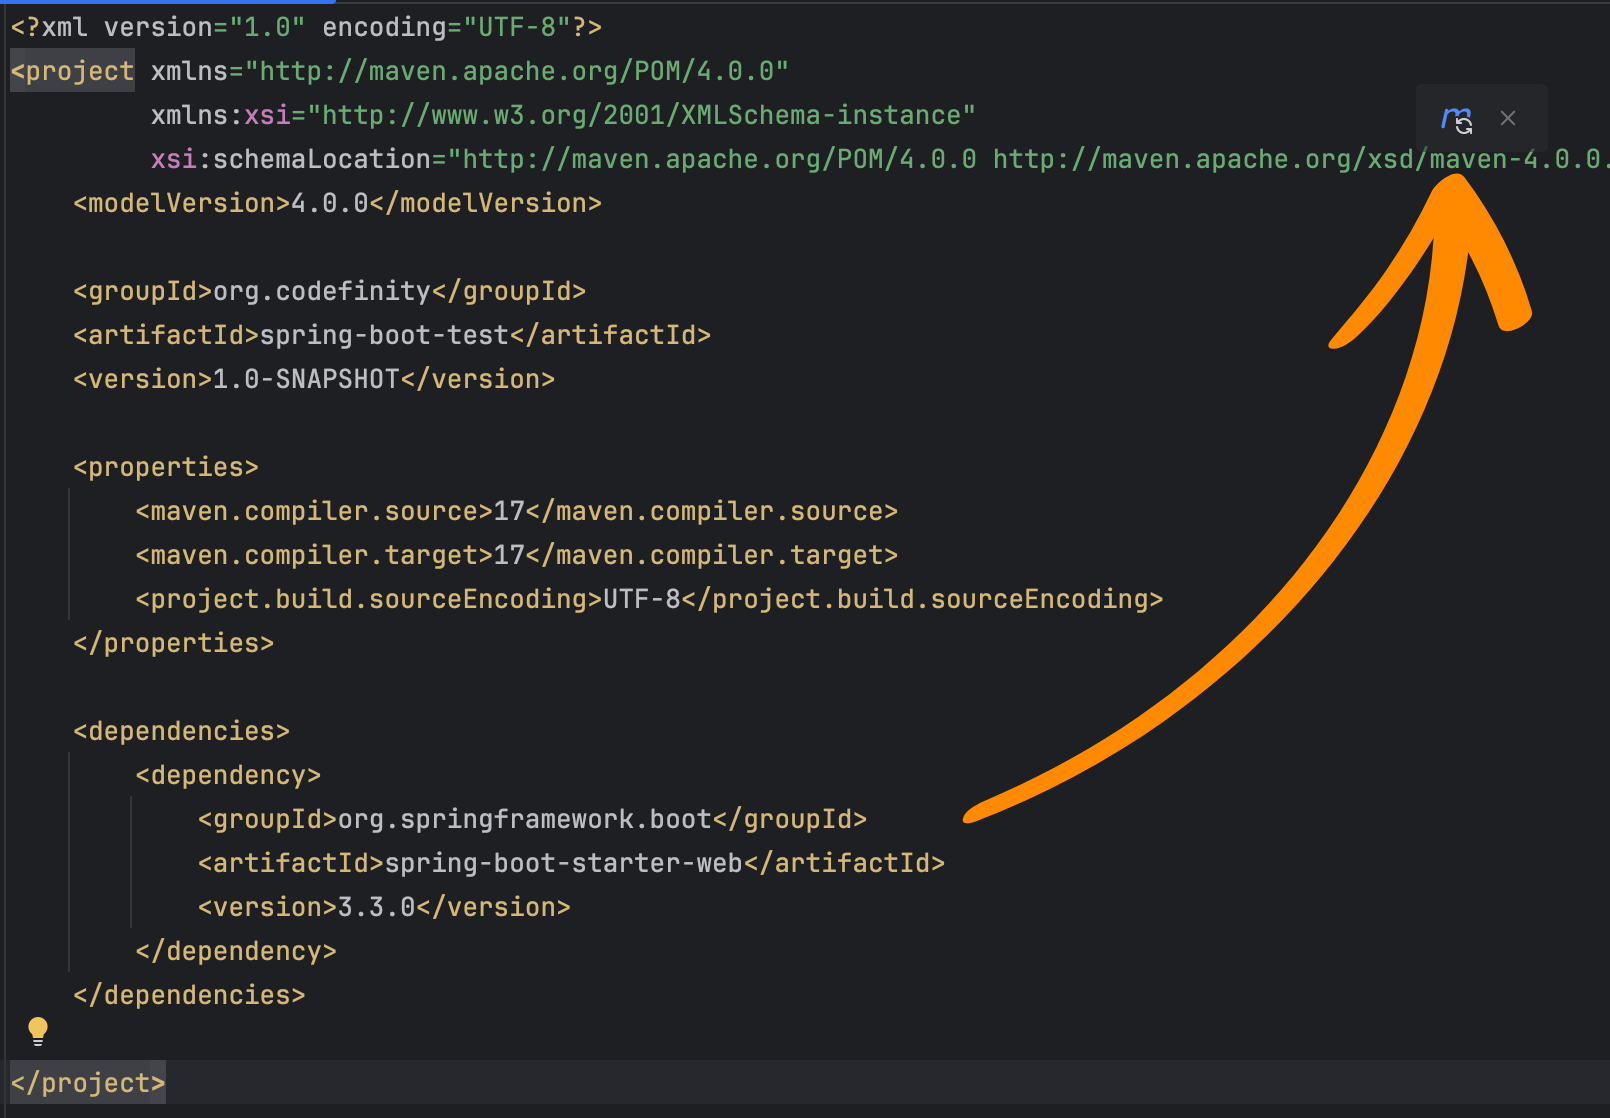
Creating the Class to Start the Application
Now, we need to create a class that will launch our Spring Boot application. This class should be located in the same directory as the Main class, which in our case is src/main/java/org/codefinity. By the way, the Main class can be deleted since it is no longer needed.
Next, we create a class called SpringBootTestApplication (the name can be anything). However, by convention, the class name typically uses the project name with Application as a suffix.
@SpringBootApplication
public class SpringBootTestApplication {
    public static void main(String[] args) {
        SpringApplication.run(SpringBootTestApplication.class, args);
    }
}
This code is the main class of the Spring Boot application, which starts the application using the main method.
The @SpringBootApplication annotation automatically configures and sets up the application, while the SpringApplication.run call initiates the launch, using SpringBootTestApplication as the main class.
Run Code from Your Browser - No Installation Required

Configuring the Setup
Now, we need to specify which class will serve as the entry point for our application.
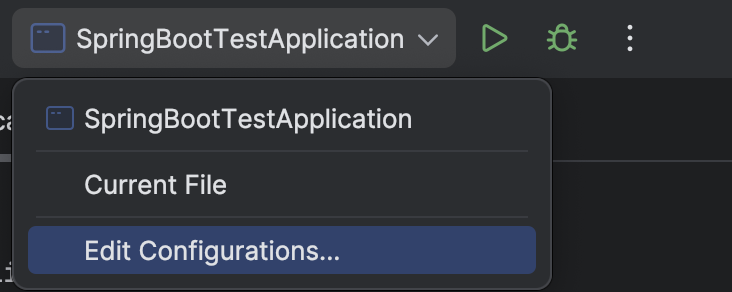
To start the Spring application, first, create a launch configuration. To do this, open Edit Configurations.
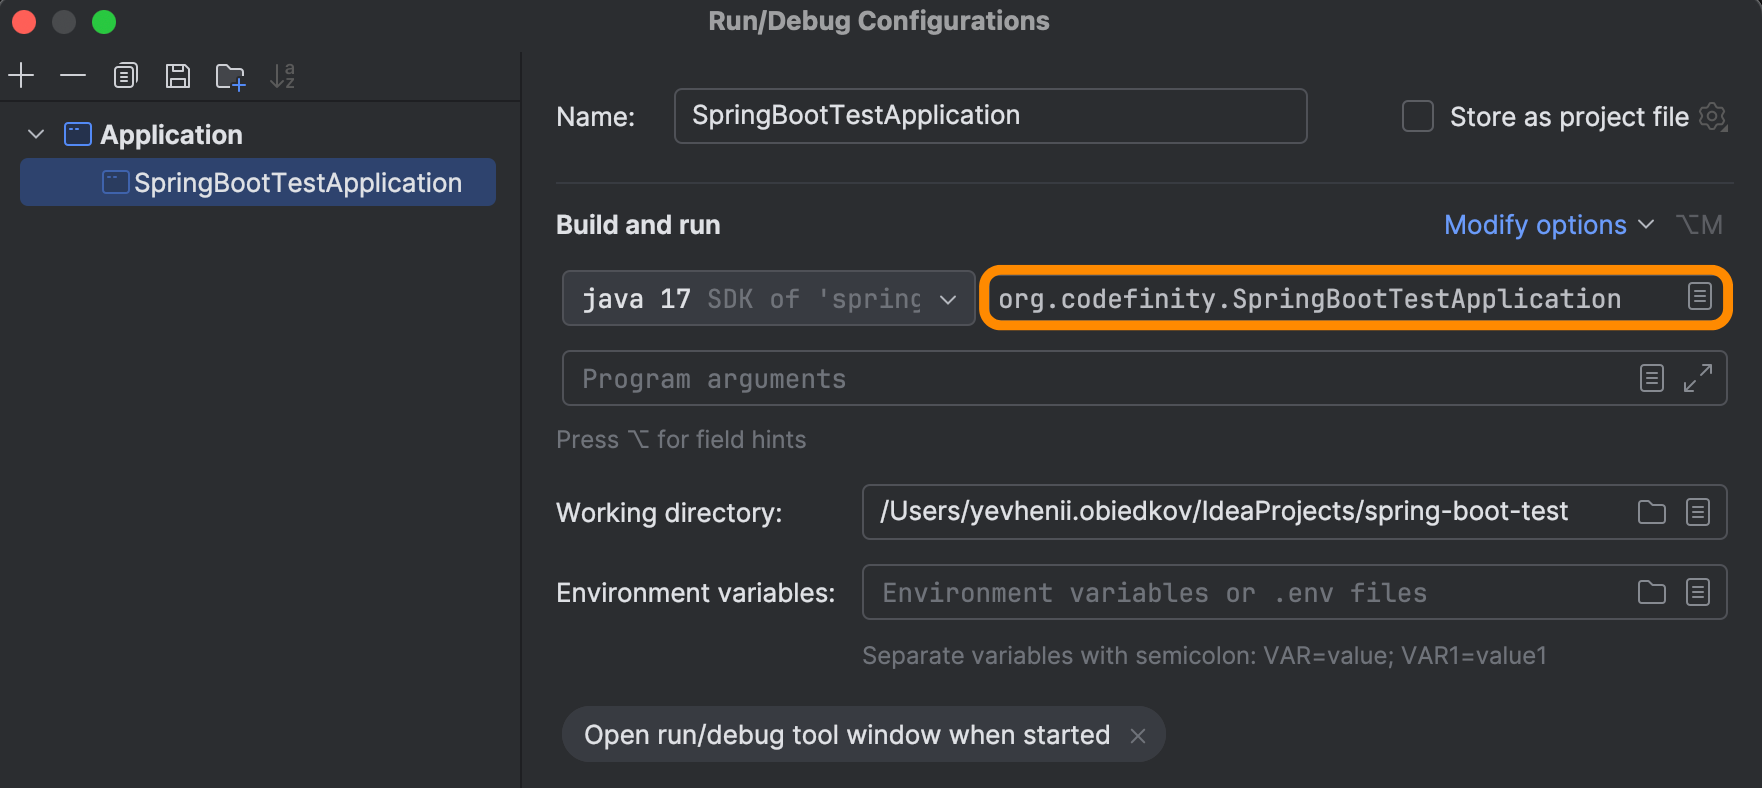
Specify the main class, SpringBootTestApplication (or whatever you named your class). It may have been automatically set up for you, in which case, there is nothing more to do.
Running Spring Boot
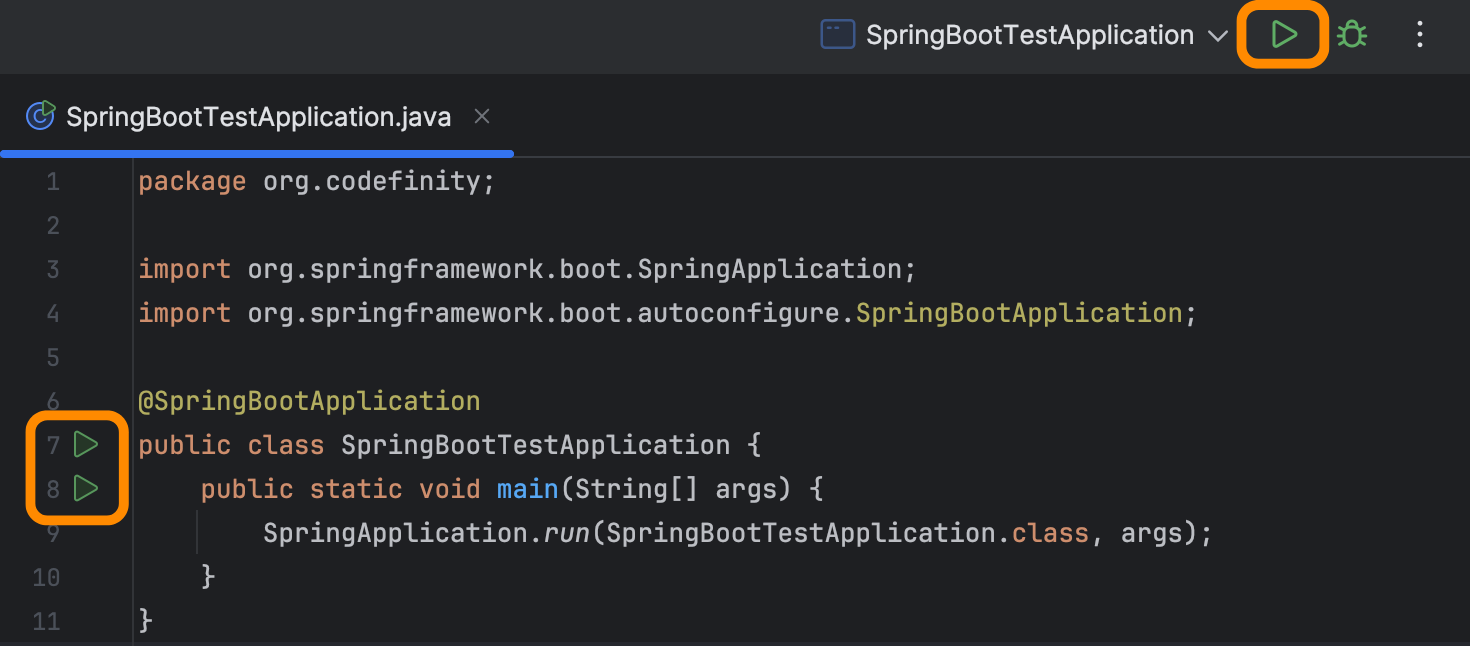
That’s it! Now our application is fully ready to be used! We can start it by clicking the run button next to the class or from the top-right corner of IntelliJ IDEA.
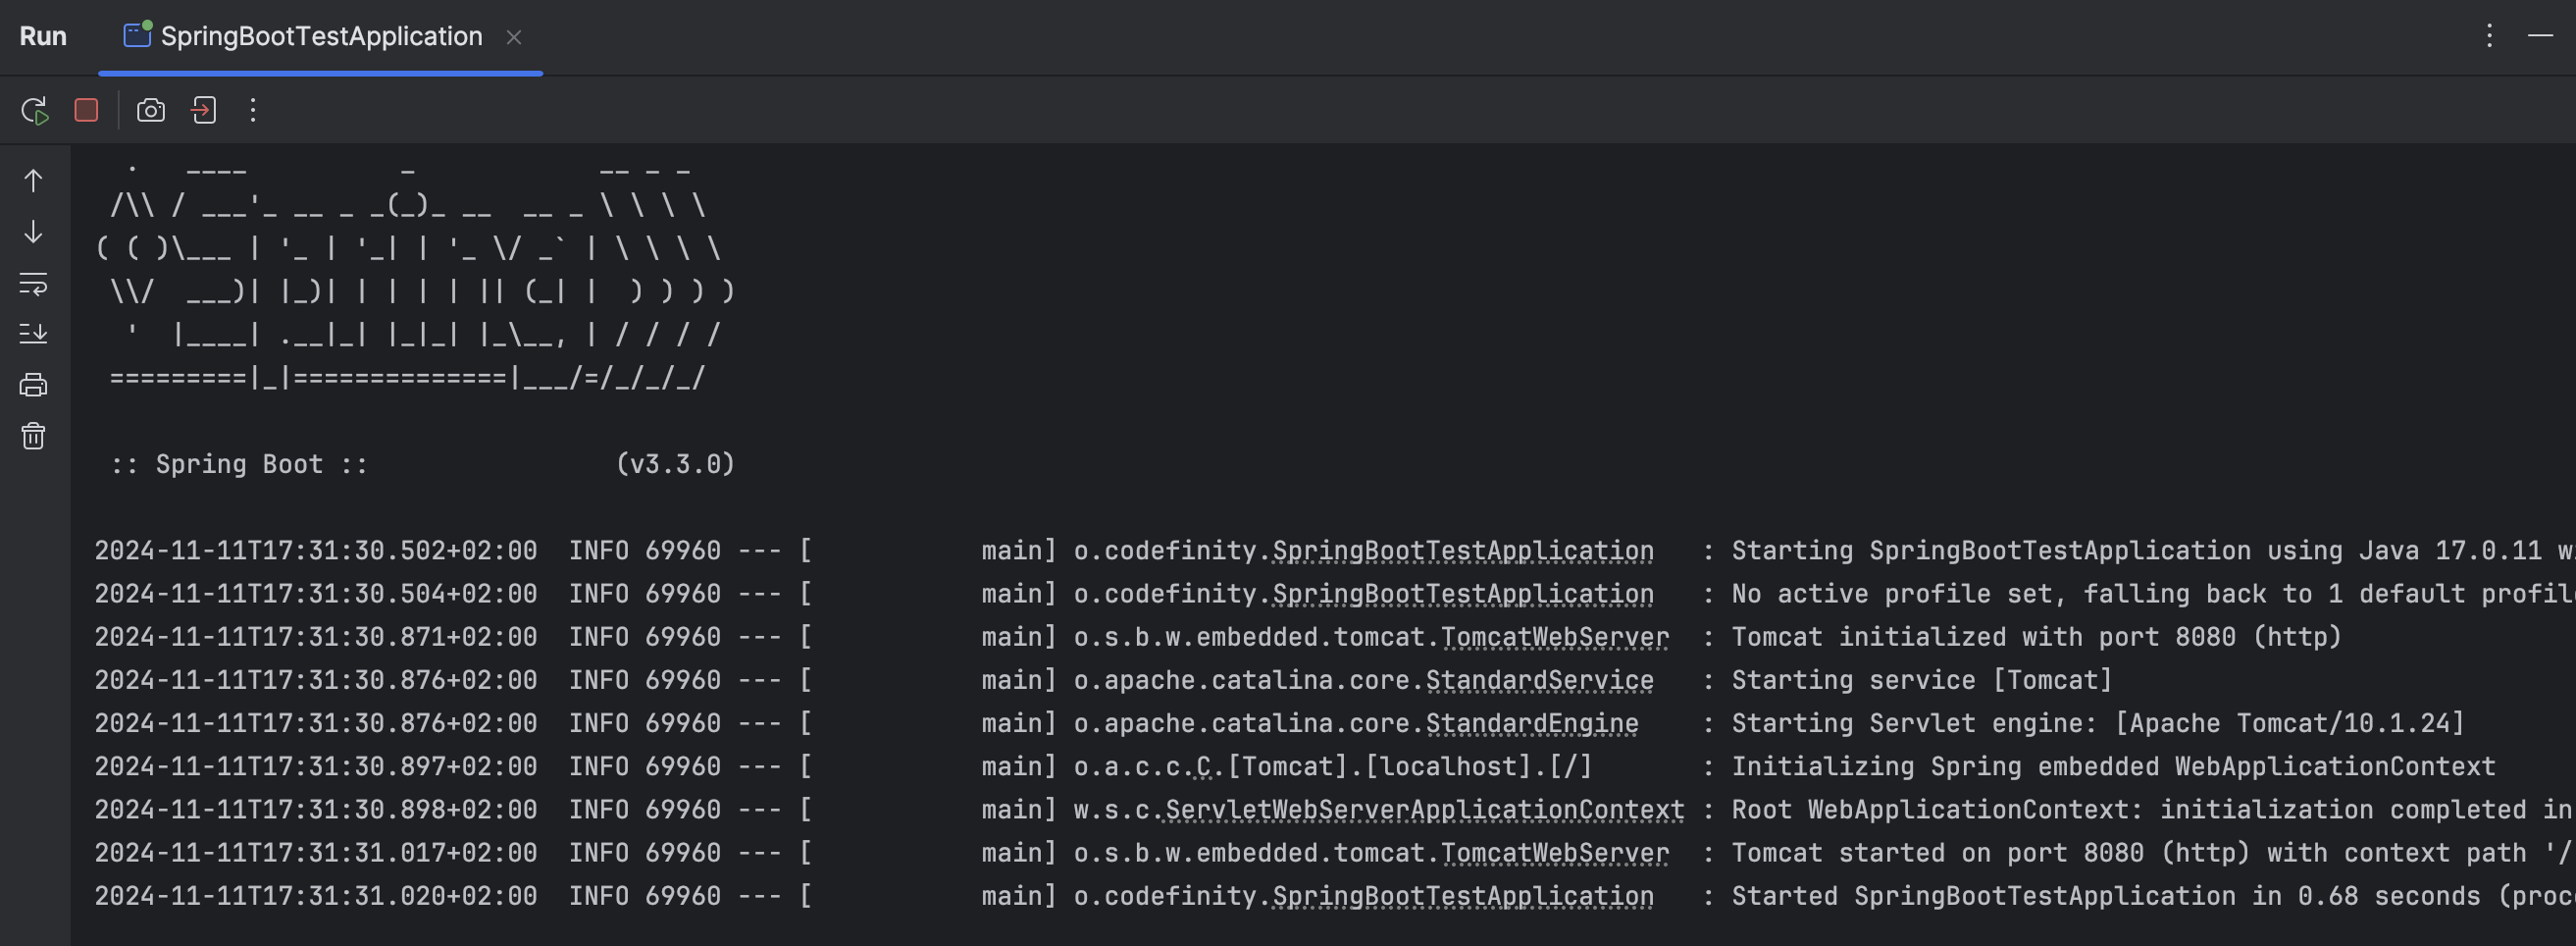
After starting the application, we should see logs like this in the console.
Additional: Configuration File
You may also need to use a configuration file for your Spring Boot application. This file allows you to specify settings for connecting to a database, change the port, or define parameters that will be used throughout your application.
To do this, you need to manually create the file in the resources folder at src/main/resources, and name it application.properties.

Connecting to a Database
In IntelliJ IDEA Community Edition, there is no built-in interface for easily connecting to a database and viewing table contents. However, this task can be simplified by using the Database Navigator plugin.
The Database Navigator plugin adds functionality, allowing you to connect to various databases, execute SQL queries, and view data directly within IntelliJ Community Edition.
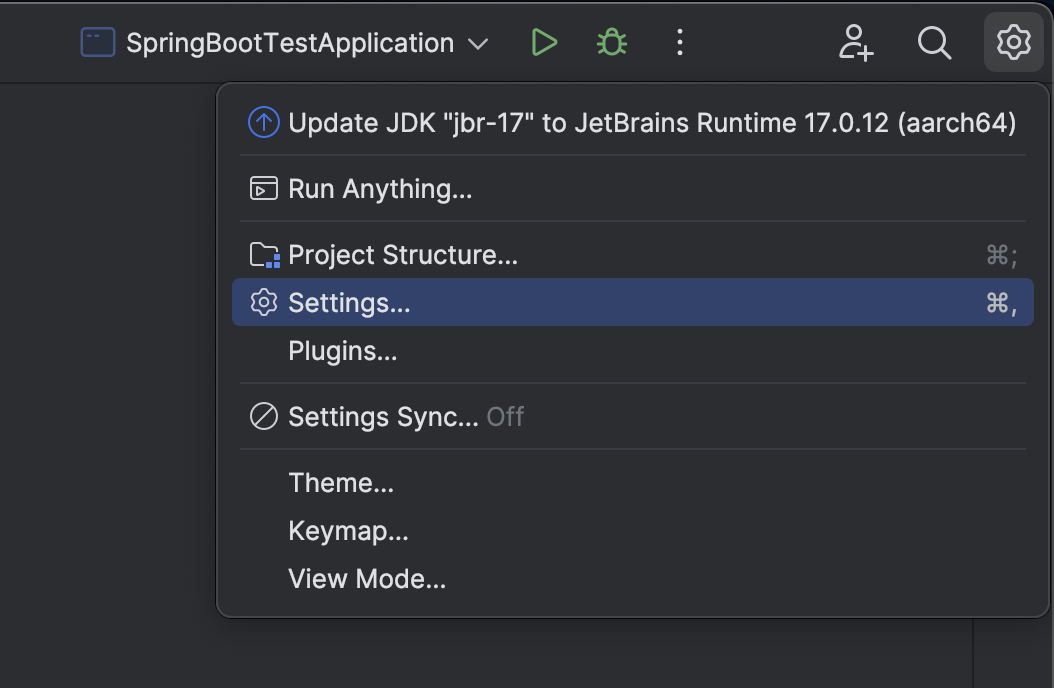
To get started with it, go to Settings.
Next, from the list, select Plugins and search for Database Navigator.
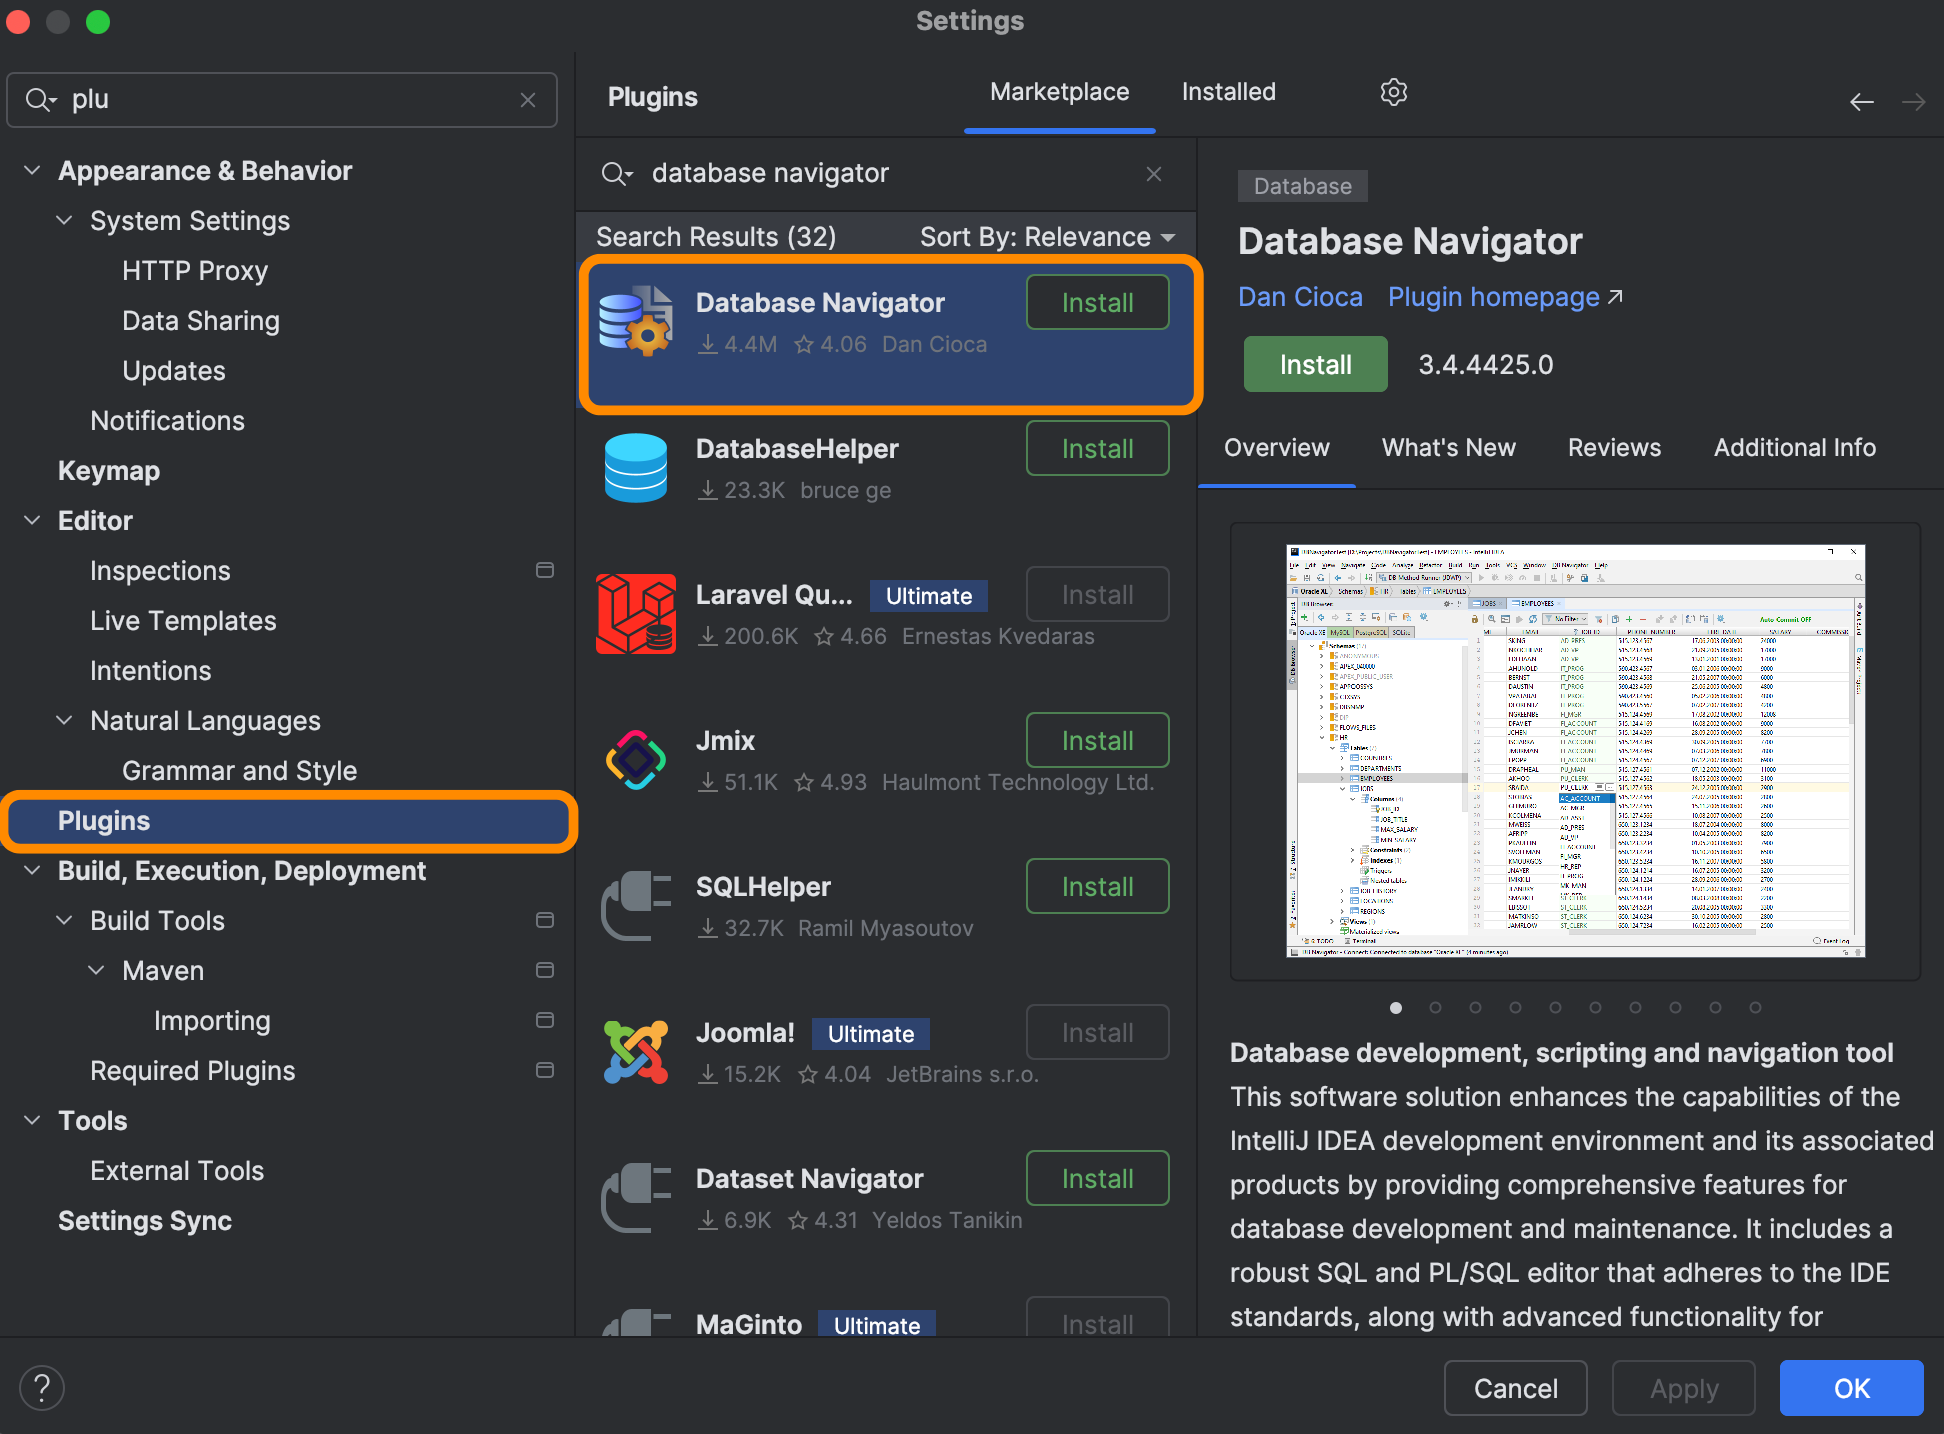
Once you find it, download the plugin and restart IntelliJ IDEA to apply the changes.
After restarting the application, you should see an icon like this:
With this, you’ll be able to connect to your database, configure connections, and view the structure and data of tables.
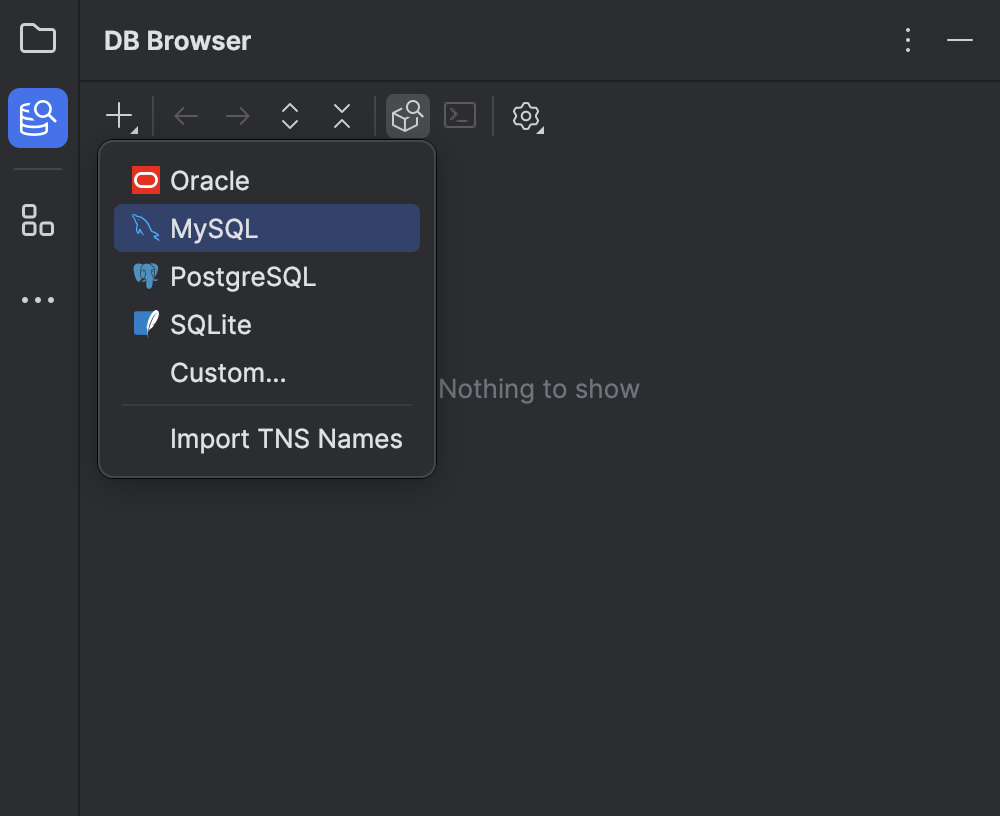
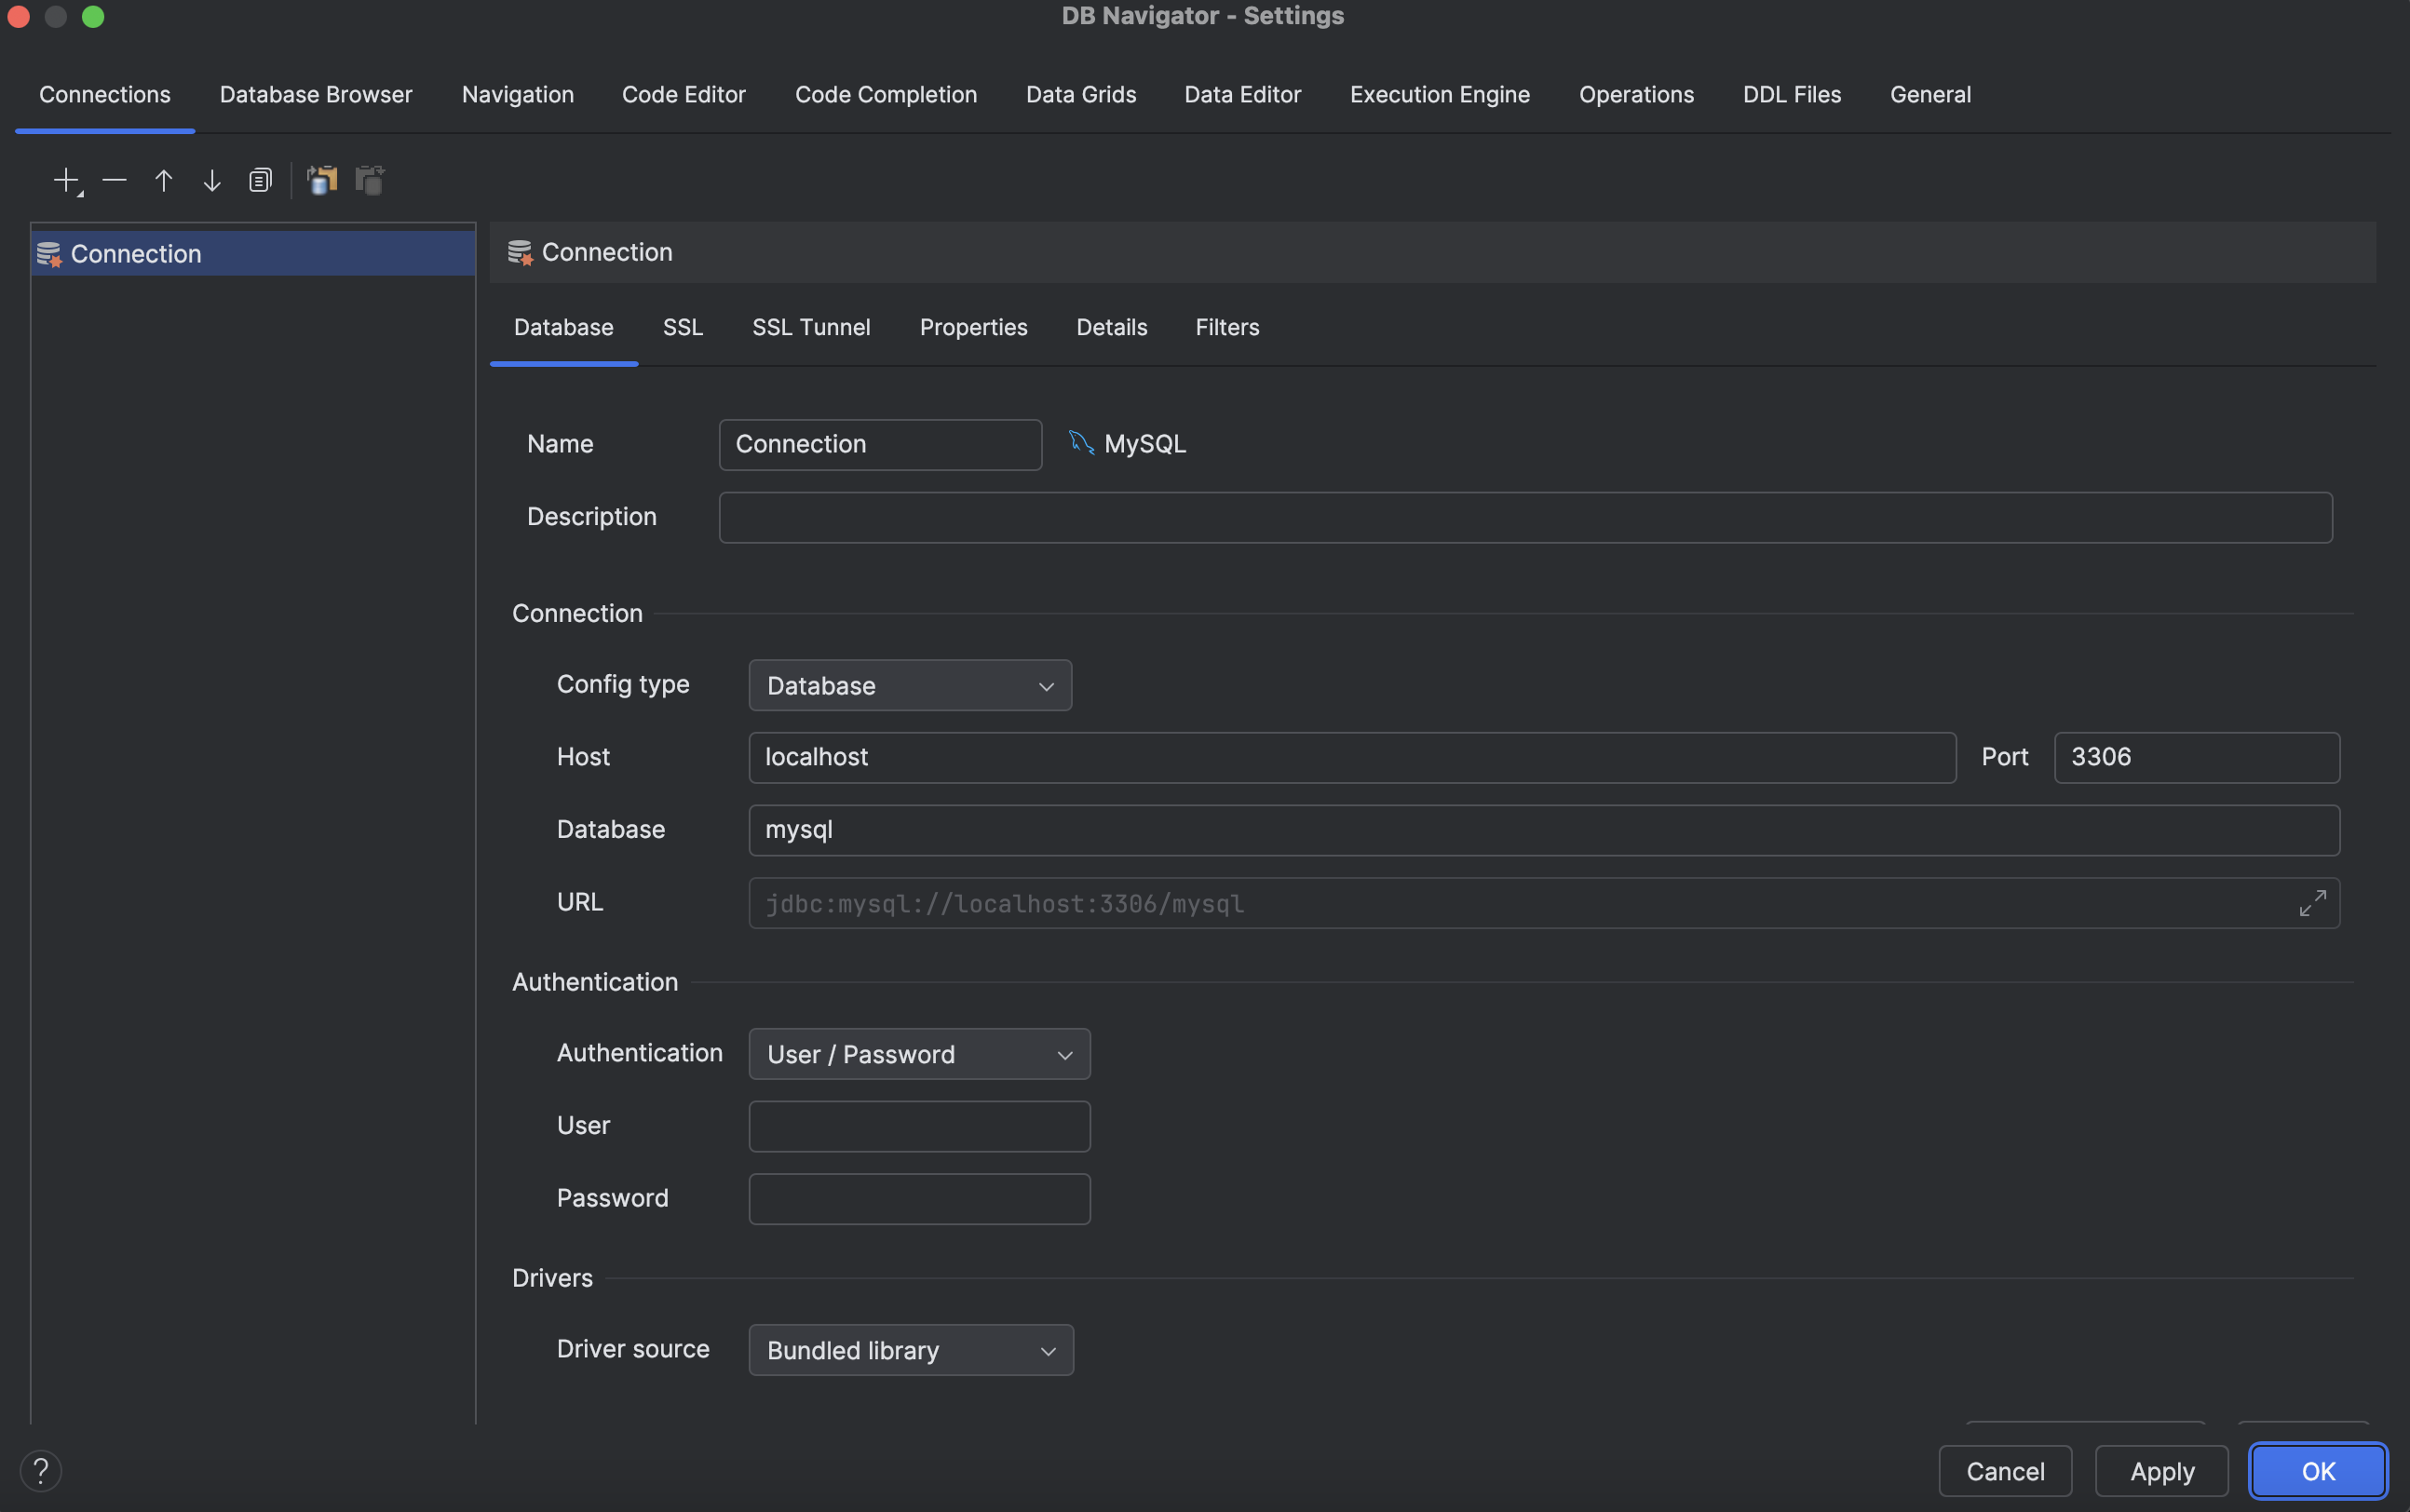
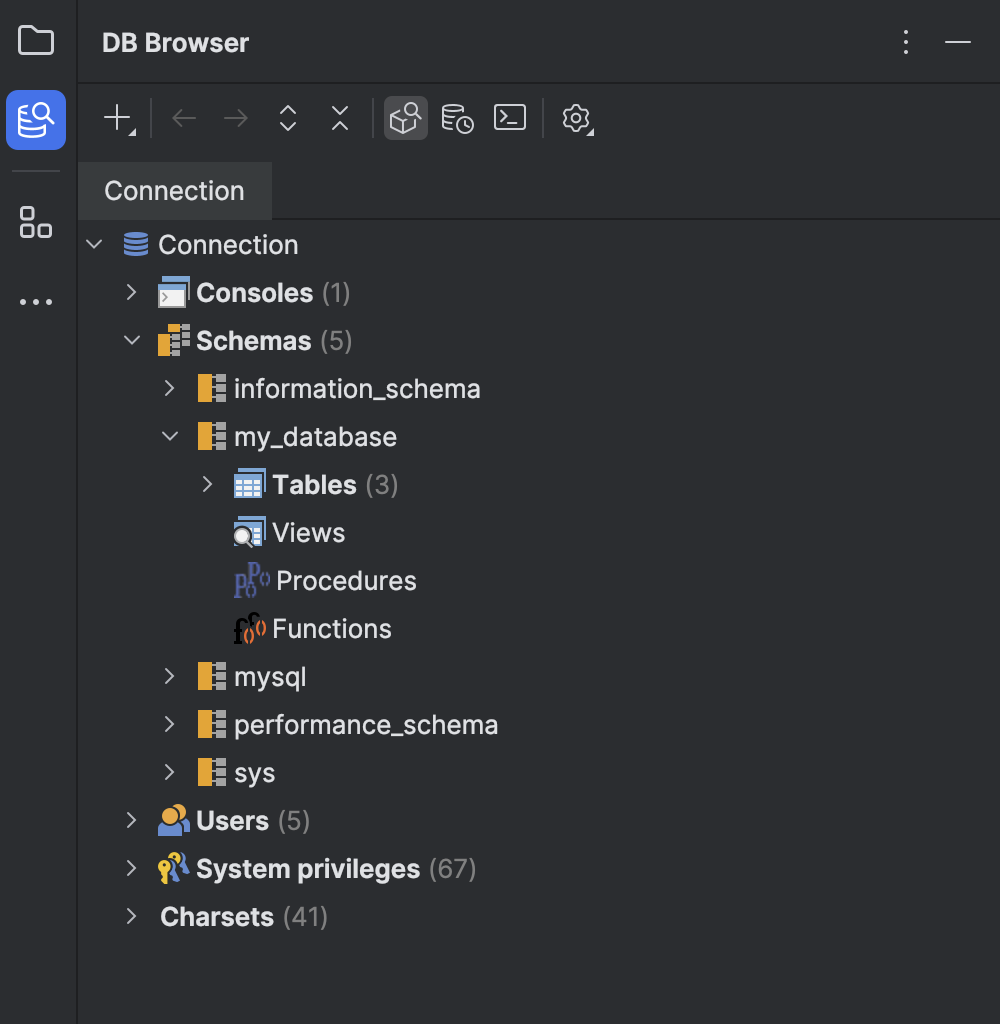
Thus, the Database Navigator plugin in IntelliJ Community Edition allows you to connect to databases, view table structures and contents, and run SQL queries directly within the IDE. It compensates for the lack of built-in database support, making working with databases more convenient and efficient.
Start Learning Coding today and boost your Career Potential

Summary
To use Spring in IntelliJ Community Edition, you need to manually add the Spring Boot dependencies to the project and configure the launch setup. While built-in support for Spring and databases is missing in the Community Edition, with the Database Navigator plugin, you can connect to and manage databases, making Spring development quite convenient.
FAQs
Q: Can I use Spring in IntelliJ Community Edition?
A: Yes, you can use Spring, but you will need to manually add Spring Boot dependencies and configure the project since the Community Edition doesn’t have built-in support for Spring.
Q: How do I connect to a database in IntelliJ Community Edition?
A: While there isn’t a built-in database interface, plugins like Database Navigator allow you to connect to and manage databases directly within the IDE.
Q: Do I need to install additional plugins to use Spring in IntelliJ Community Edition?
A: For Spring itself, you only need to add the necessary dependencies in your pom.xml or build.gradle file.
Q: Is it difficult to set up a Spring Boot project in IntelliJ Community Edition?
A: It's not too difficult, but it requires some extra steps, such as manually adding dependencies and setting up a Run Configuration to start the application.
Related courses
See All CoursesAdvanced
Java OOP
Those who know OOP can program well. That's what many programmers say. Get ready for an important part of your Java learning journey, mastering which will greatly boost your programming skills in general. You will learn how to effectively use the Java development environment, the principles of Object-Oriented Programming (OOP), and best practices in OOP. You will learn to make your code flexible and deepen your knowledge of previously covered topics. Let's get started!
Beginner
Java Basics
Learn the fundamentals of Java and its key features in this course. By the end, you'll be able to solve simple algorithmic tasks and gain a clear understanding of how basic console Java applications operate.
Beginner
Backend Development with Spring Boot
This course covers key aspects of backend development on Spring Boot, including the basics of HTTP and Spring, designing and implementing RESTful APIs, working with relational databases, and testing applications. By the end of this course, users will have a solid understanding of backend development using Spring Boot, enabling them to design and implement robust RESTful APIs and manage data effectively with relational databases. They will also gain practical experience in testing applications, ensuring high-quality code and functionality.
Python Projects for Beginners
Python Projects
by Andrii Chornyi
Data Scientist, ML Engineer
Dec, 2023・8 min read

The beginner's guide: How to Install Python, SQL, and R
How to install Python, SQL, R
by Andrii Chornyi
Data Scientist, ML Engineer
Aug, 2023・13 min read
Content of this article